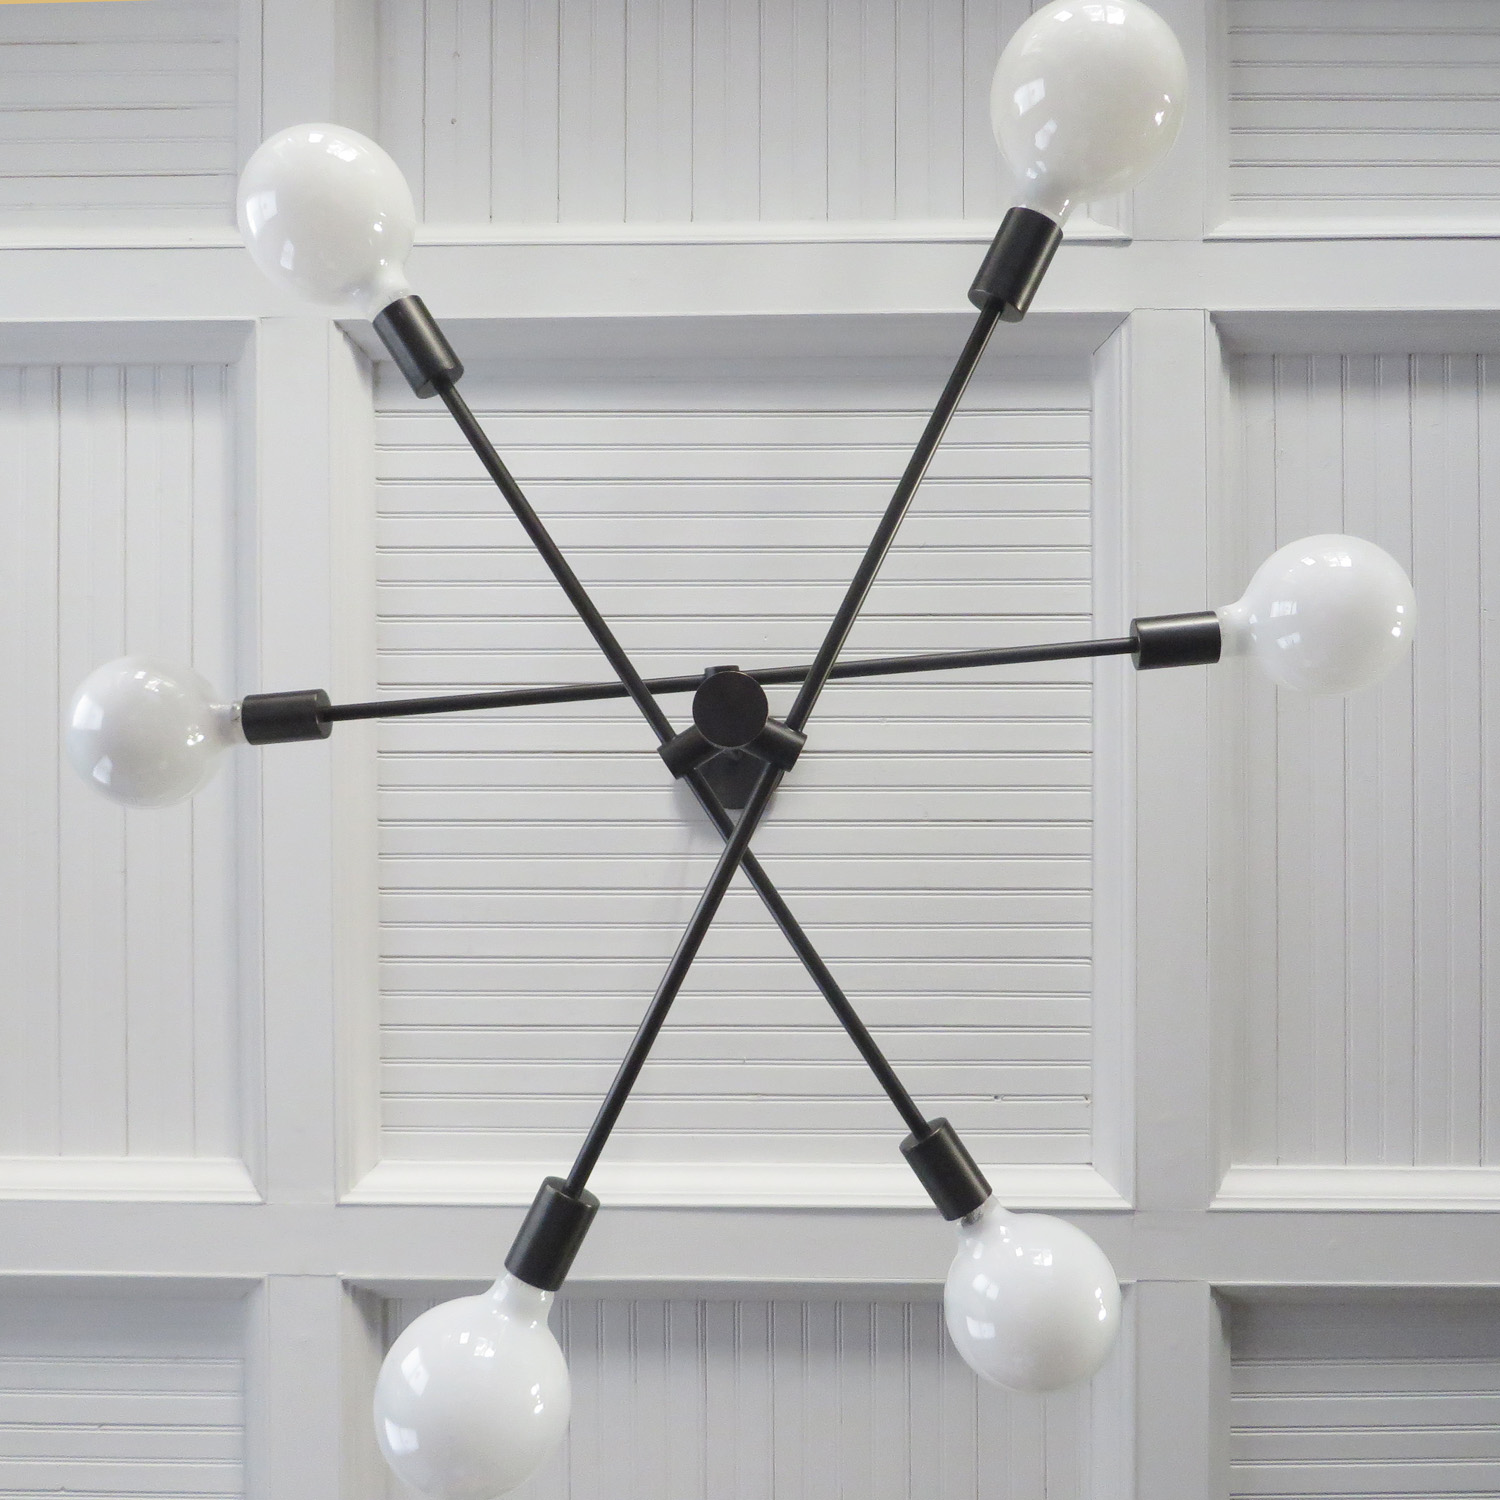
 Progress on the Third Floor has ground to a halt for the moment. I am still busy sorting stuff for the craft room, including getting ready of 90% of my magazine stash. In the meantime, we had been procrastinating on installing a new light fixture for the Dining Room since the beginning of the year. But we finally got around to installing it over the weekend so it would be up for a certain little one’s 5th Birthday Party. And I am quite smitten!
  Previously we had a more historically accurate reproduction hanging here. Unfortunately the scale and height was wrong (too small and too high). I’ve been looking for a replacement for quite a while, but hadn’t found anything that I really liked in the right price range until this fall. I found this beauty at West Elm, while looking at their catalog. I ripped out the page and looked at it for a month or so. Then as luck would have it West Elm was having a lighting sale. So I took the plunge. Of course it was backordered for a couple of months. And when it arrived it went on the back-burner while we concentrated on the third floor. I really like the contrast of the modern/retro fixture with the more traditional aspects of the Dining Room. And I wasn’t the only who had the same thought. While I was waiting for our chandelier to arrive, two of the blogs I follow installed the same fixture in Victorian houses. Nicole used this light fixture in her daughter’s room and Anna used it in her Dining Room. Unfortunately it looks like they have discontinued the Mobile Chandelier. It is very large, but it actually makes the space feel more cozy. It will be getting streamers attached to in the next couple of days and I will take some more pictures. I’m off to brave the snow!


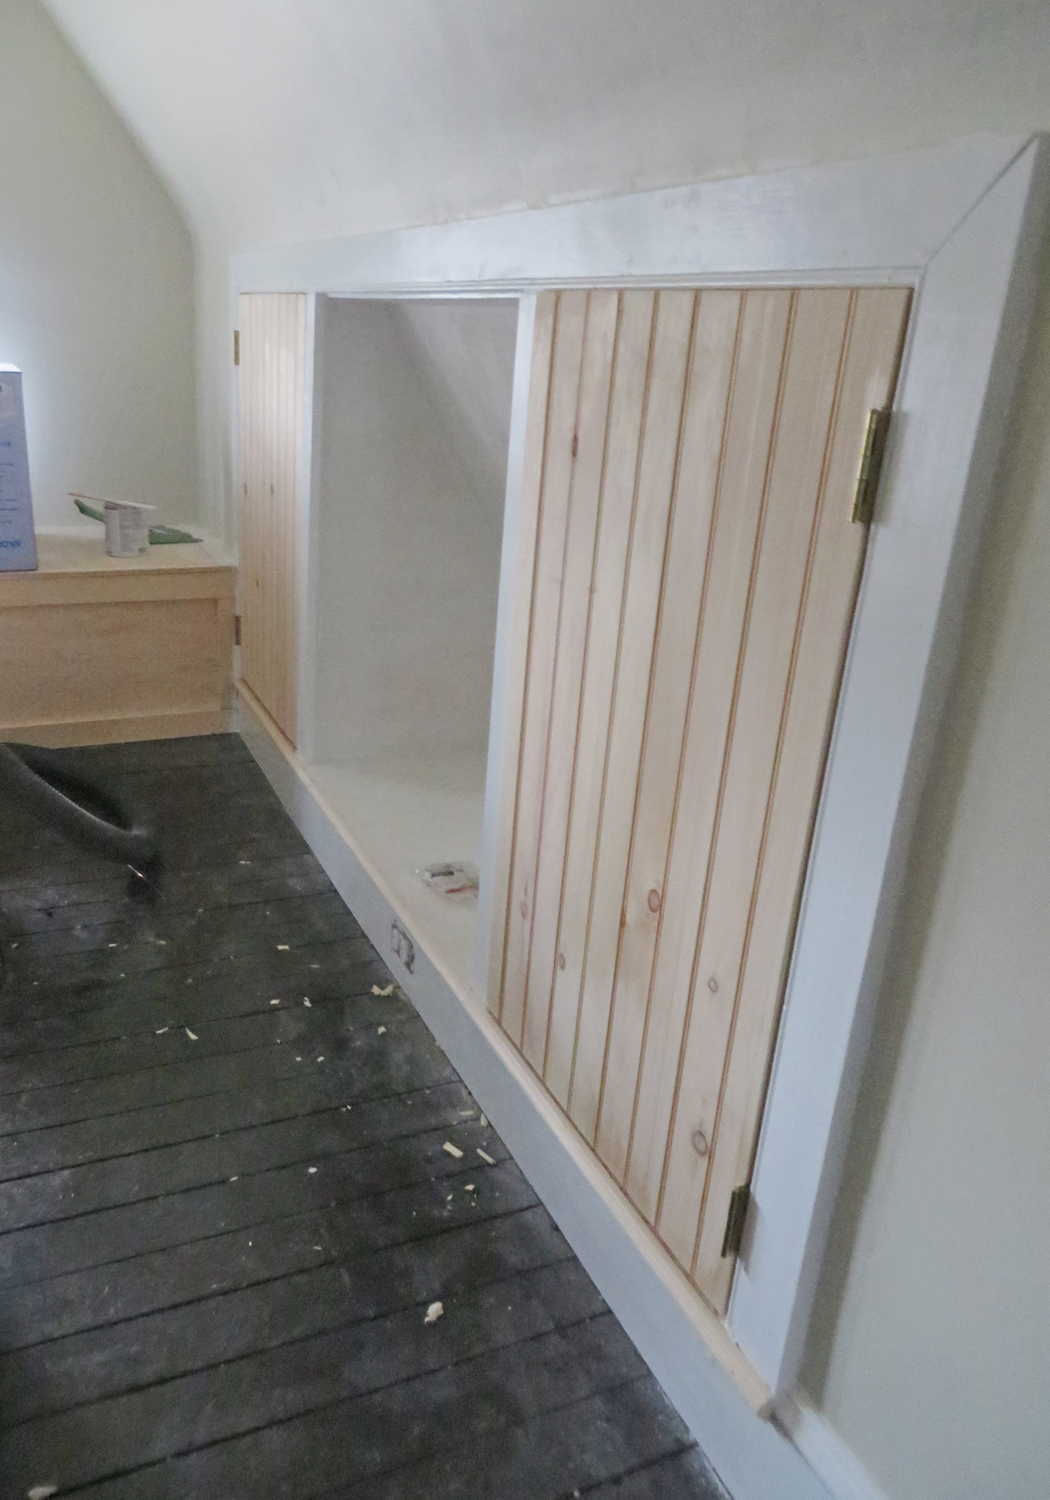
Hi All! I hope everyone is staying warm and safe! We are going a little stir crazy here. 2 snow days and 1 delayed opening this week alone. Fortunately, we have only lost a few branches and have kept power. Fingers crossed that the storm headed this way on Sunday will be small! 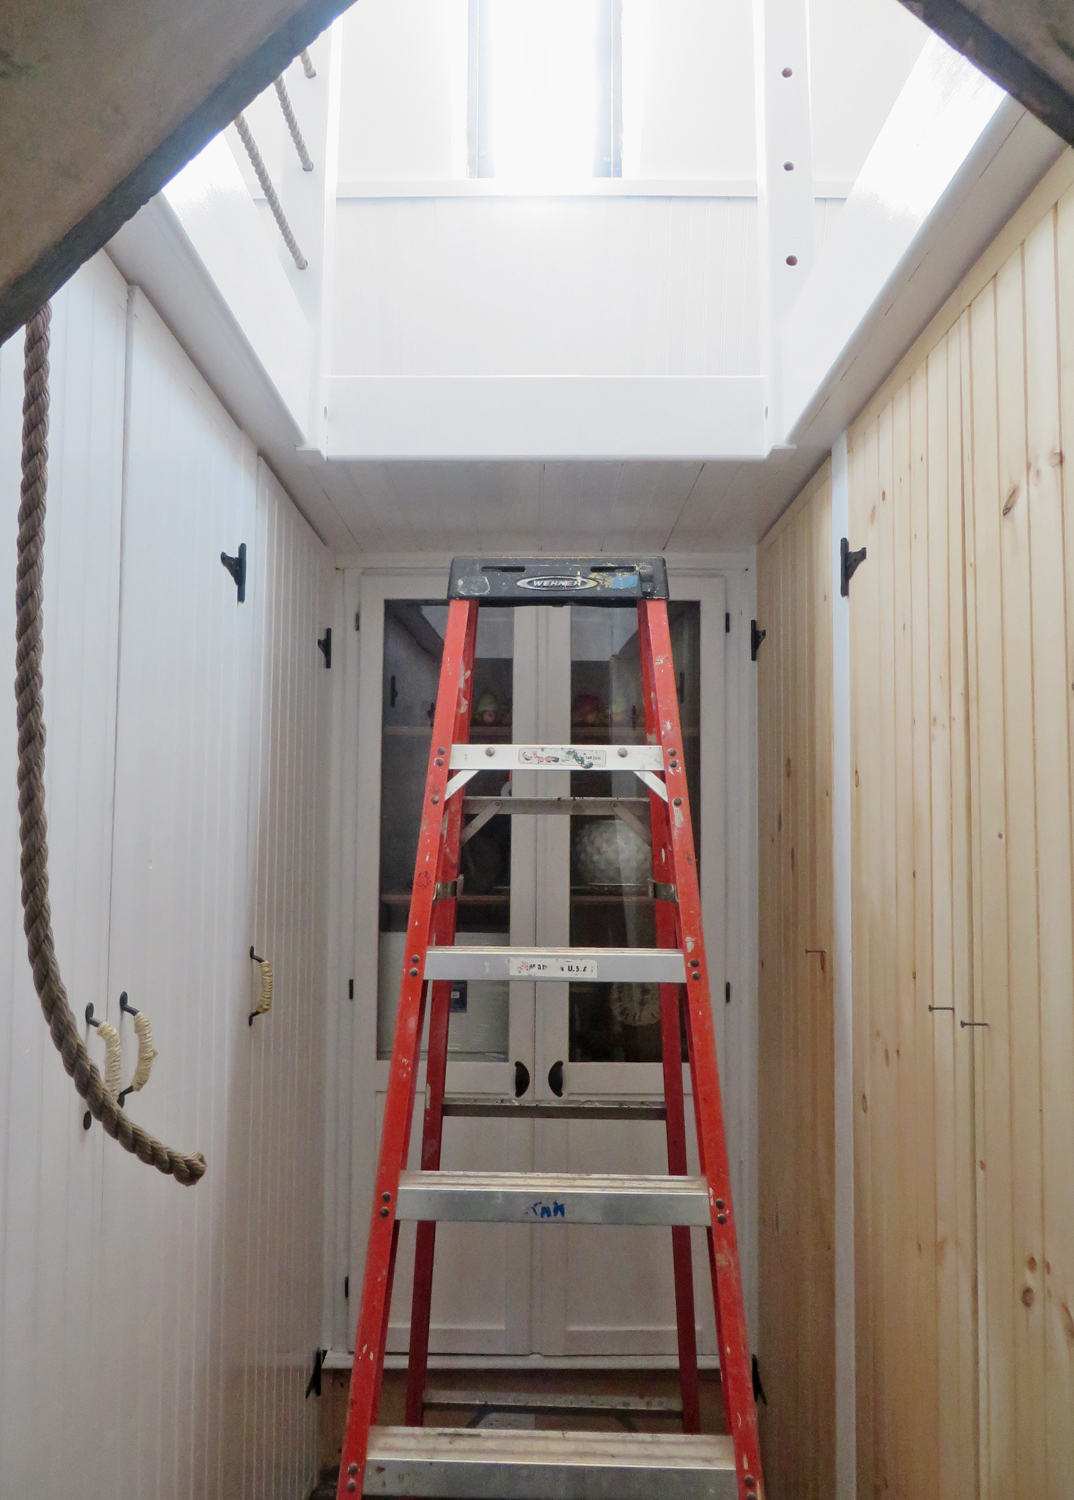 In all of this mess, we did manage to do a lot of painting over the weekend (while Grandma and Grandpa came to visit) and our contractor was here on Tuesday putting in the rest of the doors. Mr. S. was very excited to start filling the shelves (behind the doors on the left). They are pretty much full now with plastic bins of baby clothes, boxes of cds, suitcases and all sorts of random stuff that came in from the garage. After months of putting stuff out in the garage it is a relief to bring things back into the house! And the good news is that once Mr. S’s office is complete, a good portion of this stuff will leave this closet. The doors on the right hide our clothing rod. This will store our out of season coats and clothes. I’ve also started moving smaller random house stuff like vases and lamp shades into the cabinet at the back. I hope to move all of my random decorations that I am not using into that cabinet.
 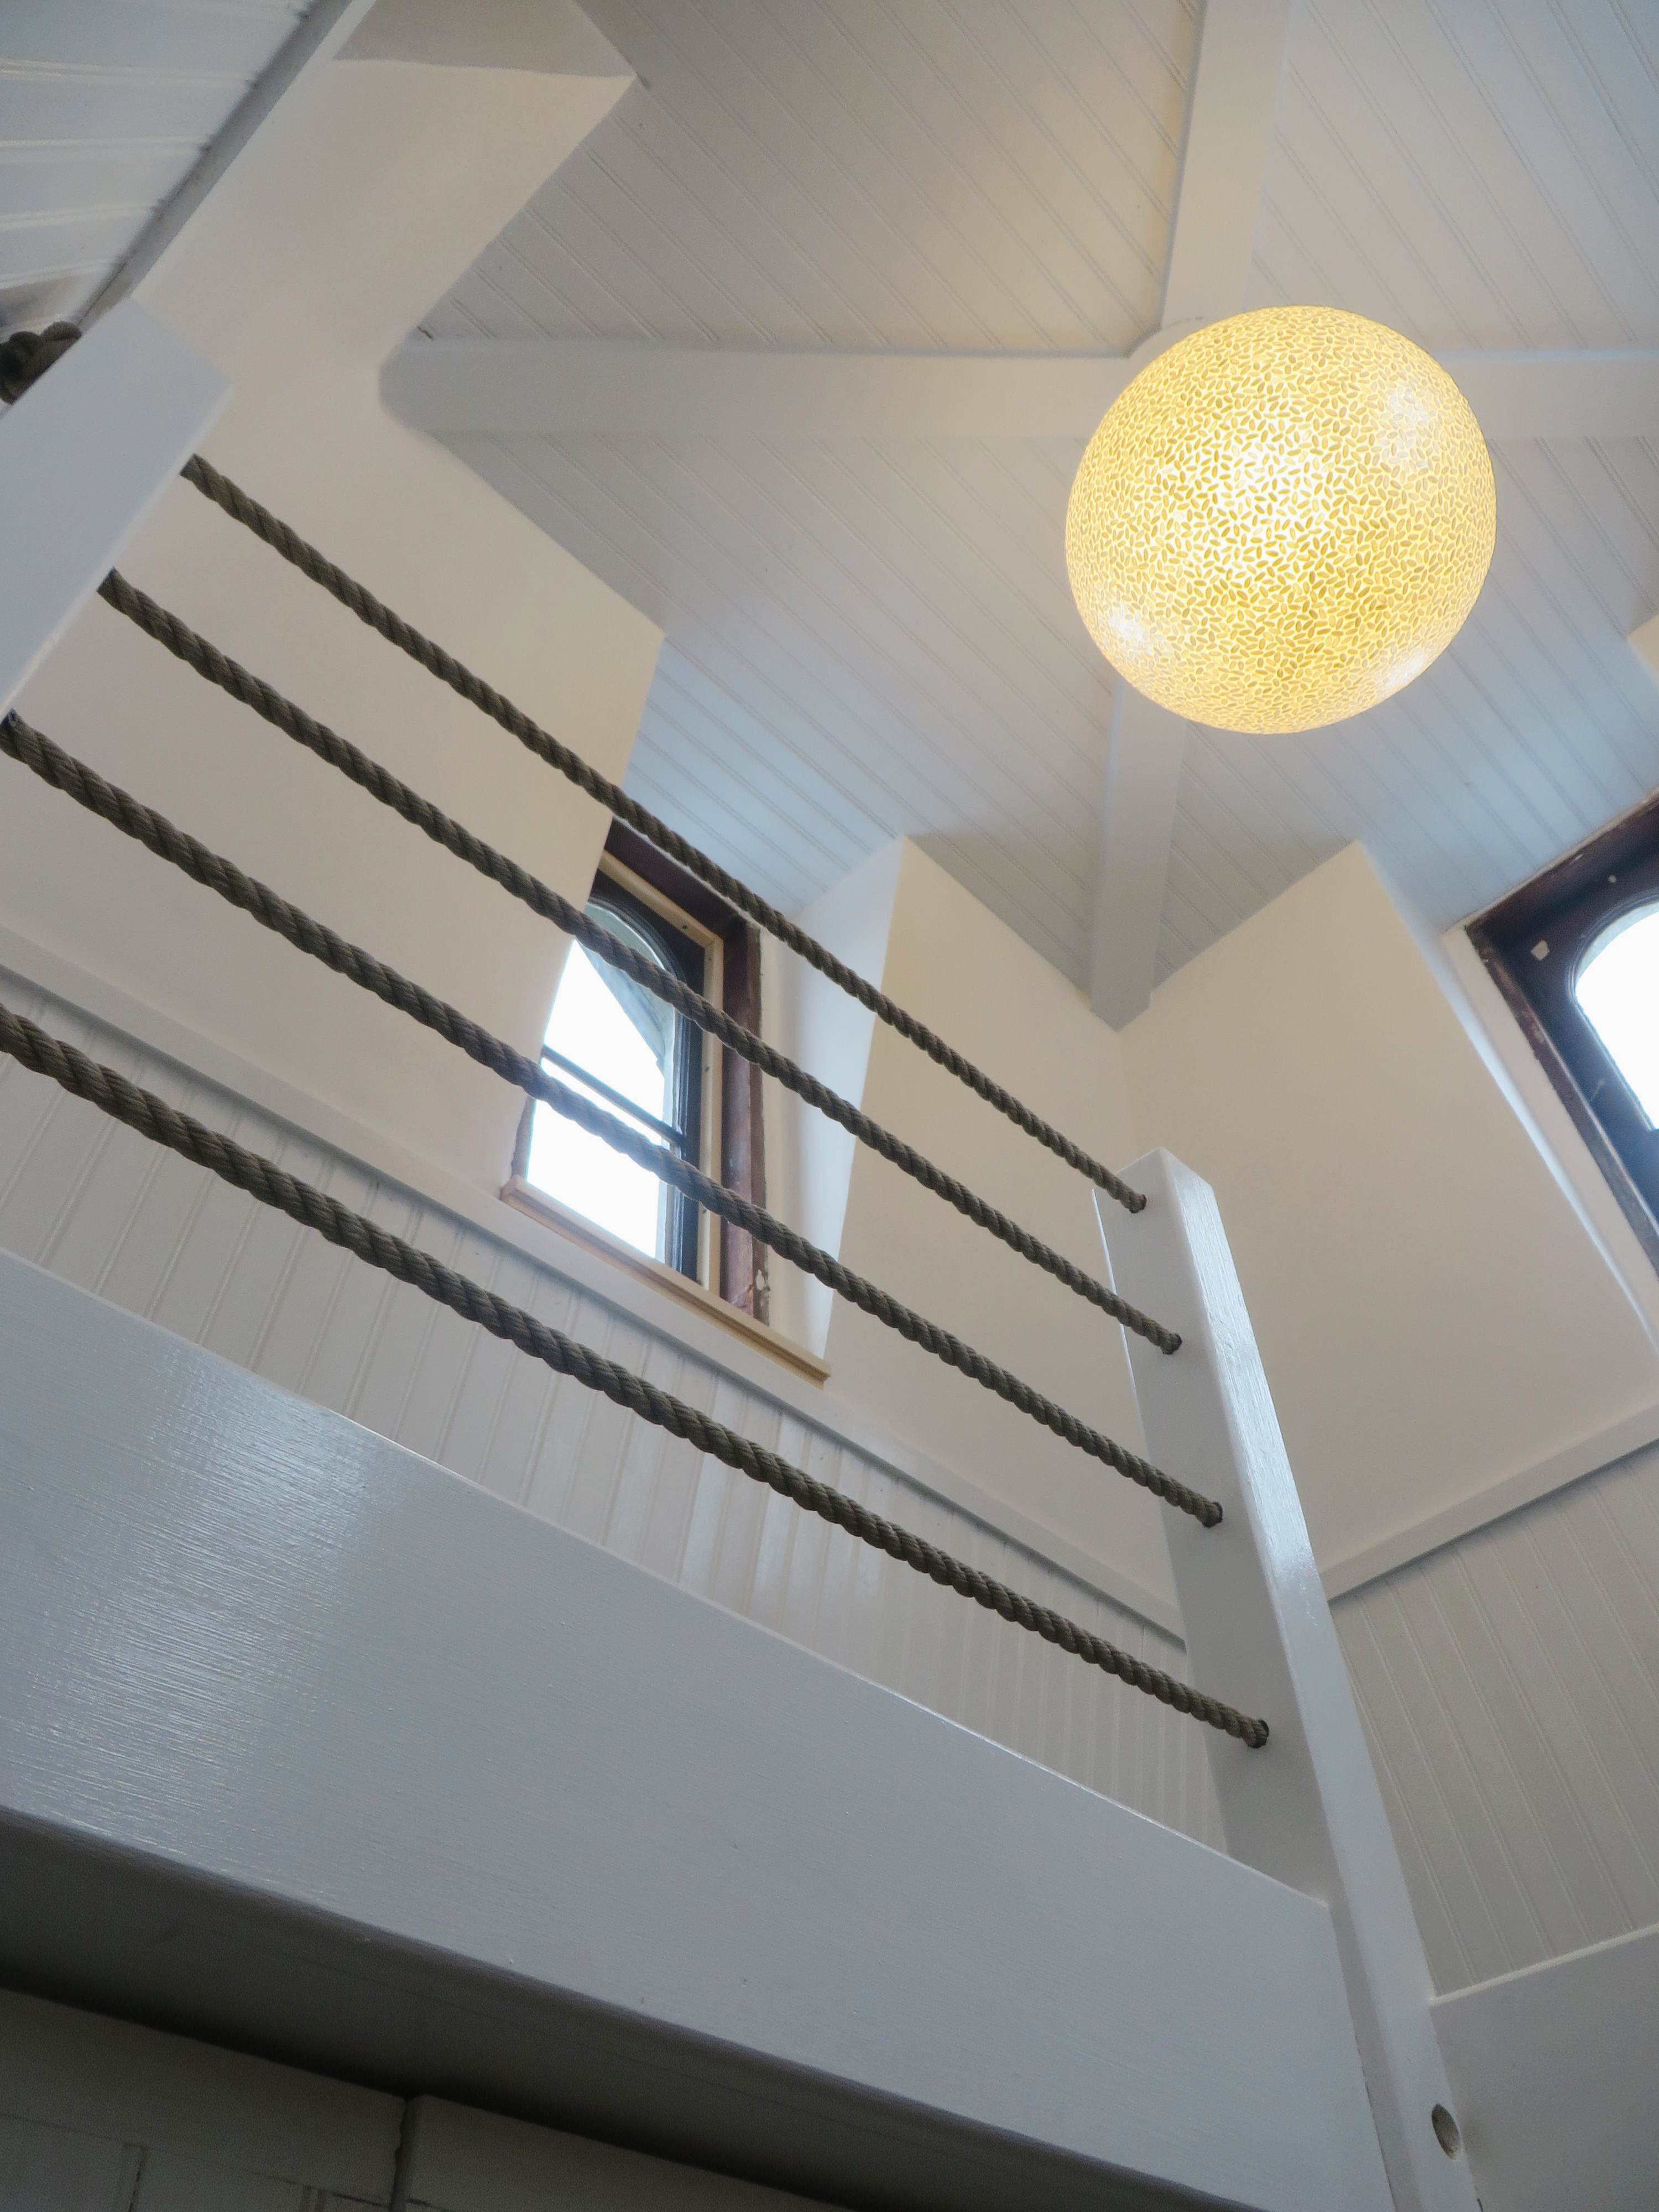 The fort portion of the tower is almost complete. The ceiling, walls, wainscot and trim is all painted. 1 side of the rope guardrail is in and 1 of the 4 windows is reglazed and installed. We still need a ladder and to cut the carpet tile to fit the floor and finish the window trim and stain it all too match. Meanwhile the light fixture is in and I am in love! It is made of rice shaped seashell pieces and resin. It has a really nice warm glow (with a warm LED Cree light bulb installed).
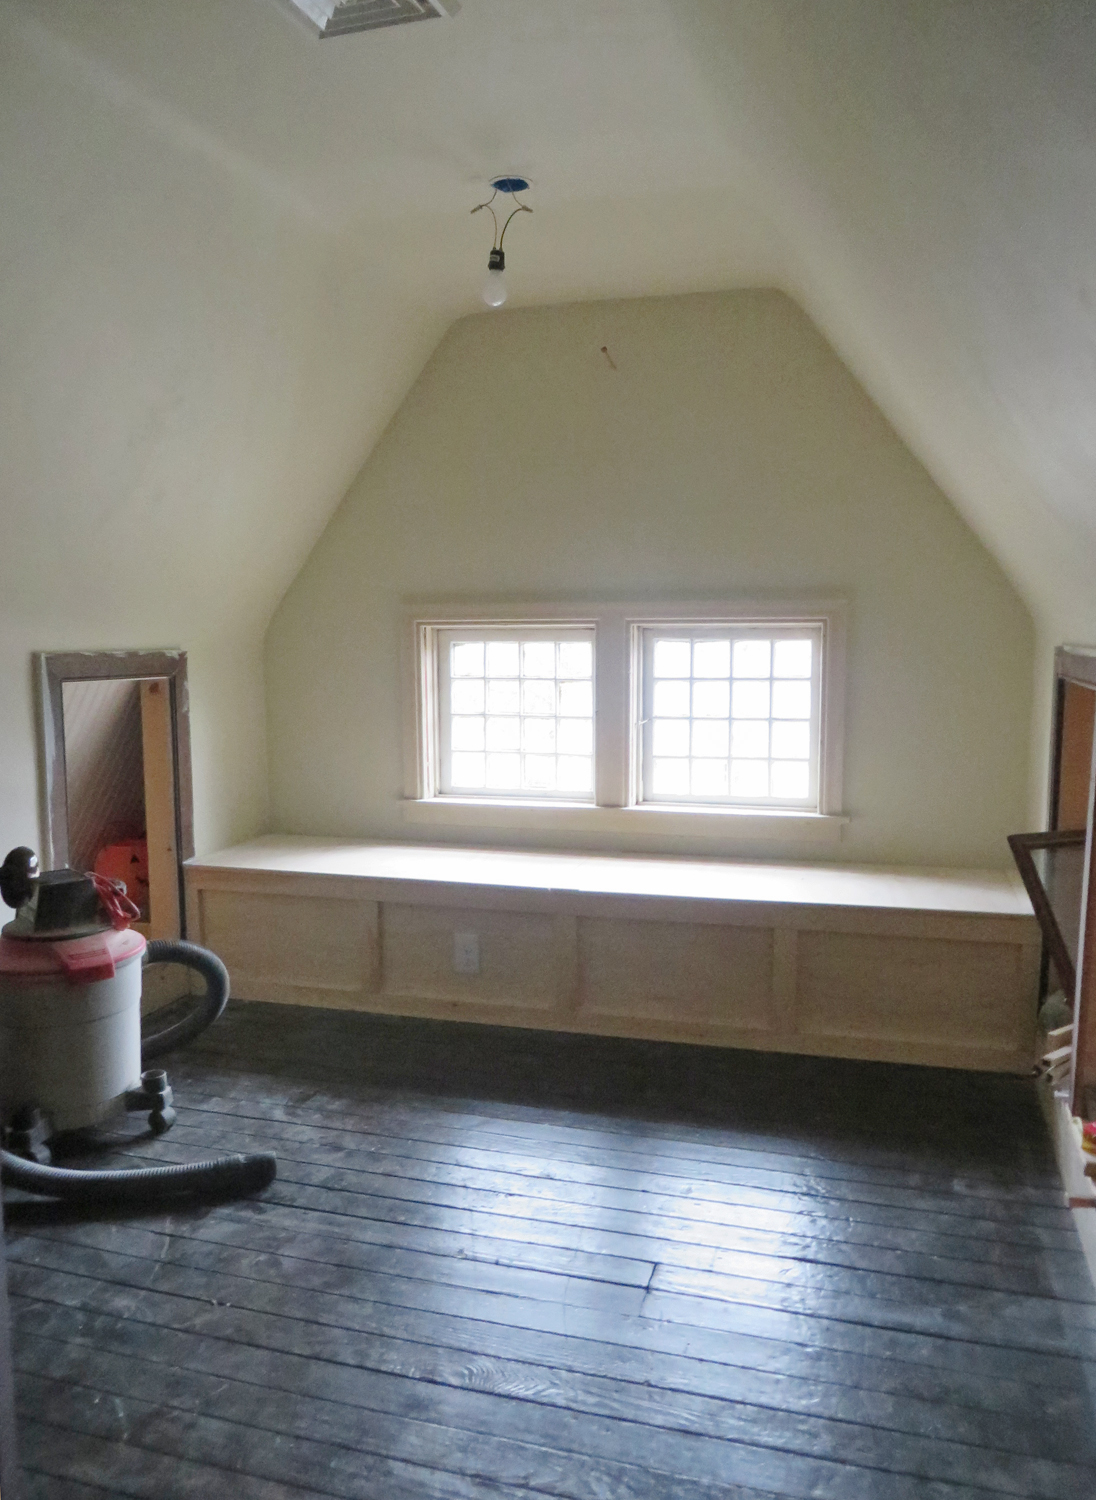
 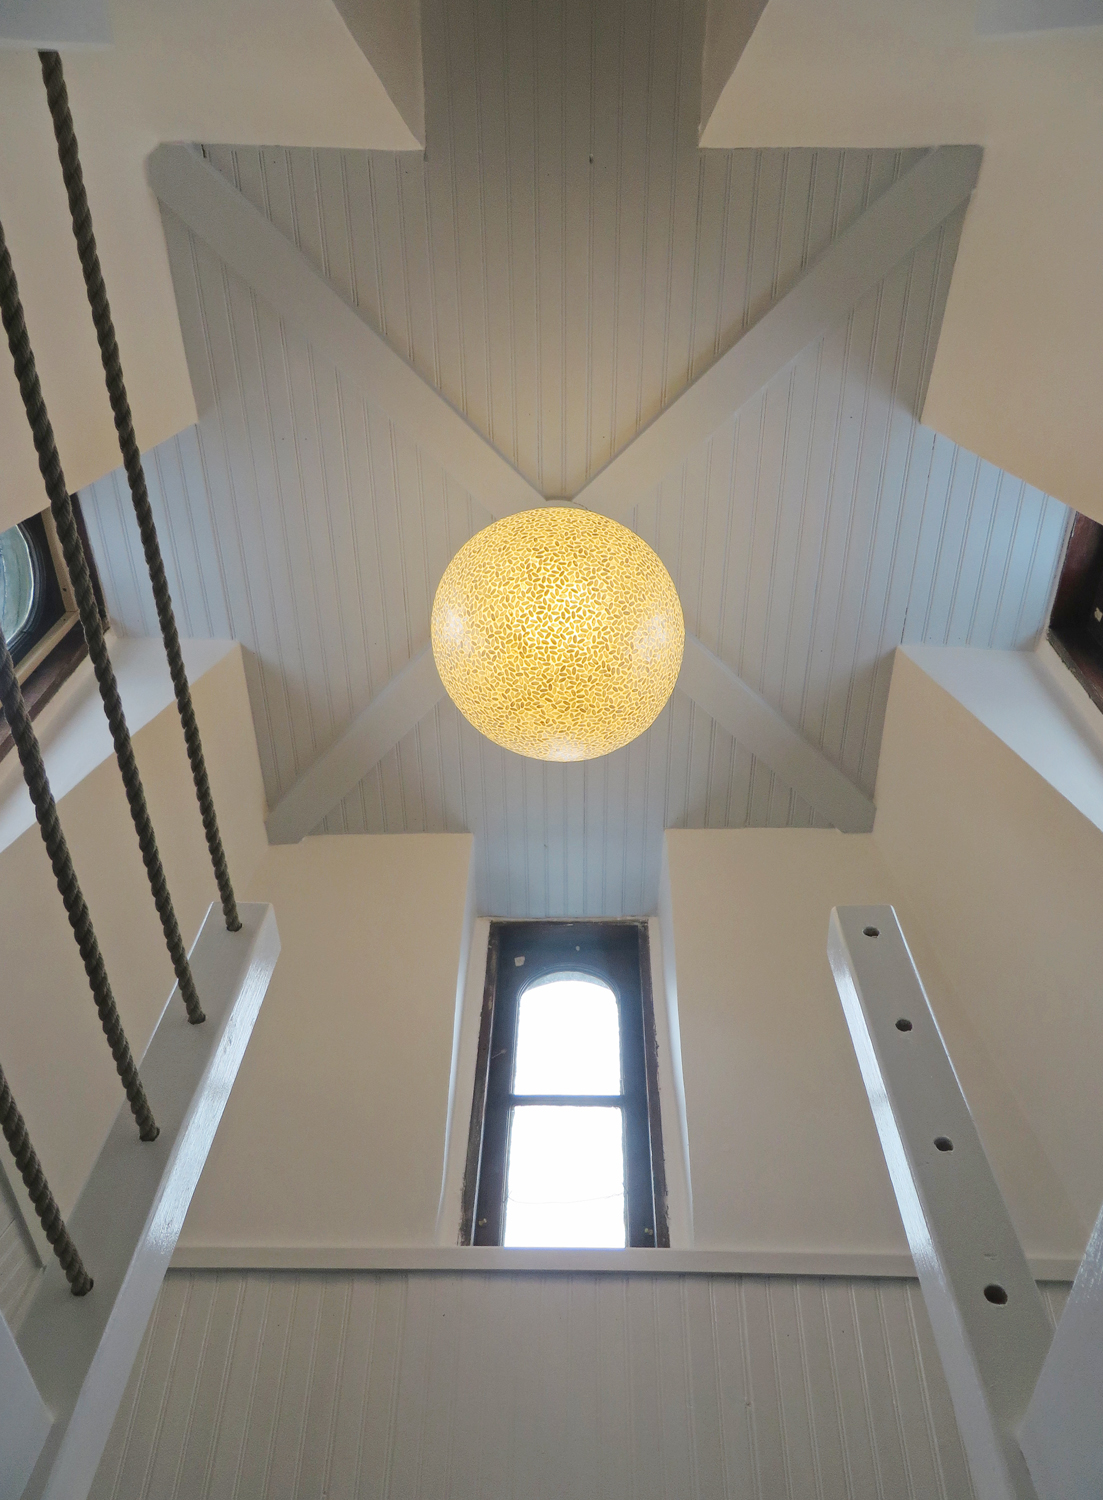 We are still debating whether to put beanbags or just pillow up in the space. We will have to try it out this weekend and see what we think. Mr. S. now jokes that this will be the most complete room in the house! Considering it is only 7′-2″x7′-2″ it should be. Stay warm and safe! I’m going to go put a sweater on and try to keep warm!
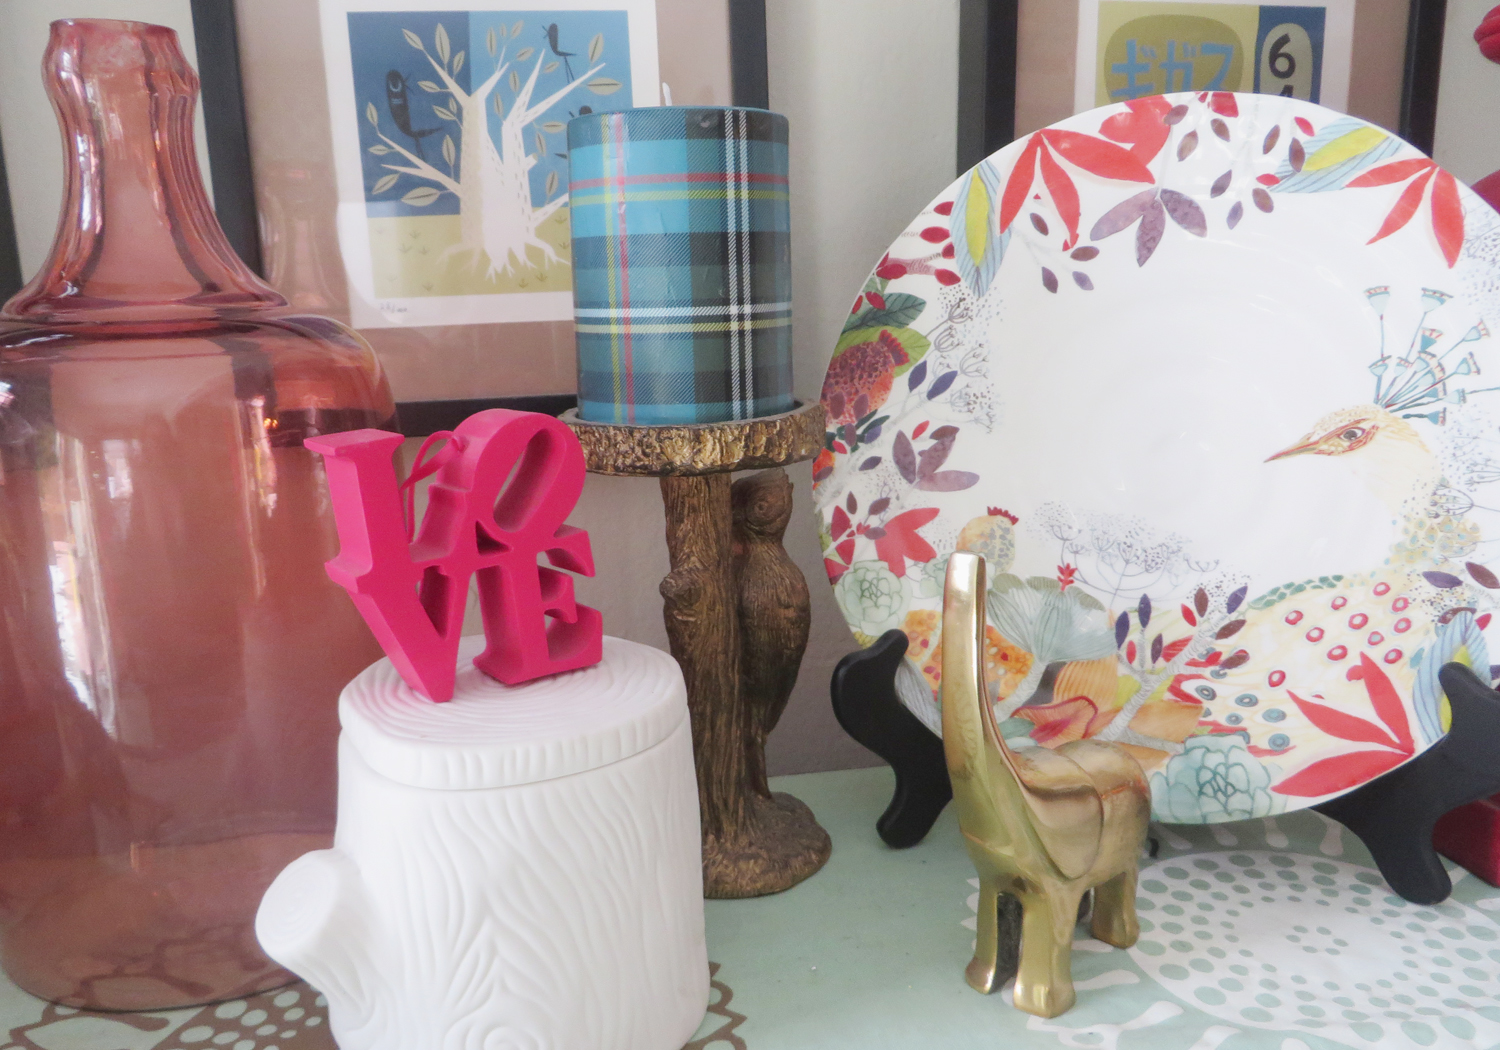 Things have slowed down up on the third floor (I guess that is what happens when it there isn’t a contractor here to keep things going and you have to go to work). So I will distract you with pretty pink things instead! I have been trying to keep the top of the piano looking seasonal since it is the first thing I see when I come in. I bought a couple of new plates from Anthropologie this week. I was looking for knobs for the tower (always nice to come up with an excuse for going) and I was nearby. Of course I visited the clearance section and I found that a couple of the plates that I had admired in the fall were on clearance. I also found some knobs on clearance, so I justified buying the pretty plates. The colors are really great with our Dining Room so I am quite pleased. I am considering hanging a mix of plates in the kitchen and I think a couple of peacocks would fit right in!
 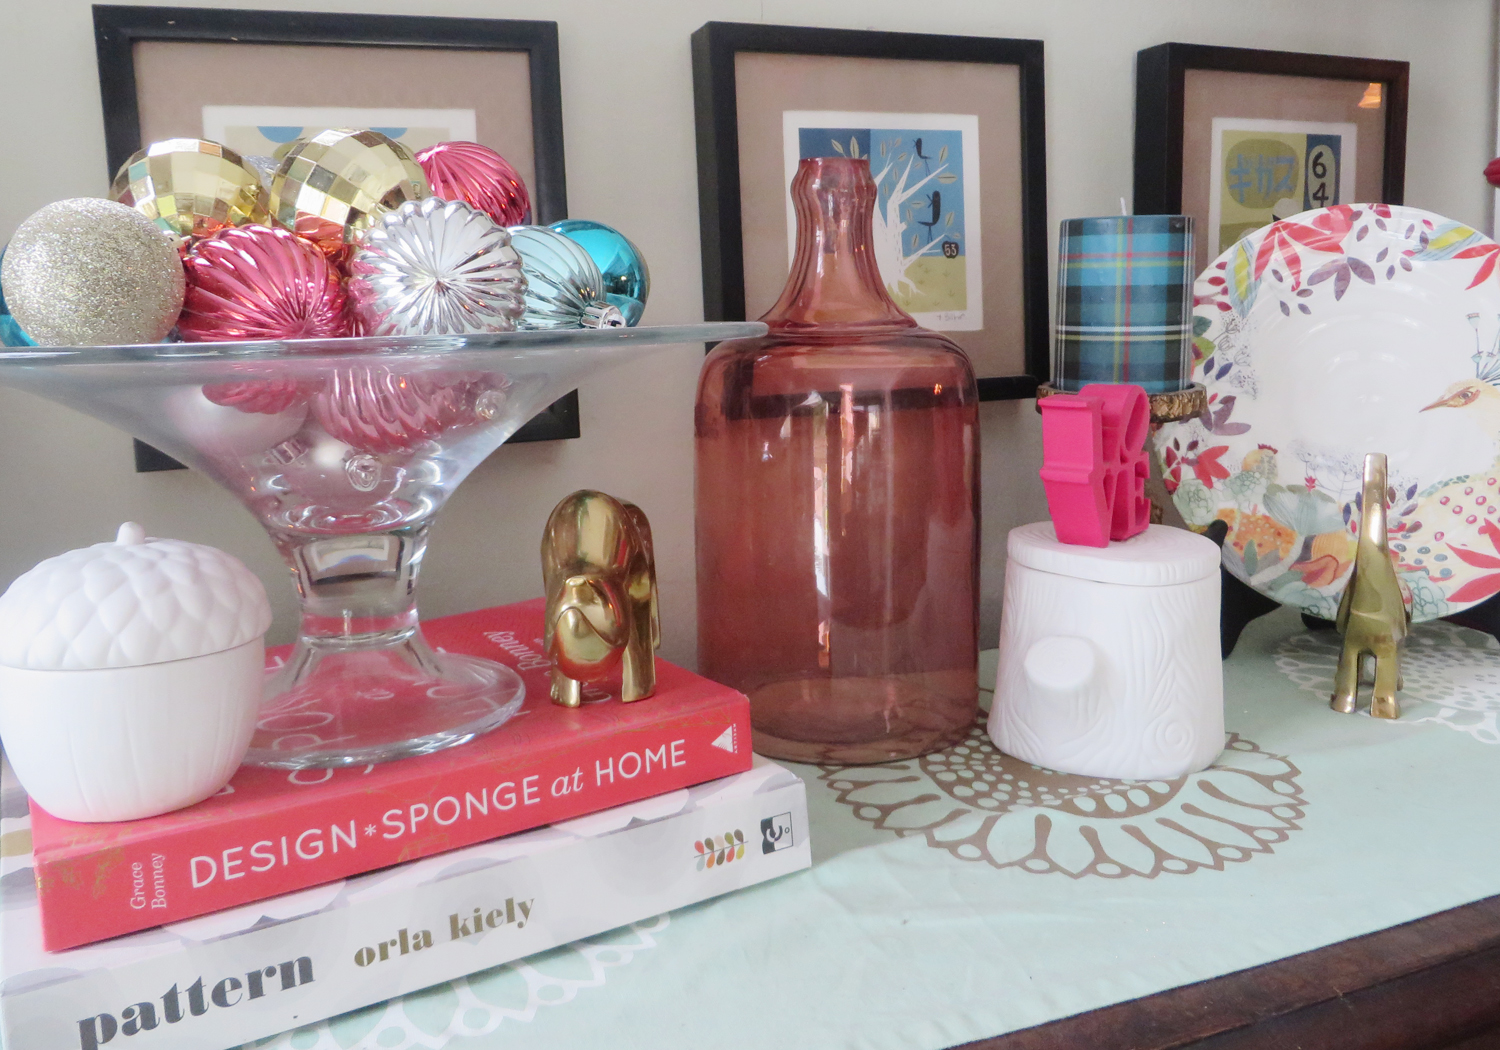 I reused Christmas ornaments like I did last year in my bowl. Then I added the gold animals I bought at Target a while back and a pink jug that I bought on super clearance last year.
 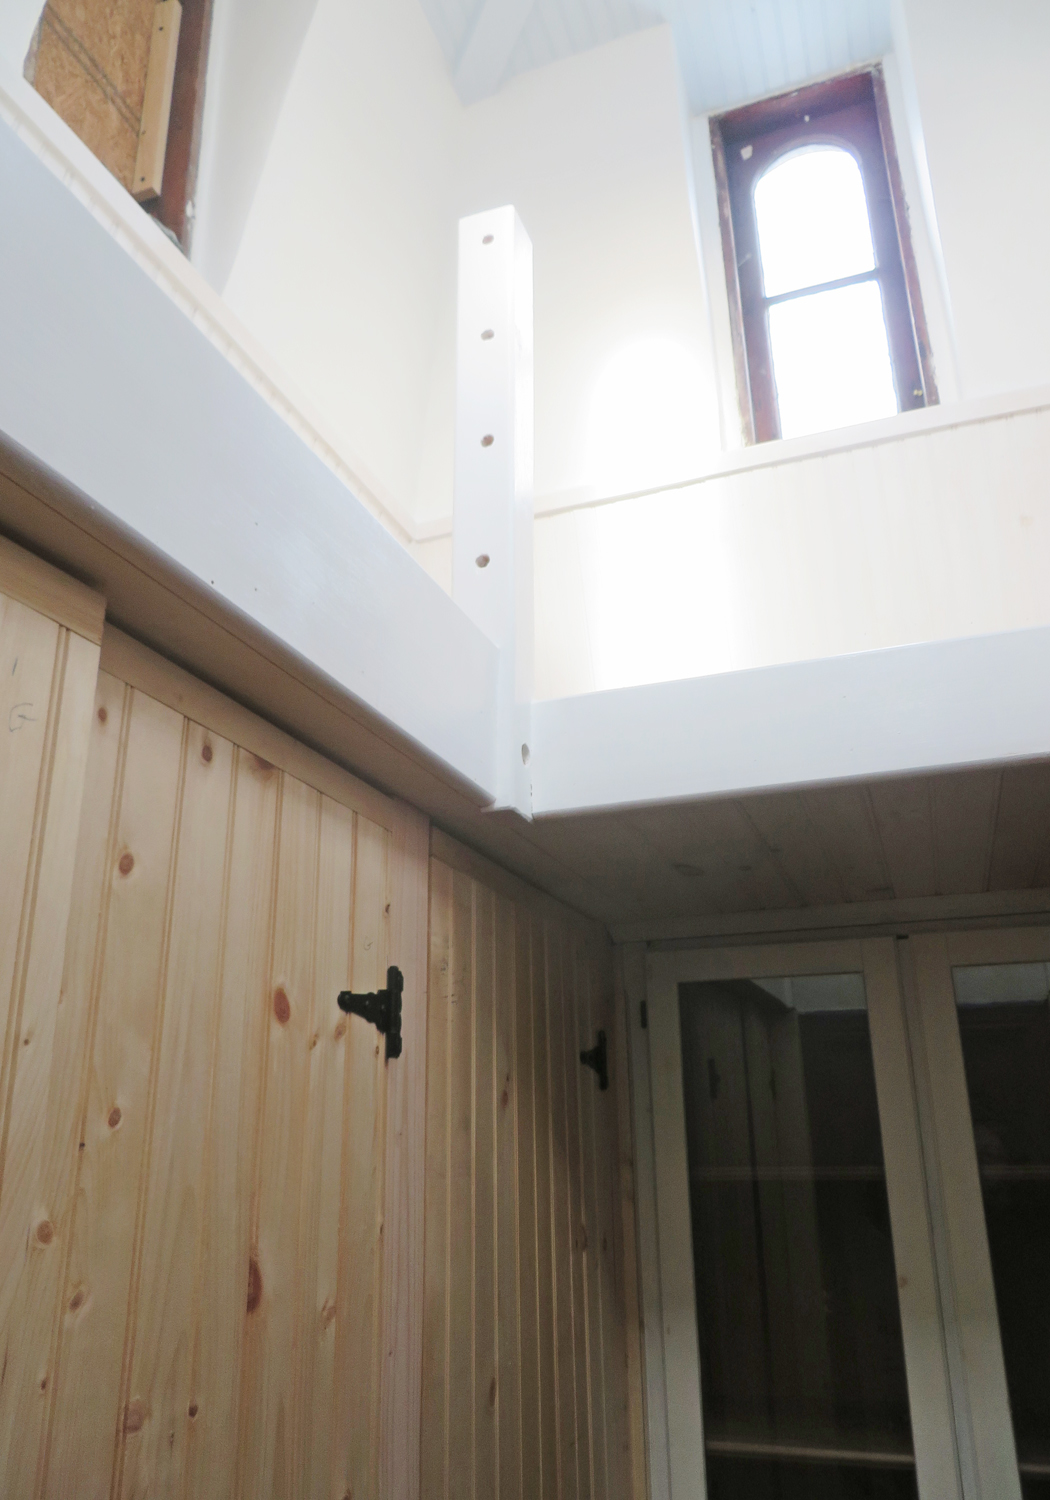 Of course I can’t leave without giving you a little sneak peak of the tower. We have been painting a little each night, but it is kind of slow for such a small space since it is hard to fit more than one person up in the loft without touching any wet paint. In fact I have paint in my hair right now! The good news is that we just have the lower wainscot and a last coat on the posts to do up there. Our contractor was here yesterday and installed 3 of the 6 beadboard doors! Our plan is to paint those up this weekend! That also means that I can bring in some of the many bins filling up the garage!
 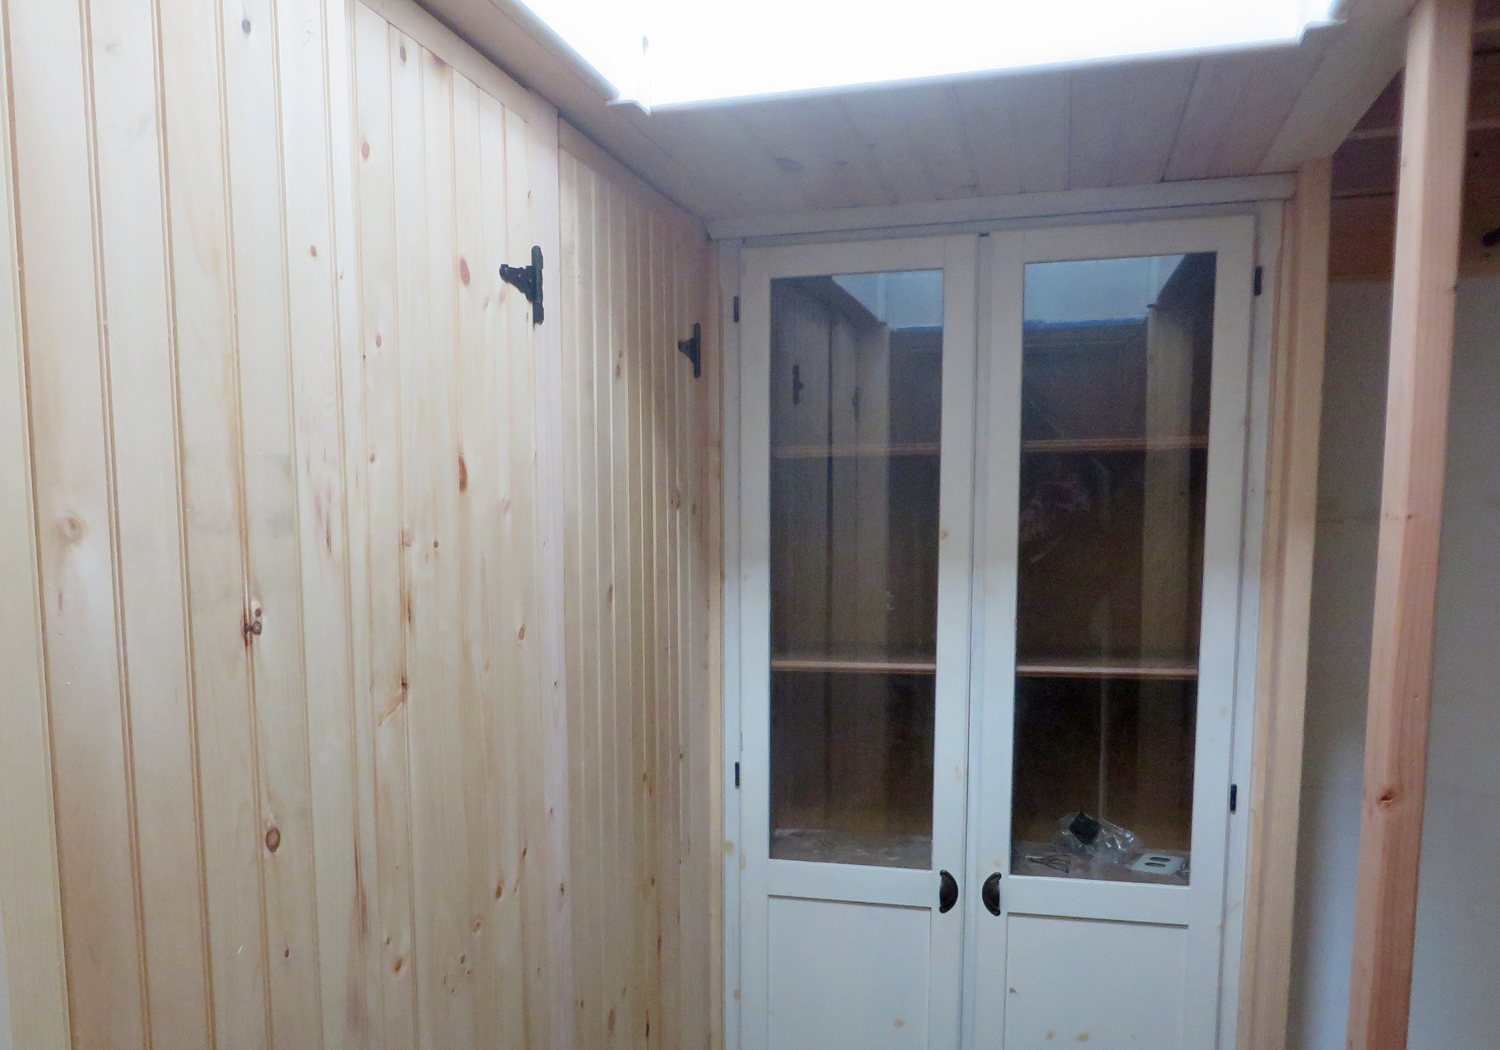 Did I mention how hard this space is to photograph? In person it is pretty cool though. It looks like a ship’s cabin. If all goes well this will actually get wrapped up in the next 2 weeks (fingers crossed).
  I will leave you with the cutest flower hooks at Anthropologie. I bought the small one not realizing that they were on sale. Now I wish I had bought more at $2.95 for the small one and $7.95 for the large. I hope everyone has a great weekend!
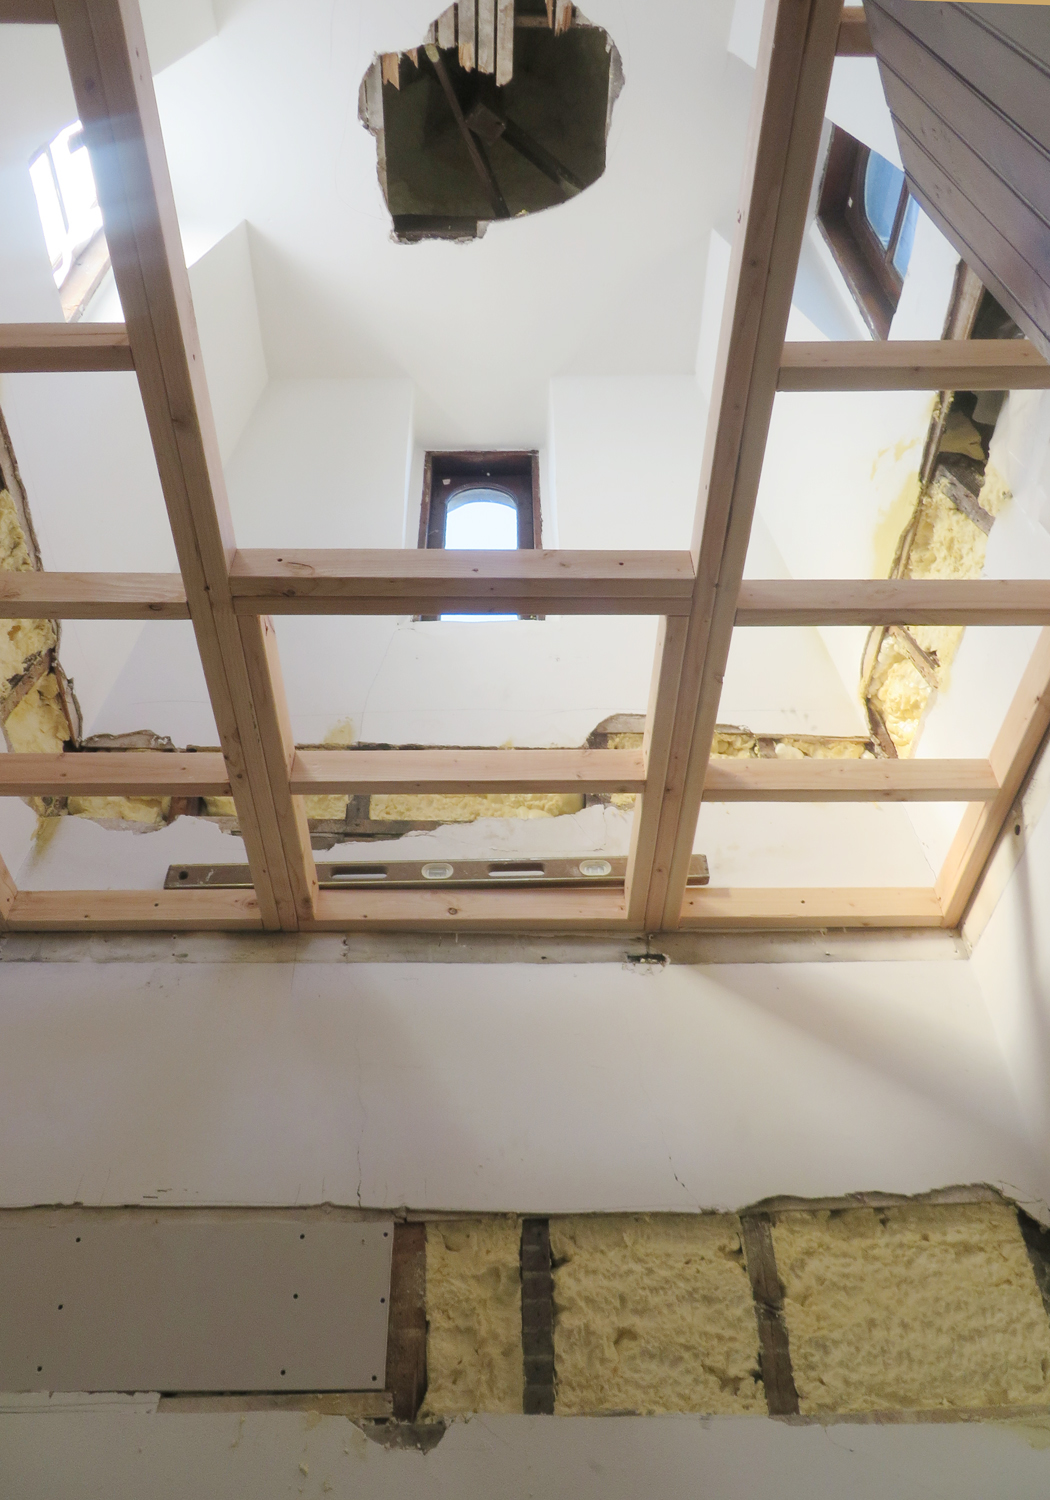
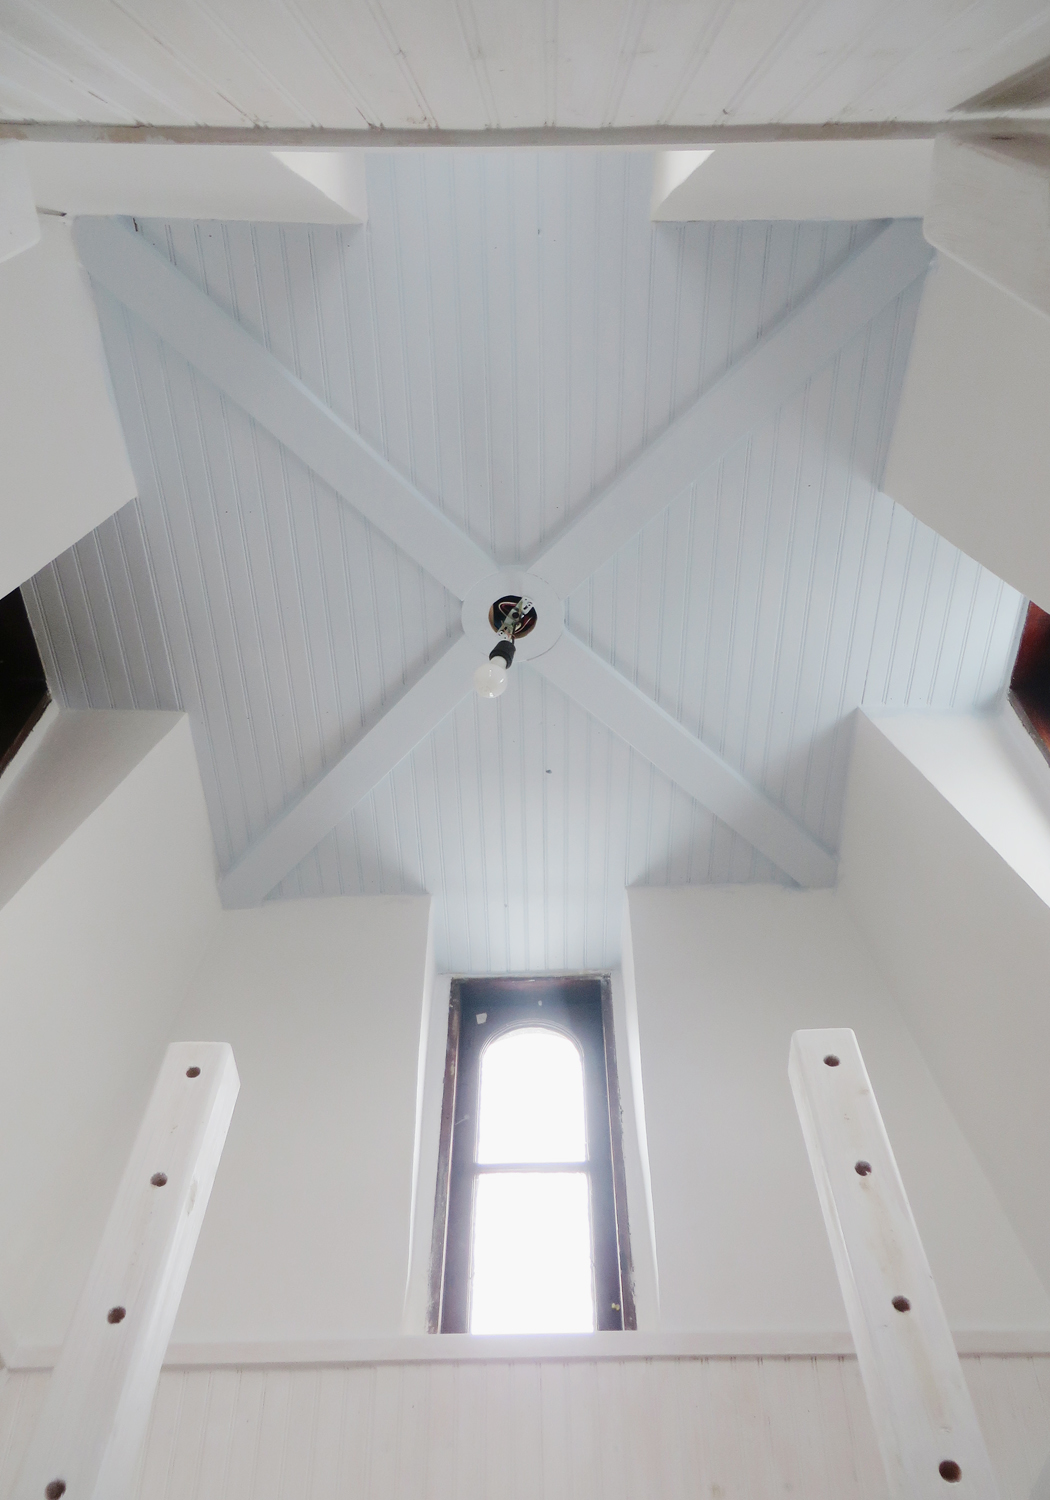 Work is still moving along over here! Our contractors finished the ceiling in the tower and the fort is almost ready. We managed to prime everything and paint the ceiling over the weekend and we have nightly homework this week to finish painting the walls and trim. He is schedule to come back over later in the week to install the light fixture and the rope guardrail (in case you were wondering what the holes in the posts were for). We are going to leave the windows stained (at least for now). They need a A LOT of work, so once they are fixed up they may not be in a condition suitable for leaving unpainted, but we thought it is worth a shot. They have never had stops, a sill or casing, so we will be installing those in a little bit (in a matching dark stain). The interior storms will also have a dark brown frame. I am loving the ceiling. We used the thin beadboard that comes in packs from Home Depot. We were covering up a BIG hole, so we installed blocking for the light fixture and for something for the middle of the beadboard to attach to. Then we installed 1×4 diagonally with a circular piece in the middle. The circular piece was a happy accident, since we didn’t take into account the size of the cover plate for the light fixture we had to add that at the last minute. I am really liking the nautical feel.
 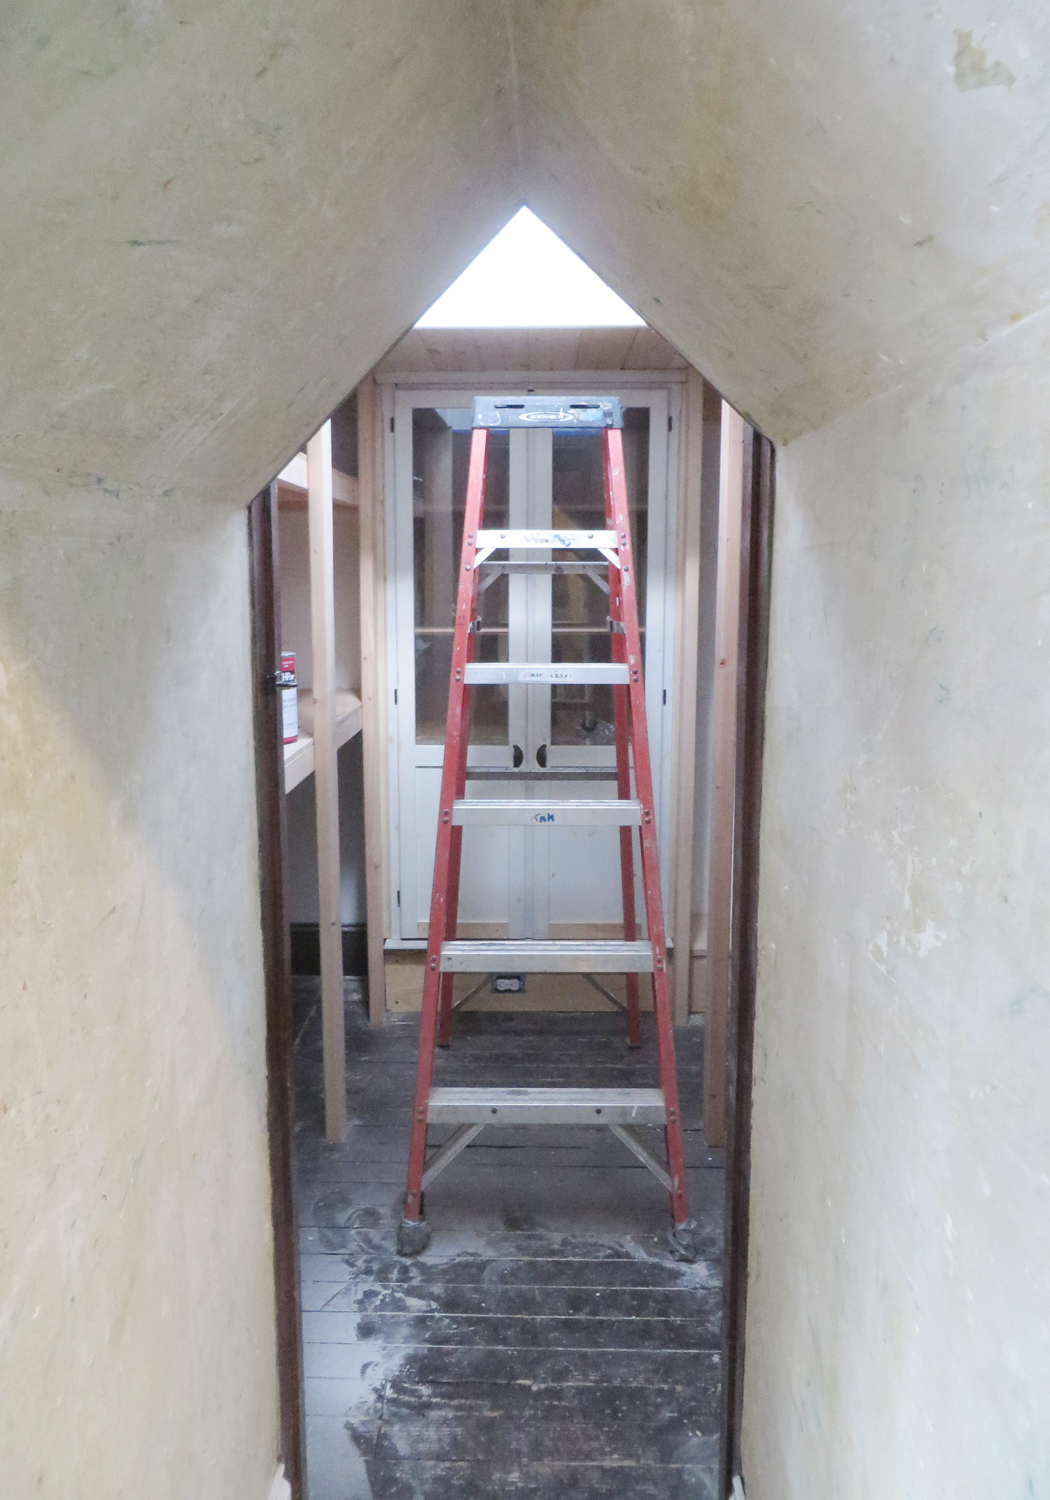 It is such a hard room to take a photo in (13′ tall by 7′-2″ by 7′-3″). This is view from the adjoining bedroom. The cabinet at the back is our old Ikea shelving unit from our bedroom. Our contractor cut it down by 6″ so it would fit. One of my favorite things is when you walk through this narrow passage way there is such a bright light coming in but you can’t see where it is from at first.
 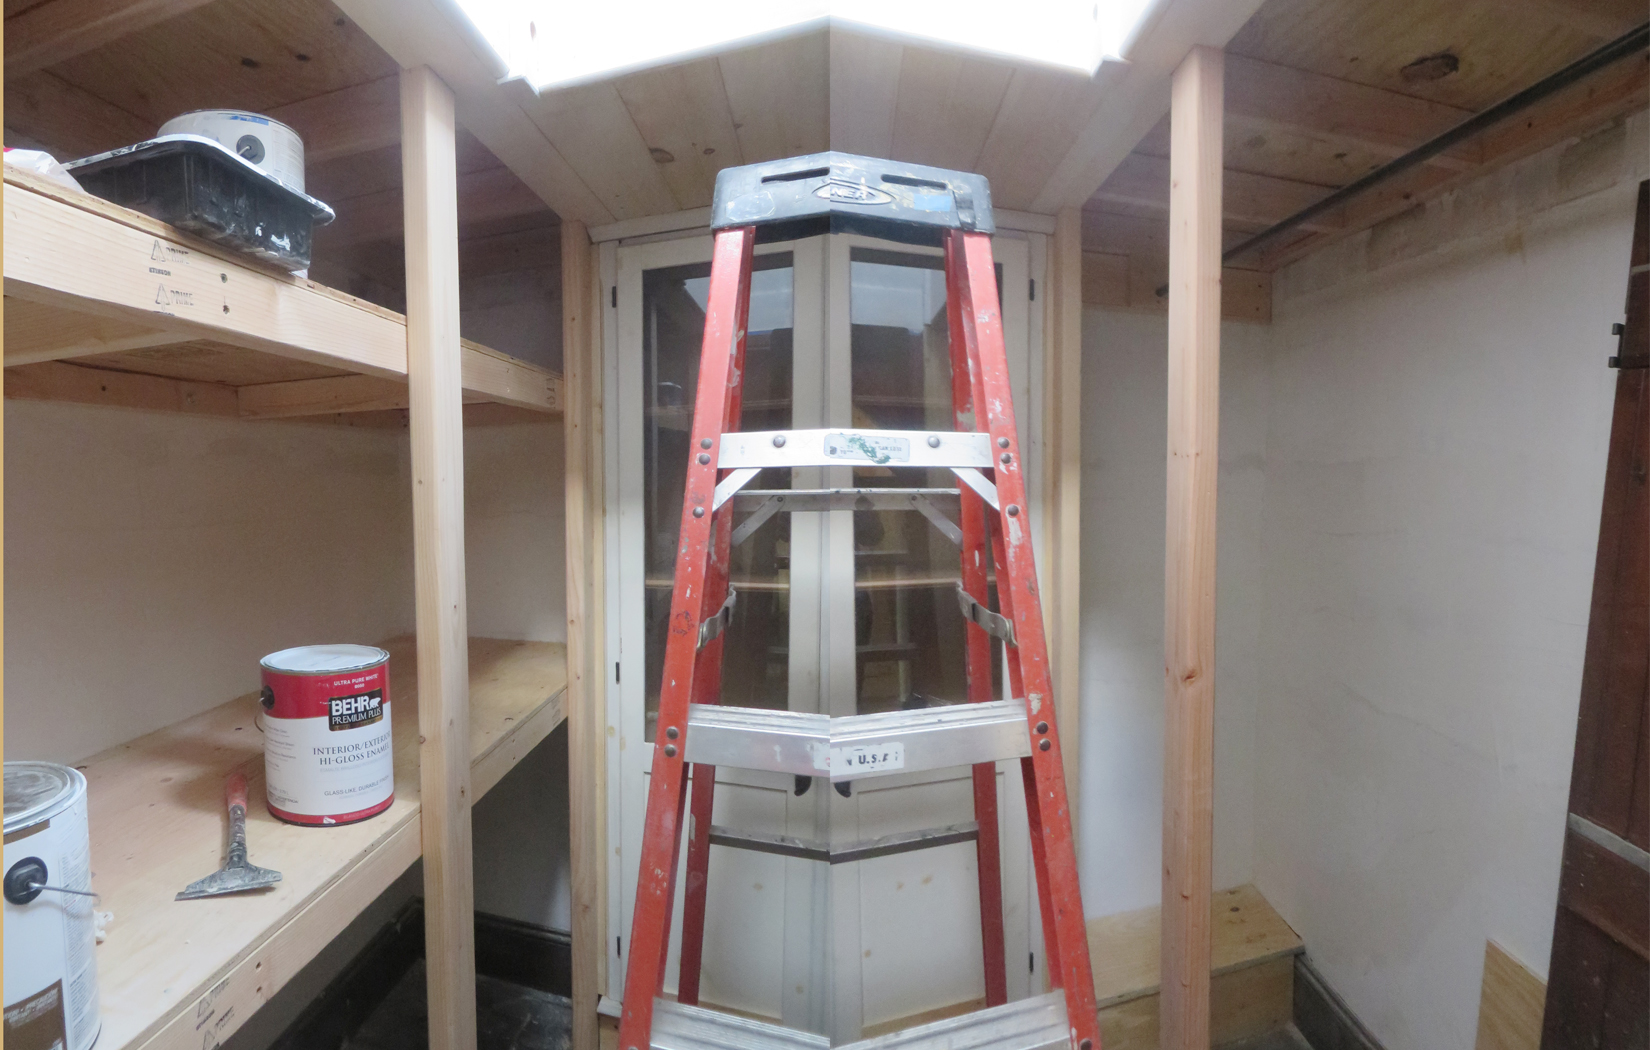 The doors for the closets on either side will be beadboard (sense a theme?). They will hide the shelves on the one side and the clothing rod on the other side. We are also working on finalizing the design for the ladder. I think it is going to be pretty awesome. So the one random old thing in this space is the clothing rod, which is actually an original gas pipe. It was in this space when we moved in and I am pretty sure it has been a clothing rod since the house was built (I wonder what year clothing rods were invented). It has a really thin diameter, but it is super sturdy. I was glad that we could reuse it. I also have a piece of wood with old hooks that will be going back behind the rod as well.
 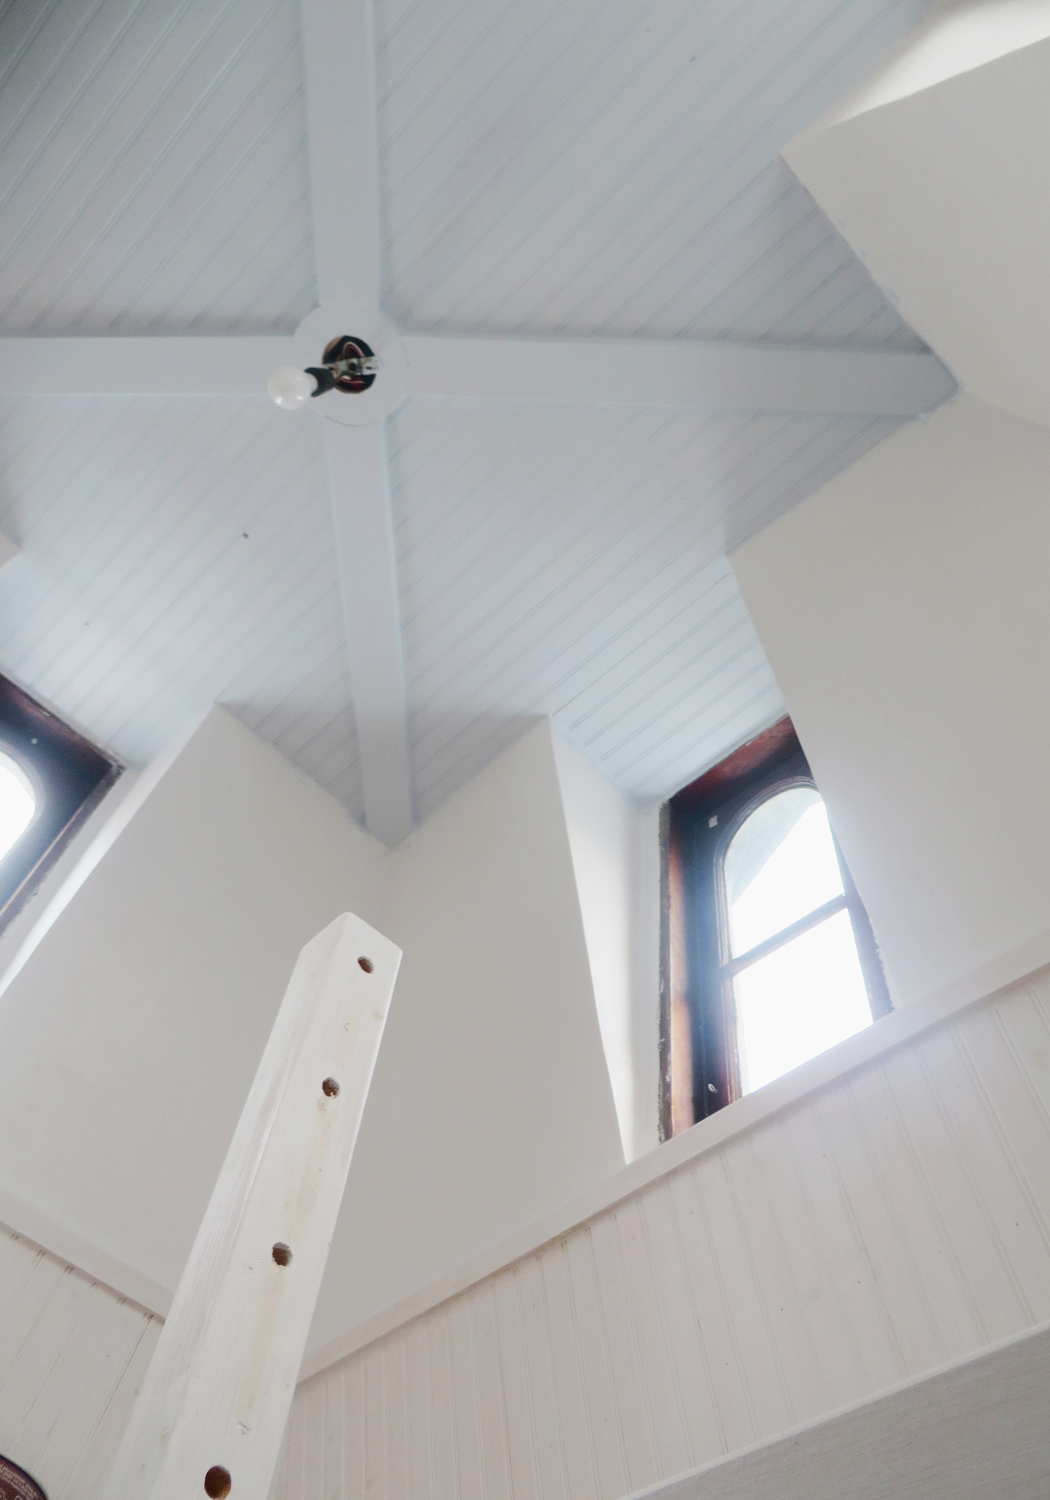 I am pretty sure that my contractor thinks I have lost my mind, making the third floor closet one of the prettiest rooms in the house.I think it is going to be pretty cool when it is finished, and if the kids don’t like it I think Mr. S. is going to move in.
We are Snow Day #2 here (14″ of snow), and everyone is going a little crazy. I’m looking forward to some school tomorrow. I have a lot to jam into the end of the week! Without further ado here are some progress photos of the third floor. 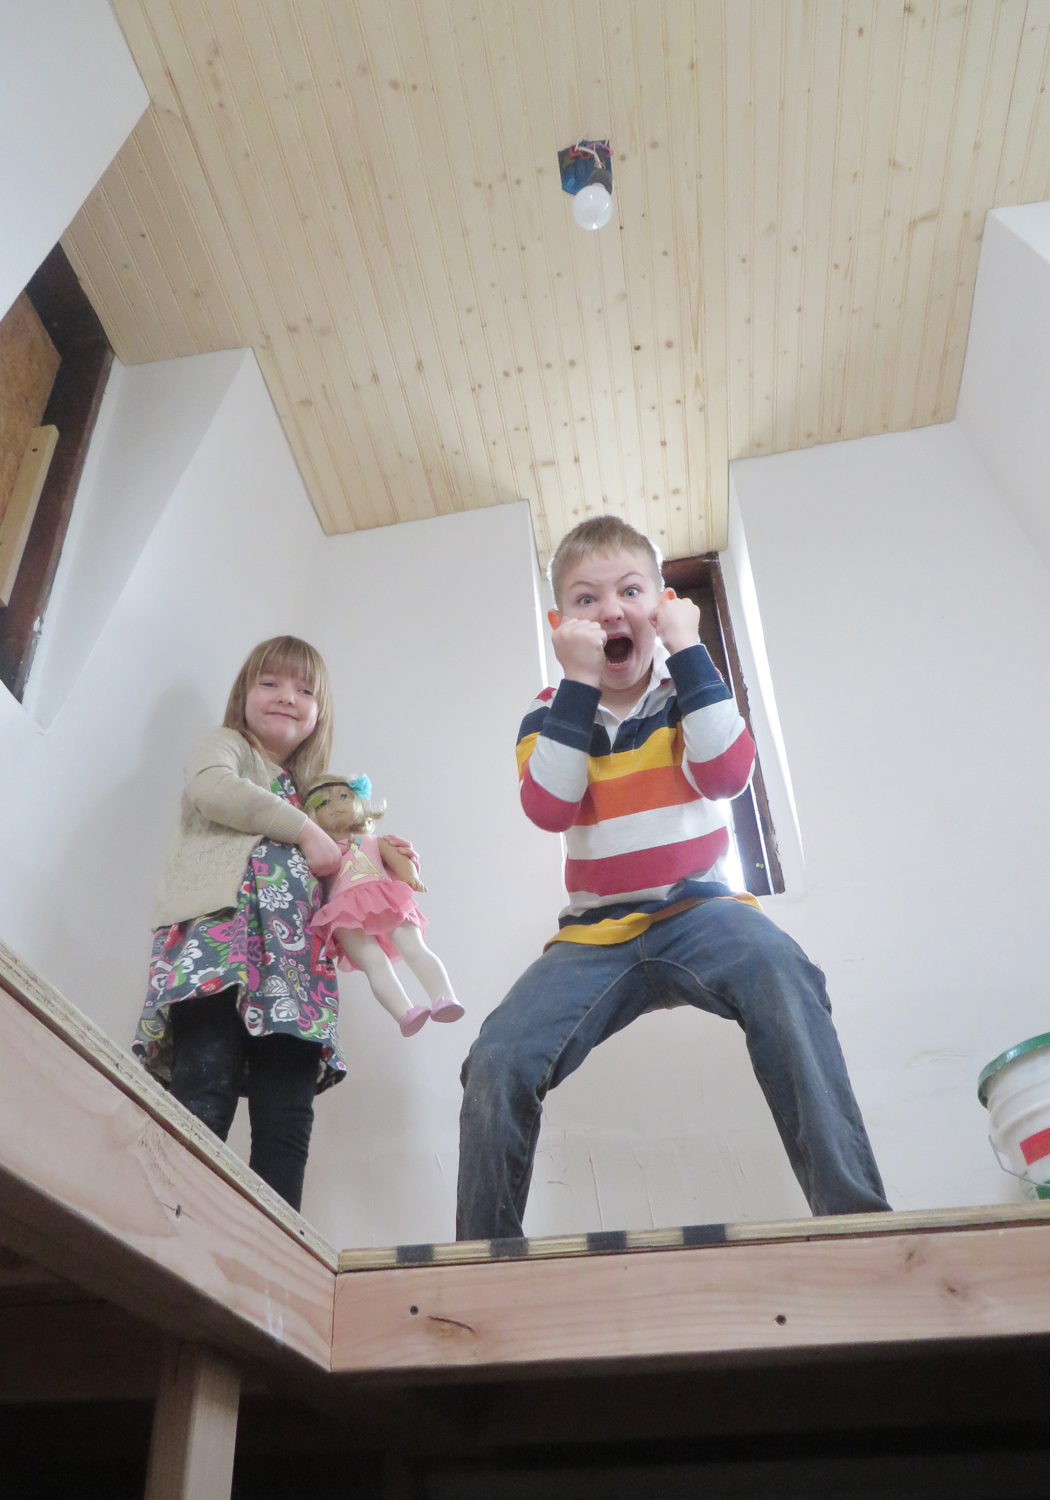 Do you think someone is excited for his tower fort? It is still a work in progress, but the kids have had a chance to check it out now. Plus the ceiling is beadboarded and most of the wall repair is complete. There is still a long list of stuff to complete, but I’m not sure how long these two will wait. Of course Mr. S. and I have also checked it out and think it would make a pretty nice hangout spot for us too.
  Of course I shouldn’t be claiming anyone’s space since the Craft Room/Studio is officially open for business. As always there is still quite a bit to be done, wallpaper to hang, shelves to build and LOTS of organizing. But, I have spent a lot of time up there in the last few days, and even in the cold weather it is feeling quite toasty. We managed to finish the painting on Saturday, which meant that we could bring in the furniture on Sunday.
 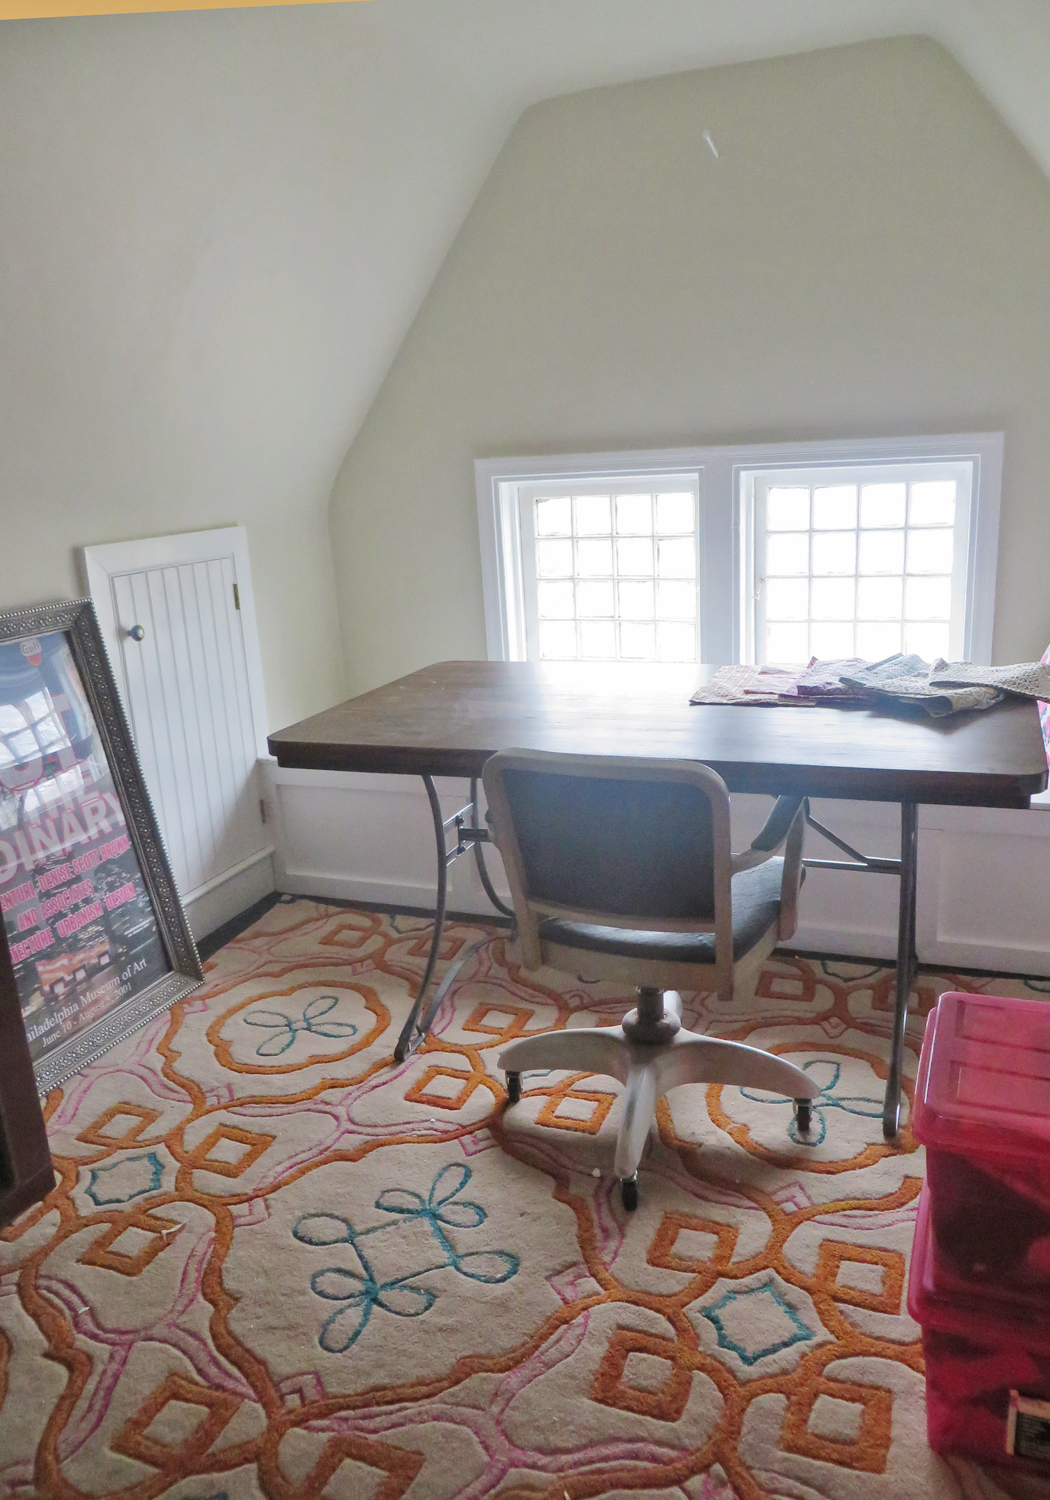 It is difficult to get a good photo of any of the spaces up on the third floor. But the space feel cozy but not too small. The new trestle table is great. It is the Jackson Table from World Market. It is just the right size and looks like it should hold up well. I may put some extra clear coat on the top since the finish looks like it might not be the most durable.
 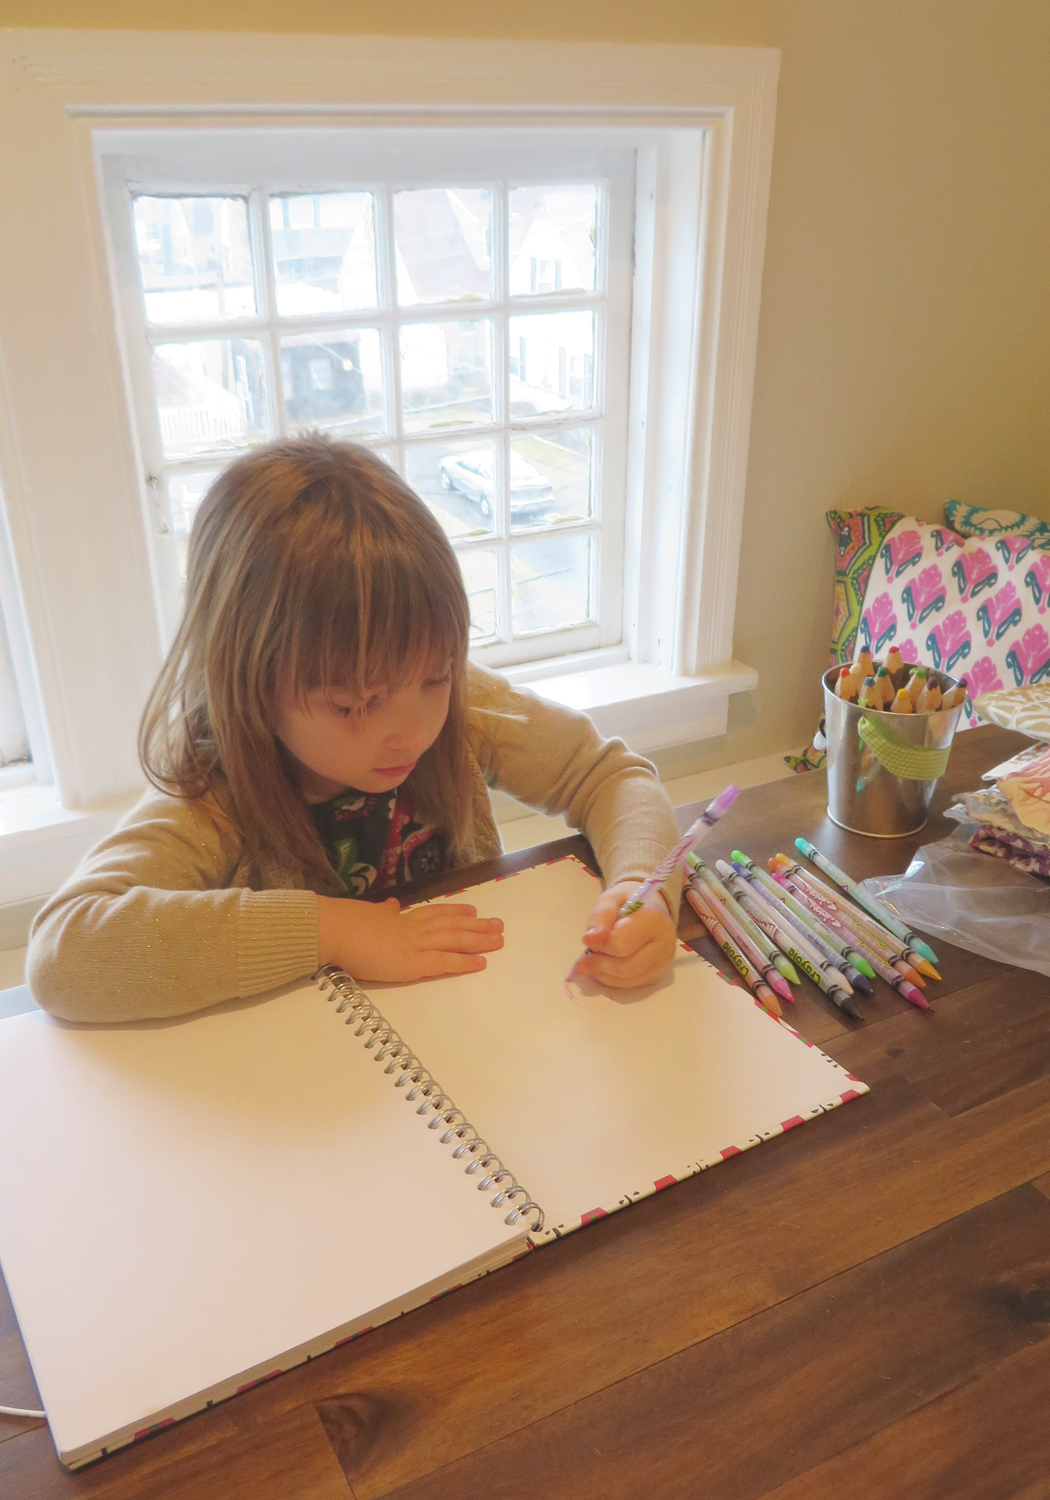 As soon as the furniture was in the kids asked where their art supplies were so they could get started. I got out new notebooks for both kids (Thanks Ikea!).
 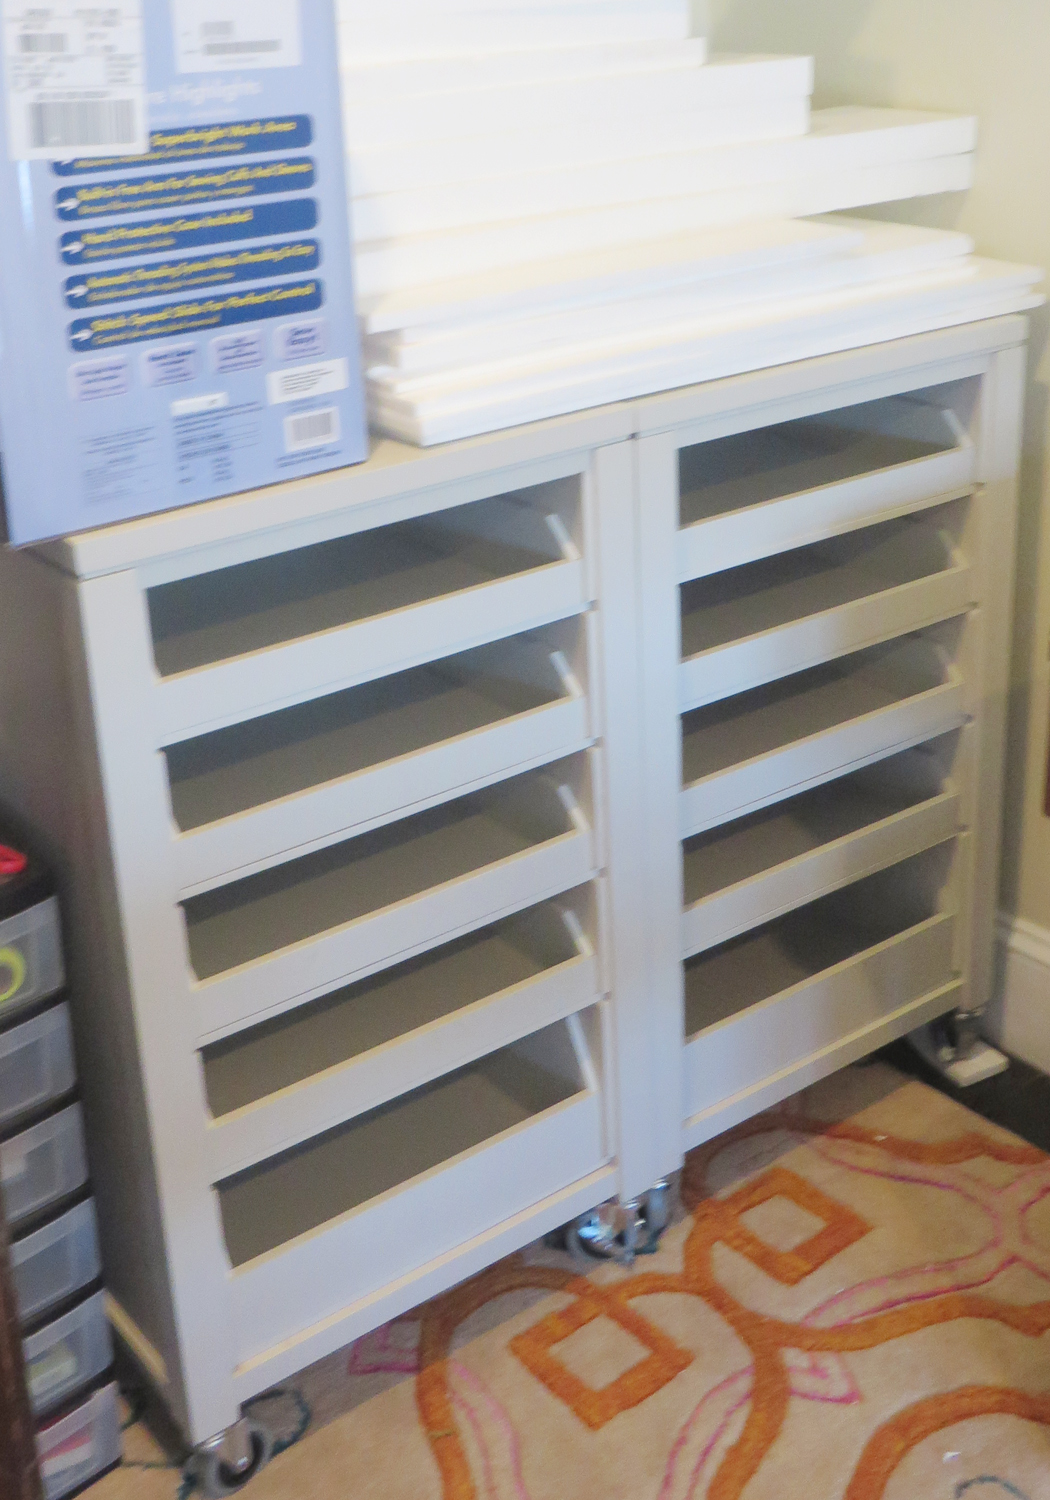 My own art and craft supplies will be stored in these 2 beauties! I bought these Martha Stewart Craft Carts on clearance a couple of months ago in Sharky Gray, but they are still available for $129 each with free shipping in several other colors. They came in 2 HEAVY boxes each and I’m not sure whether they would actually make it down the stairs in 1 piece, now that they are assembled (I guess I can never move). I’ve had my supplies scattered around in multiple locations for years, so this is a pretty exciting development for me! I even started going through some of my sewing supplies which includes several boxes from my grandmother’s stash. Sewing will probably be the first major projects in here, as I have curtains to make for the Master Bedroom and cushions for in here.
  I bought some fabric at the Galbraith and Paul annual showroom sale in December. They make such beautiful block patterns! Normally their prices are quite steep, but they sell smaller remnants by the pound. Needless to say it was crazy fighting it out with a bunch of other designers, but I came home with these beauties that I am planning on using for pillows for the space.
  Finally, I thought I would show you the knobs for the storage spaces in the eaves. I bought these on clearance at Anthropologie a couple of years ago. They only had 3 which I quickly snapped up for $3.99, not knowing what I would use them for. I think it is my happiest accident in the space! I have more to show, but of course the space has already been filled up with boxes from around the house, just waiting to be sorted. Next up I thought I would share a couple of fun finds from my grandma’s sewing stash. I hope everyone is staying warm! It is quite cold here with no end in sight.
 Another quick update here! Our Craft Room is getting closer to being finished. The cabinet beadboard doors are in, and all that is left in construction world are 2 shelves and lots of paint. The doors are designed very similar to the ones I did for the basement. They also match the original doors to this room (which I why I chose to use them). There will be some additional ones as we work our way through the third floor, since we have several more eave spaces that I want access to.
 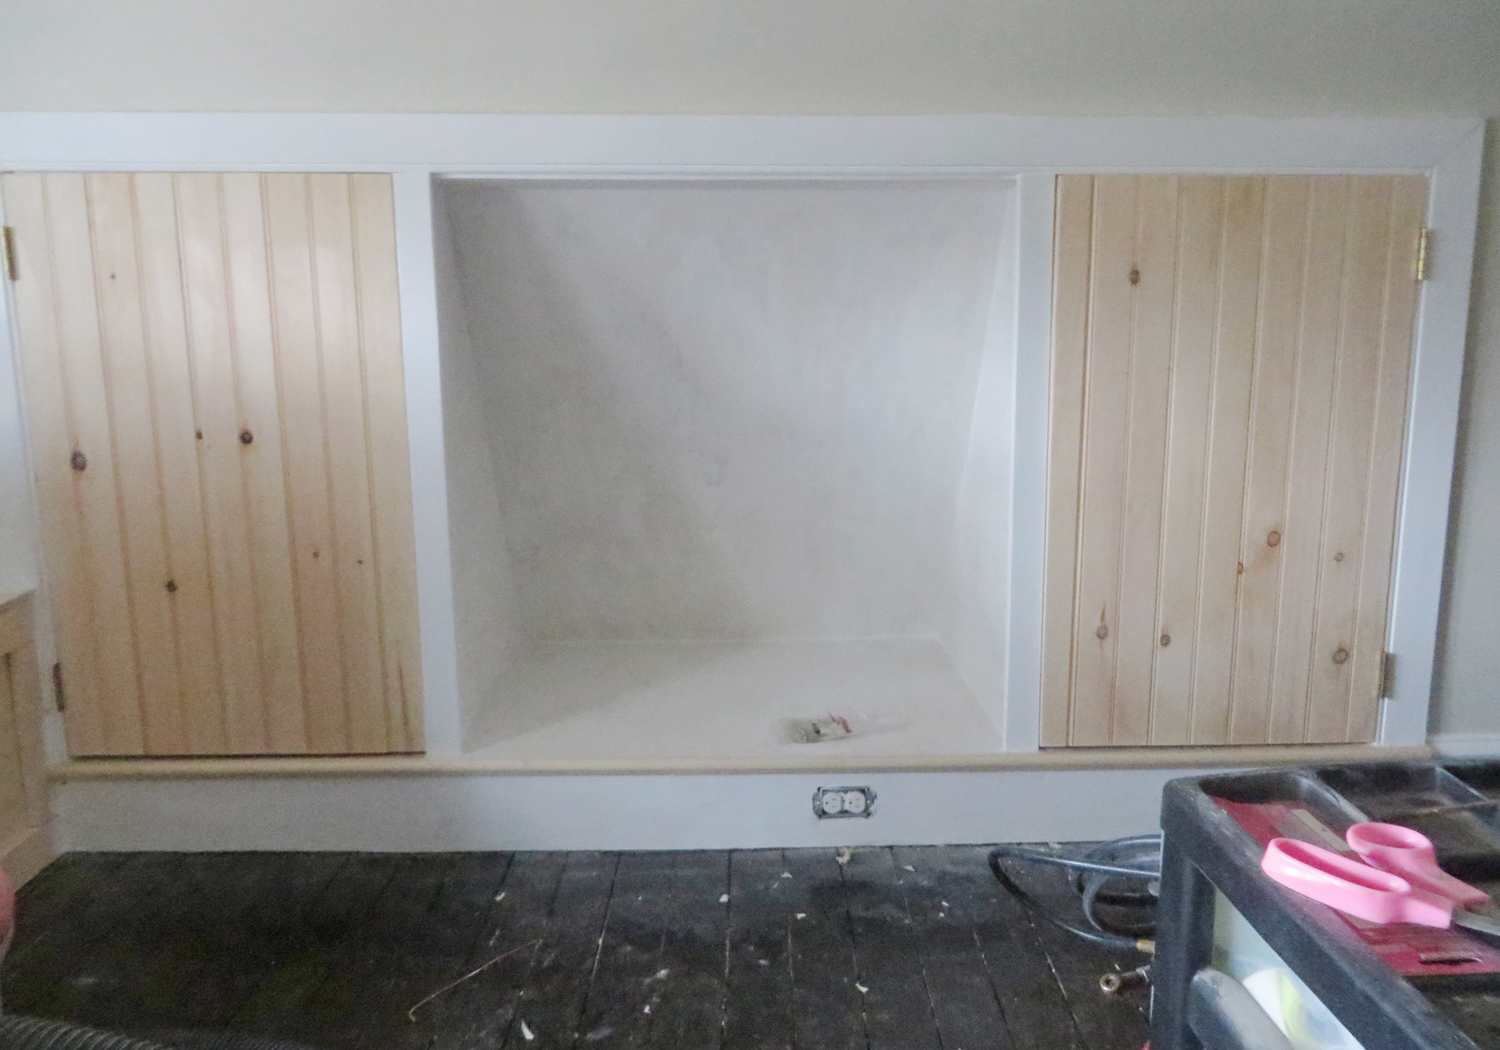 In an ideal world I will have the room painted and start putting furniture in by the end of the weekend. Now it is time to see how optimistic I am being (fingers crossed).
 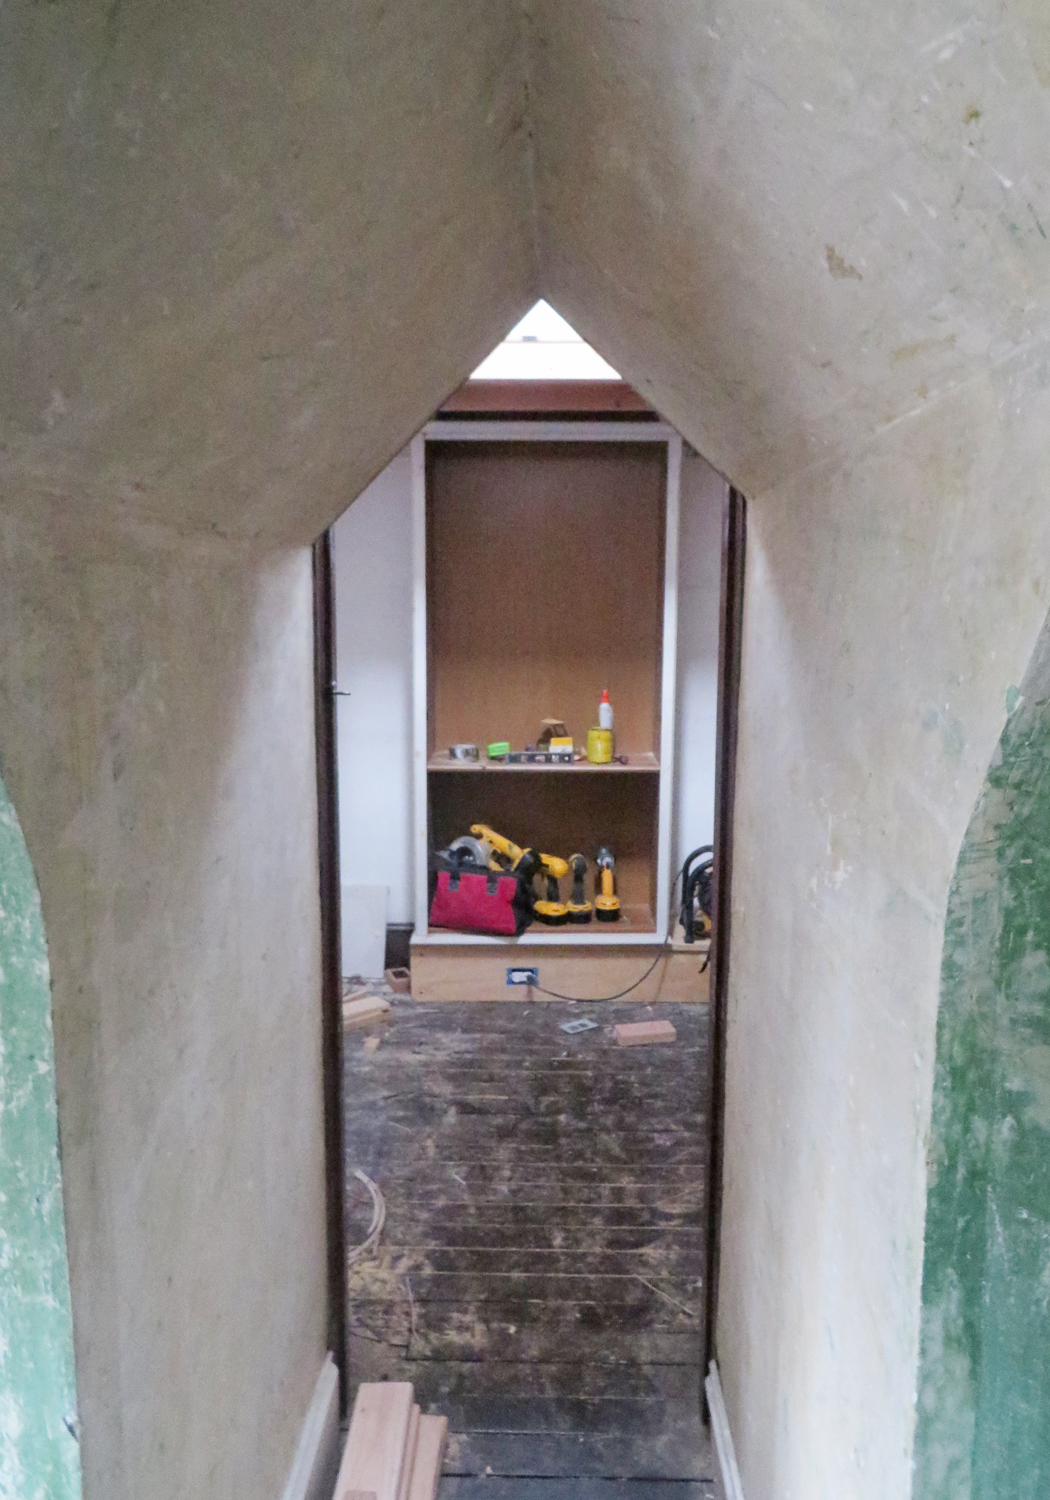 In the meantime our contractor has been busy in the tower. The loft is in (although we still need to add some extra posts) and he has installed one of our old Ikea shelving units from our bedroom. He had to cut 6″ off the bottom to make it fit (over a boxed out AC duct). I’m excited to use something that I had sitting in the garage. The plan is to line either side with some light framing and closet doors.
 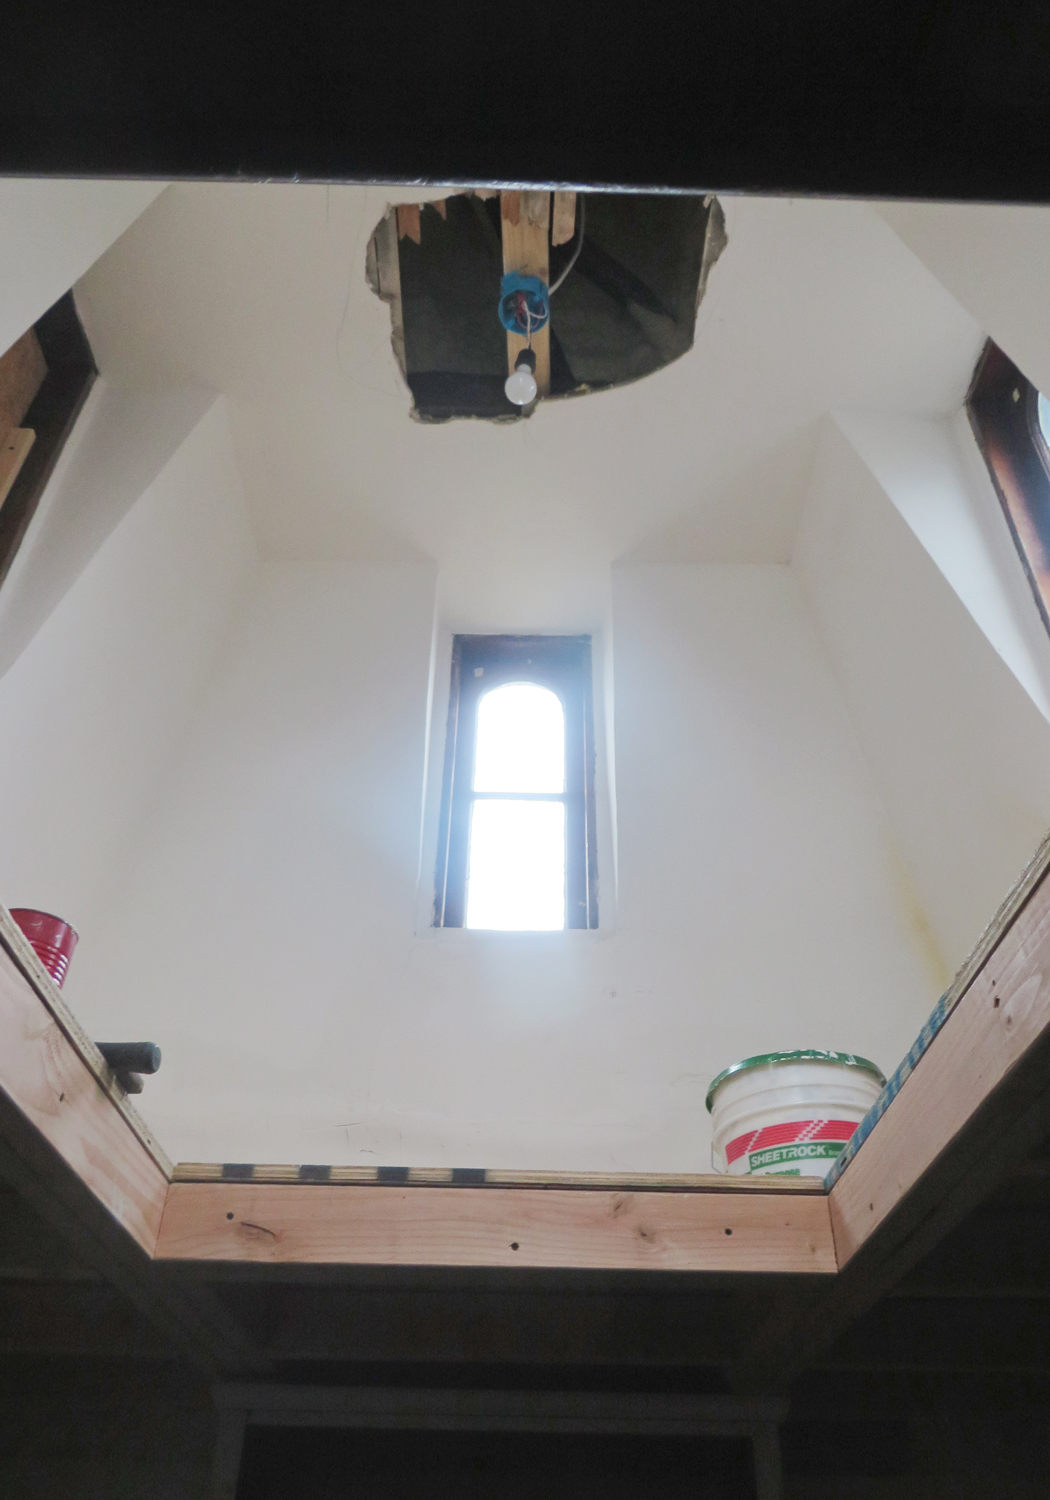 He is going to work some more on the ceiling today. Mr. S. and I are SUPER excited for this space! The kids keep asking to go up and check out the fort. Since it is still a bit of work in progress, we haven’t let them up there yet (although Mr. S. tested it out when the weren’t there and gave it a thumbs up). Also for the first time last night we were able to flip a switch and have light, which was amazing! For years we would literally use a flashlight at night to come up to the third floor to get something. Now we have lights in all of the rooms up here. Sometimes it is the small things!
Next up is the ceiling in the tower! Can you tell I’m excited?
Thought I would show you a quick update of the tower (from about 15 minutes ago). My contractor had a free day in his schedule this week, so I had him get started on the framing for the tower room/closet/fort. There is a lot to do, but it is pretty darn exciting to see the framing go up! It will be slower going after today, but I am an excited girl (and I know a couple of little ones who will be impatiently waiting for their fort to be finished).

My favorite 2 minute craft from the 2013 holidays! 1 Miniature Tree in a Blue Canning Jar.
Happy New Year Everyone! I can’t believe it is already the second week of the year! We had a nice quiet New Years followed by 1 day of school and then a snow day! Now the snow has melted but we are having the coldest weather in 20 years. The downstairs is a bit chilly (as I sit here in multiple layers). Fortunately all the insulation in the roof means that the second floor is nice and toasty, even if there is a 20 degree differential right now between the 2 floors!
I’m not normally very good with New Year’s Resolutions but I have decided that there is one this year that I am going to try to work on. Spend more time with my family! Technically I do spend a fair amount of time with them, but the resolution is about spending quality time, where I am not distracted by the million of other things going on. I’m not quite sure how I am going to pull it off, but I am going to try. What New Year’s Resolutions have you made?
 In other news, we did manage to actually have a fairly productive weekend. Mr. S. and I decided it was time to get working on the Craft Room. We have spent countless hours trying to get the walls and ceiling smooth. Between wallpaper that wouldn’t cooperate, old plaster with cracks and no finish coat, and patching from the holes for the insulation, I thought it was never going to end. Every time I would tell myself that it was the last coat of spackle I would find more spots. Well, we finally called the walls done and primed and painted. So far we have 2 coats of paint and I might go for 3 on the sloped ceiling/wall, since it shows every imperfection thanks to its super close proximity to your eyes and the way the window sits. We still have to prime and paint the trim and bench.
 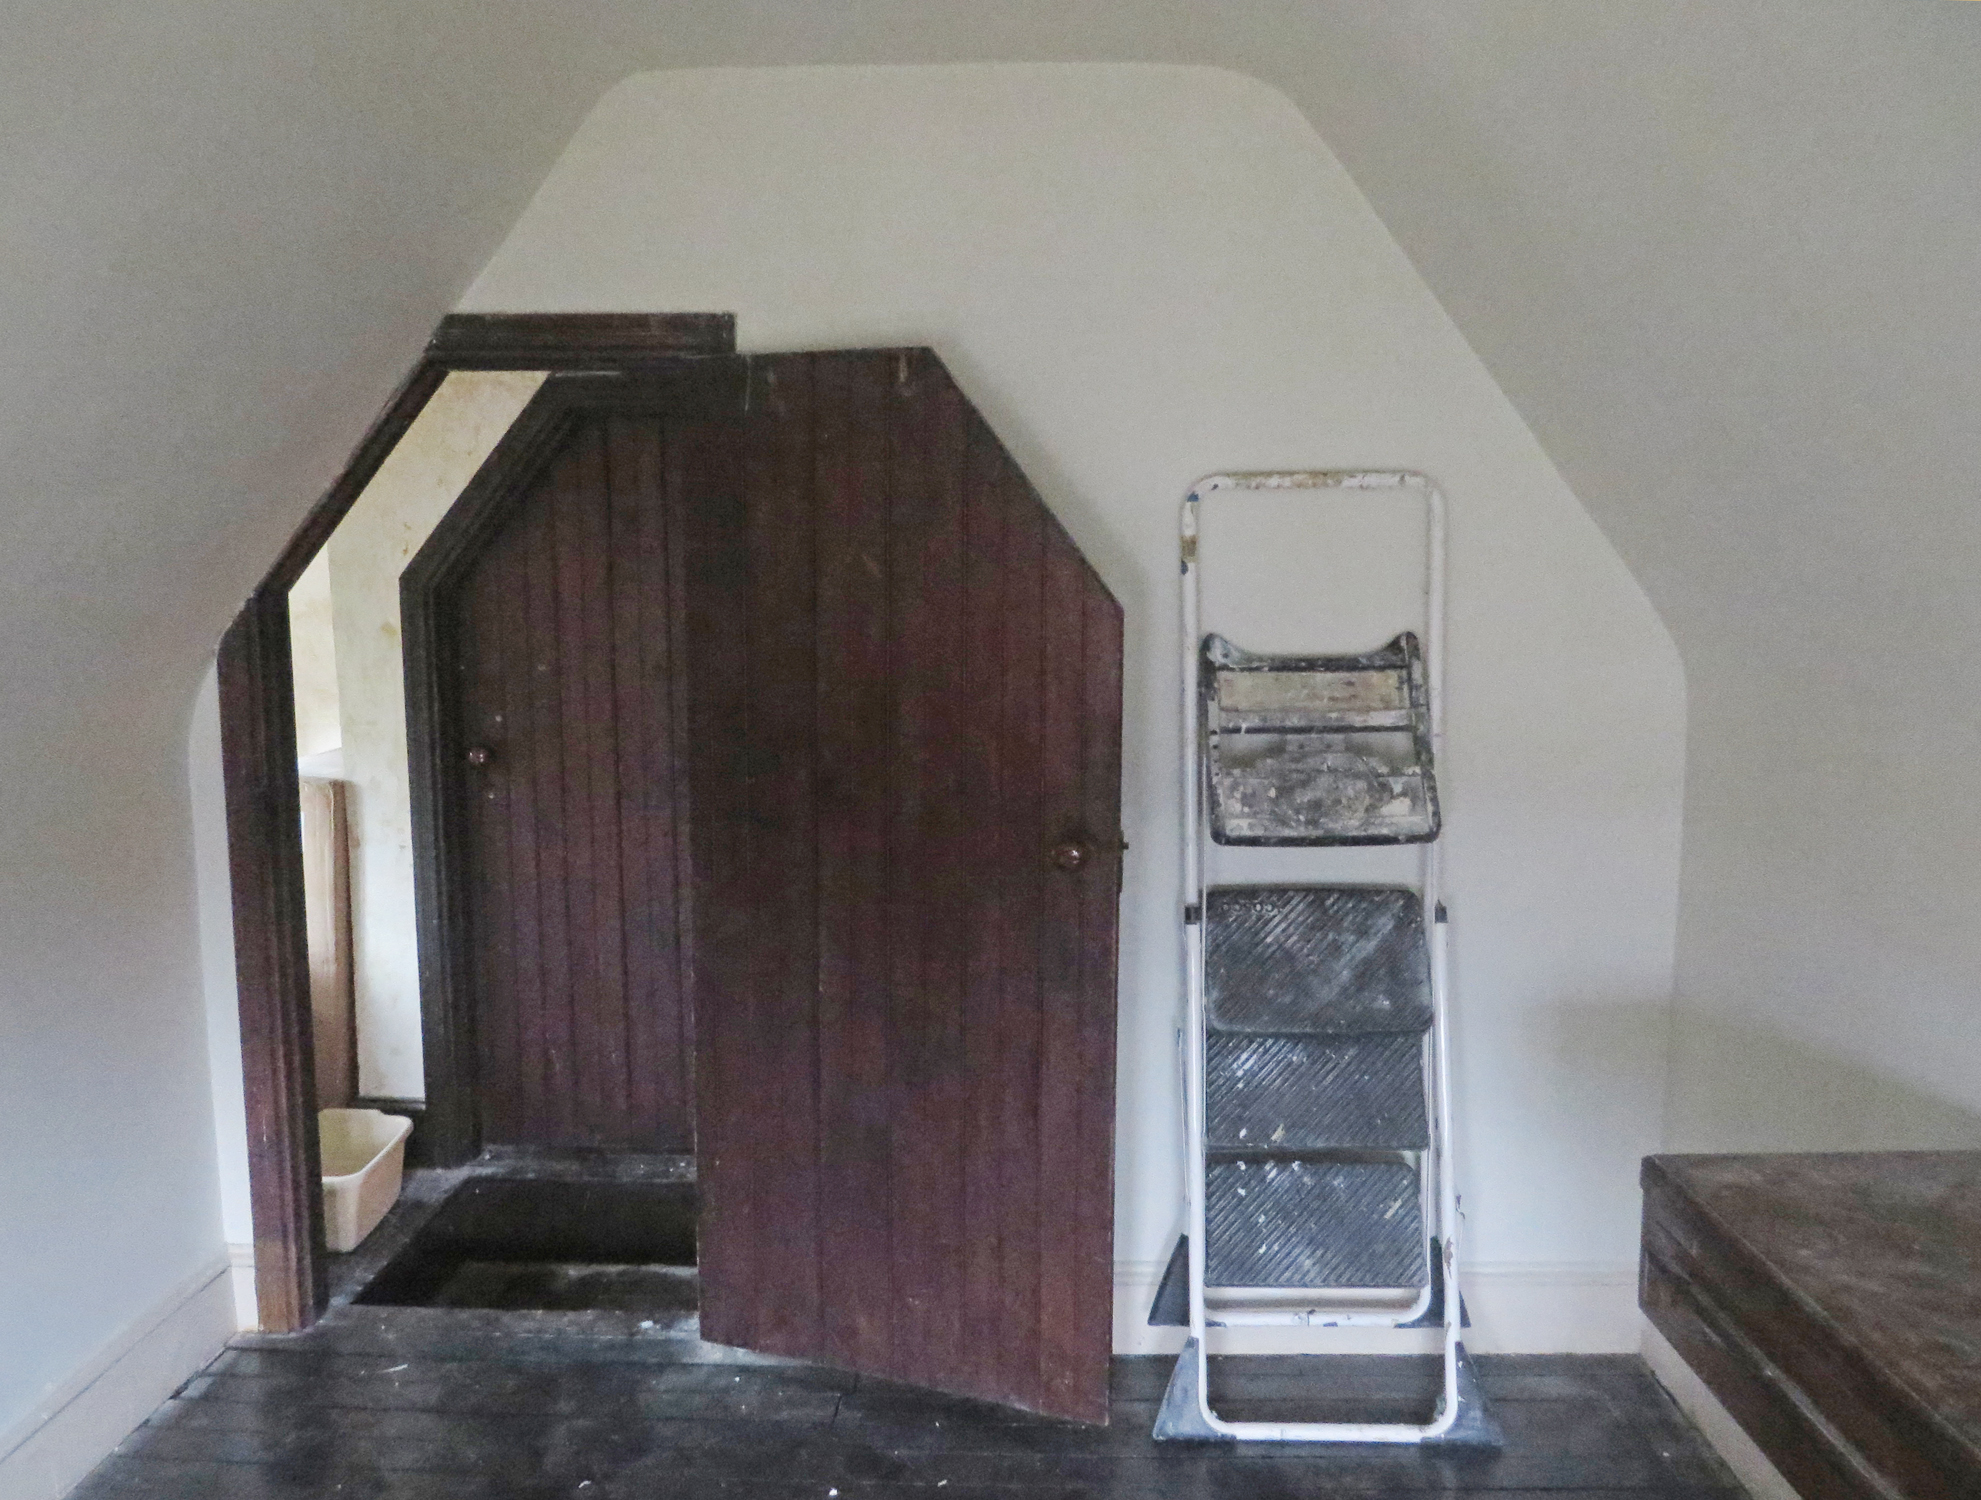 The door to the room will be staying stained, as it is one of the few places in the house to have its original finish. Almost everywhere else that is a stained finish the previous owner striped back, so it doesn’t have the same luster as this. The rest of the trim will be painted white to keep it clean. The walls themselves are a light gray, just enough color so the whit trim will pop against them. Fortunately the dark brown painted floor is in really good shape! There was nasty carpet covering it, that we chose to leave in place until the wall and ceiling painting was complete. It was very exciting to bring it out to the garbage yesterday! Hopefully by next week we can start actually bringing in the rest of the furniture and accessories! I am also ordering a couple of storm windows for the room. Once they arrive (and I hopefully like them) I will give you some more details!
I hope everyone is having a great 2014! Cheers!


A Belated Happy Holidays!
As you can tell I’m running behind schedule. We have survived a whirlwind of activity in the last week and I am ready for some low key hanging out!
We changed up our family photo this year and took a break from the Living Room and instead took an imaginary trip to Germany.
And in case you haven’t seen our previous years…


Do you have a favorite?


I know I am a little late in the season but I thought everyone could use a little eye candy, in between the last minute hustle and bustle! I stopped by Terrain last week to take a quick look after a meeting. The weather was absolutely terrible but it was still beautiful. My favorite thing had to be these succulent topiary trees. I’m not sure exactly how they are constructed (may be with florist foam?) but they are certainly beautiful and I love the muted color range.
 Their terrariums are always great. I liked that they had added bits of holiday decorations to them including pine cones, holly sprigs and in this case a small faux bird.

The outside was full of Christmas trees and amazing winter containers. When I see these containers I always think that I need to plant some holly. Of course by spring I always forget. Maybe this is the year I will remember.
 I love the texture of this planter. The birch branches paired with eucalyptus, red twig dogwood, and some evergreens.
In case you would like to see the previous years at Terrain, here is 2012 and 2011.
I hope everyone has a lovely weekend! I will be back Monday with this year’s holiday card.