Search Results For "beadboard"

Basement Beadboard Ceiling Details

The most popular question I get on my blog, is about the beadboard ceiling in the basement. I have promised to write a more detailed post. So here it goes…

I am become sort of a beadboard expert over the years. I didn’t start out this way, but our house is old and already had a good bit of beadboard, and I have had to patch some over the years as well as installing new. Beadboard and wood planking comes in all sorts of sizes and dimensions and range in price from totally affordable to kind of expensive. I’ve used a bunch of different varieties for different uses. In the basement we have used 3 different types.

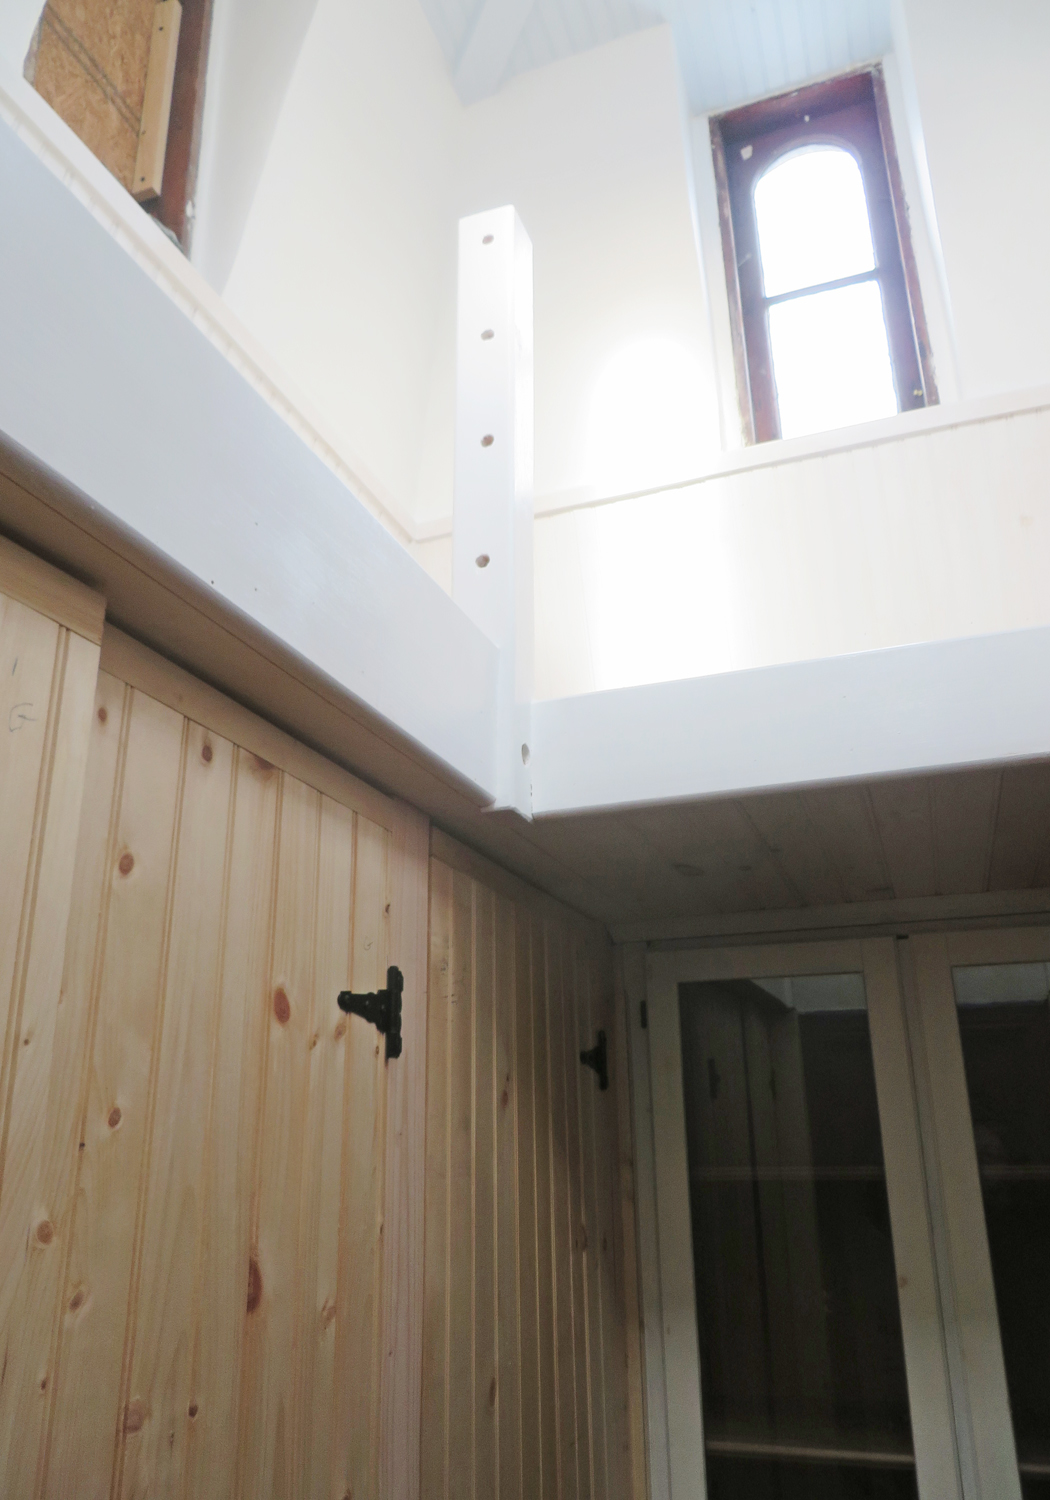
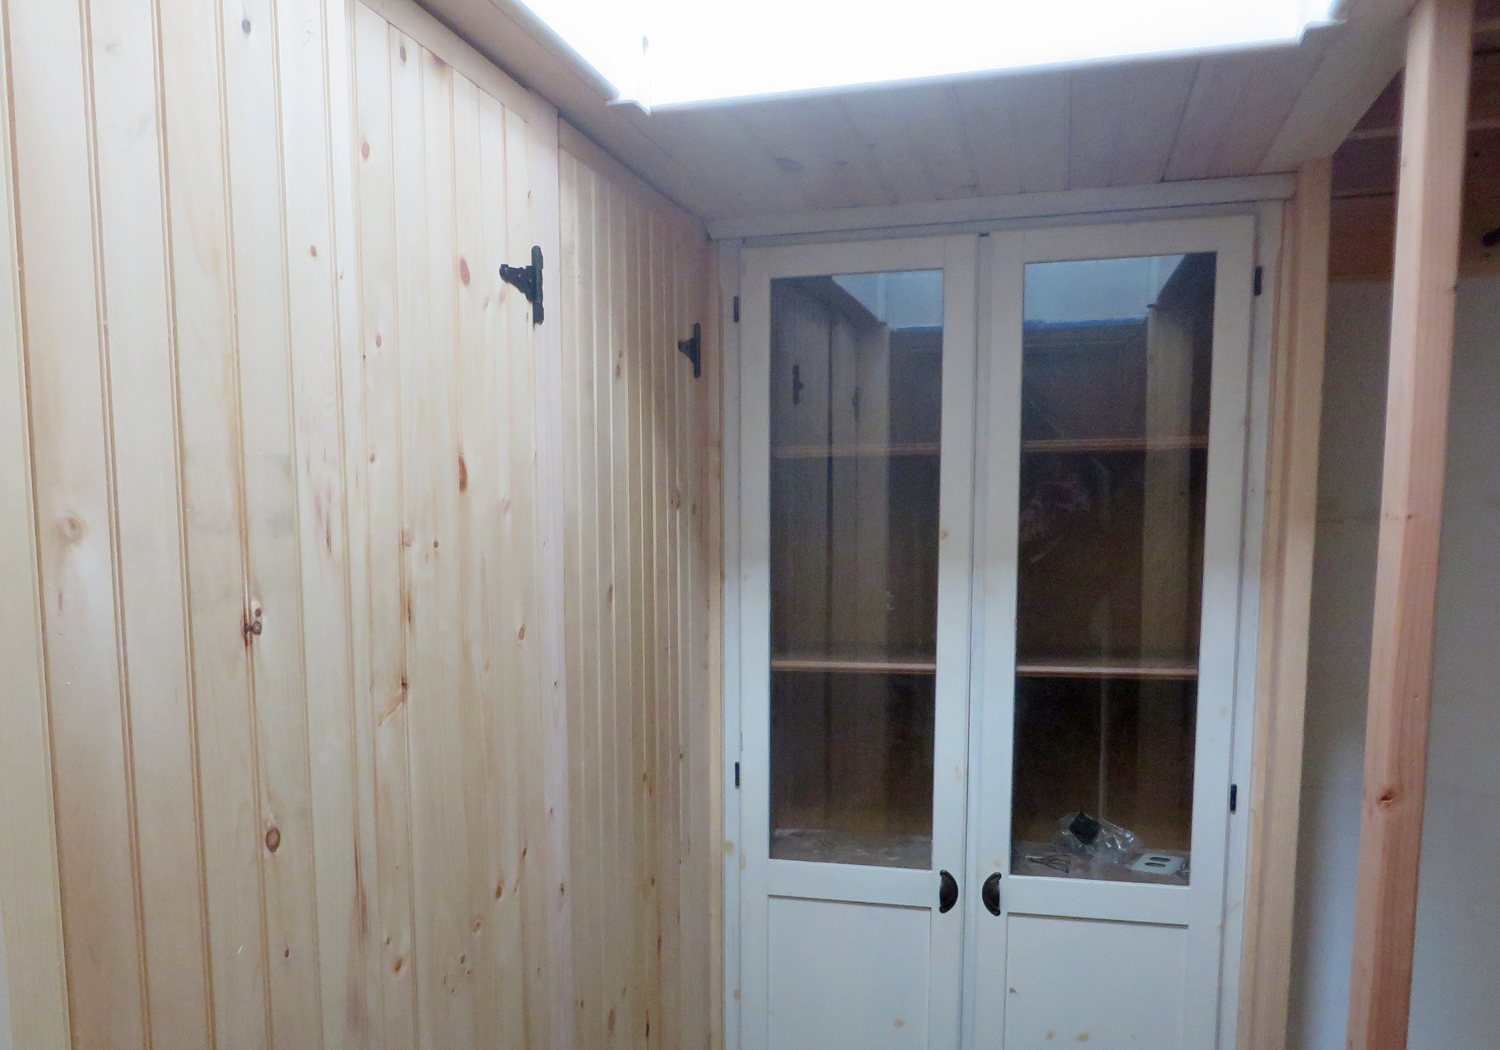
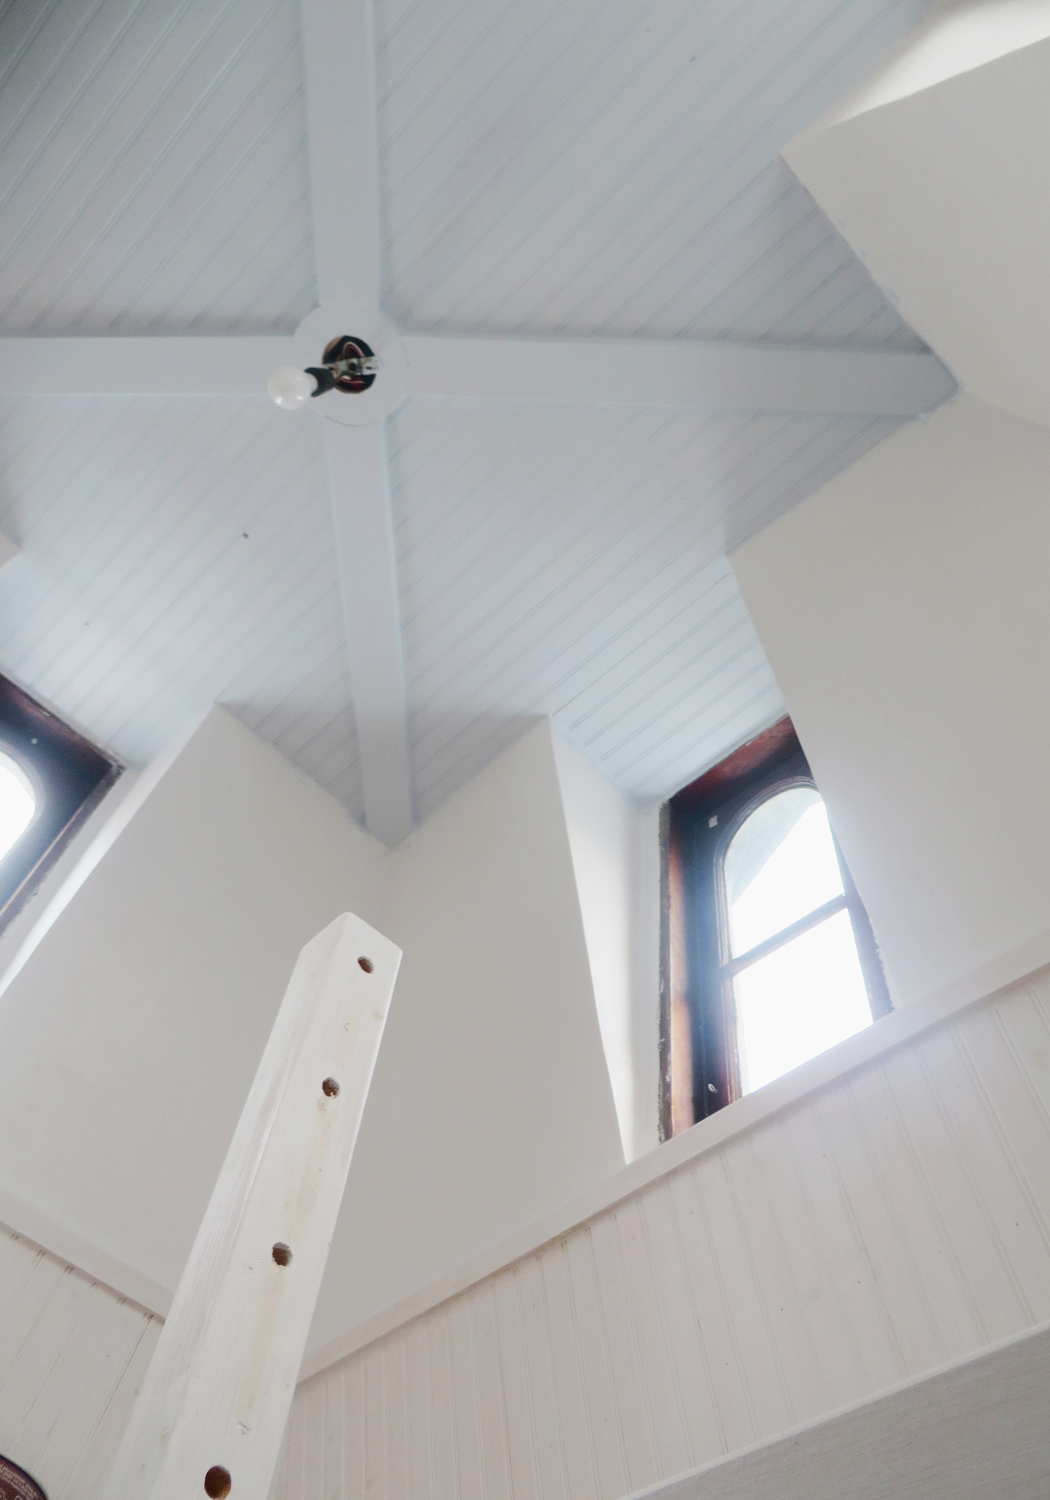
Beadboard Detail at the Window

1. Walls: We used a classic full size tongue and groove beadboard for the walls. This is 3/4″ thick and approximately 6″ wide. One one side there is a “bead” in the middle and on one end, giving you about a 3″ repeat. On the back it is smooth with a simple v-groove at the joint. The basement already had some of this board on the walls, so we actually salvaged what we could for re-installation. The nice thing about this is that you don’t need any backup. This is strong enough to act as the wall surface. It is simply nailed to the studs. This is also what is installed on our porch roof (which is what this type of board was originally meant to be used for). Fortunately Home Depot sells it in 8′, 10′ and 12′ lengths.

Thin Plank Ceiling in Bathroom. This is permanently attached.

Our Dining Room Ceiling: Beadboard & Beams attached to a plywood substraight

2. Ceiling Option 1: For our Dining Room Ceiling and the Ceiling in the new basement Bathroom we used a thinner beadboard product. It is still tongue and groove but it is only about 3/8″ thick. This will tend to warp, so it usually requires a back up material (in our case 1/2″ plywood). This nice thing is that it is really light weight and easy to cut. These come in shorter length and are packaged in sets. They are available in pine unfinished and white, as both a beadboard and a plank product. For our Dining Room we used the beadboard and for our bathroom ceiling we used the plank. In both cases we went with the less expensive pine and primed and painted it ourselves. However this isn’t a good option for a removable ceiling since the piece are flimsy and have a tendency to warp if not attached to a substraight.

Basement Beadboard Ceiling Details

3. Ceiling Option 2: For our removable ceiling we want with a sheet product. This is about 1/8″ thick and is available in a 4’x8′ sheet and primed white. This is easy to work with and inexpensive. However because it is so thin it will tend to sag, so we had to be careful about not making the spacing too large. This also meant creating a “grid” out of wood for the panels to sit in. The nice thing about the thin panels is that it helped us maximize the ceiling height. We even bent one panel about 1/2″ to allow for an extra low pipe.

Ceiling w/ T-Shaped Pieces Installed

Step 1:We started by creating an upside down T shape out of 2 1×4 pieces and attaching them perpedicular to the floor joists above. This gave us enough space for the miscellaneous plumbing to fit.

Step 2: Rough in lights as required. We centered our in each “bay” of the ceiling. This took a lot of effort to come up with a pattern. Our ceiling was full of pipes and other obstructions (we are below the kitchen). I stood there for about a half hour with my contractor and a piece of paper trying to come up with an acceptable pattern.

Testing Panel Locations before Installing the Cross Piece

Step 3: Figure out the spacing on the panels and test fit.

Step 4: Install the cross pieces. We used 1×2 with a groove cut for the panel and notches out on either side for them to sit on the 1x4s running the other way.

Ceiling Before Painting

Step 5: Install all of the panels. Because everything is pretty snug it definitely takes a little adjusting to get them into place. We installed the ones with lights first,since the trim piece goes over the panel.  I have to say that it is kind of pain to move them, but I don’t plan on doing it very often (maybe once a year to tops). The one advantage I do see is that if I get a leak above (i.e. the dishwasher) it would most likely only require taking 1 panel out.
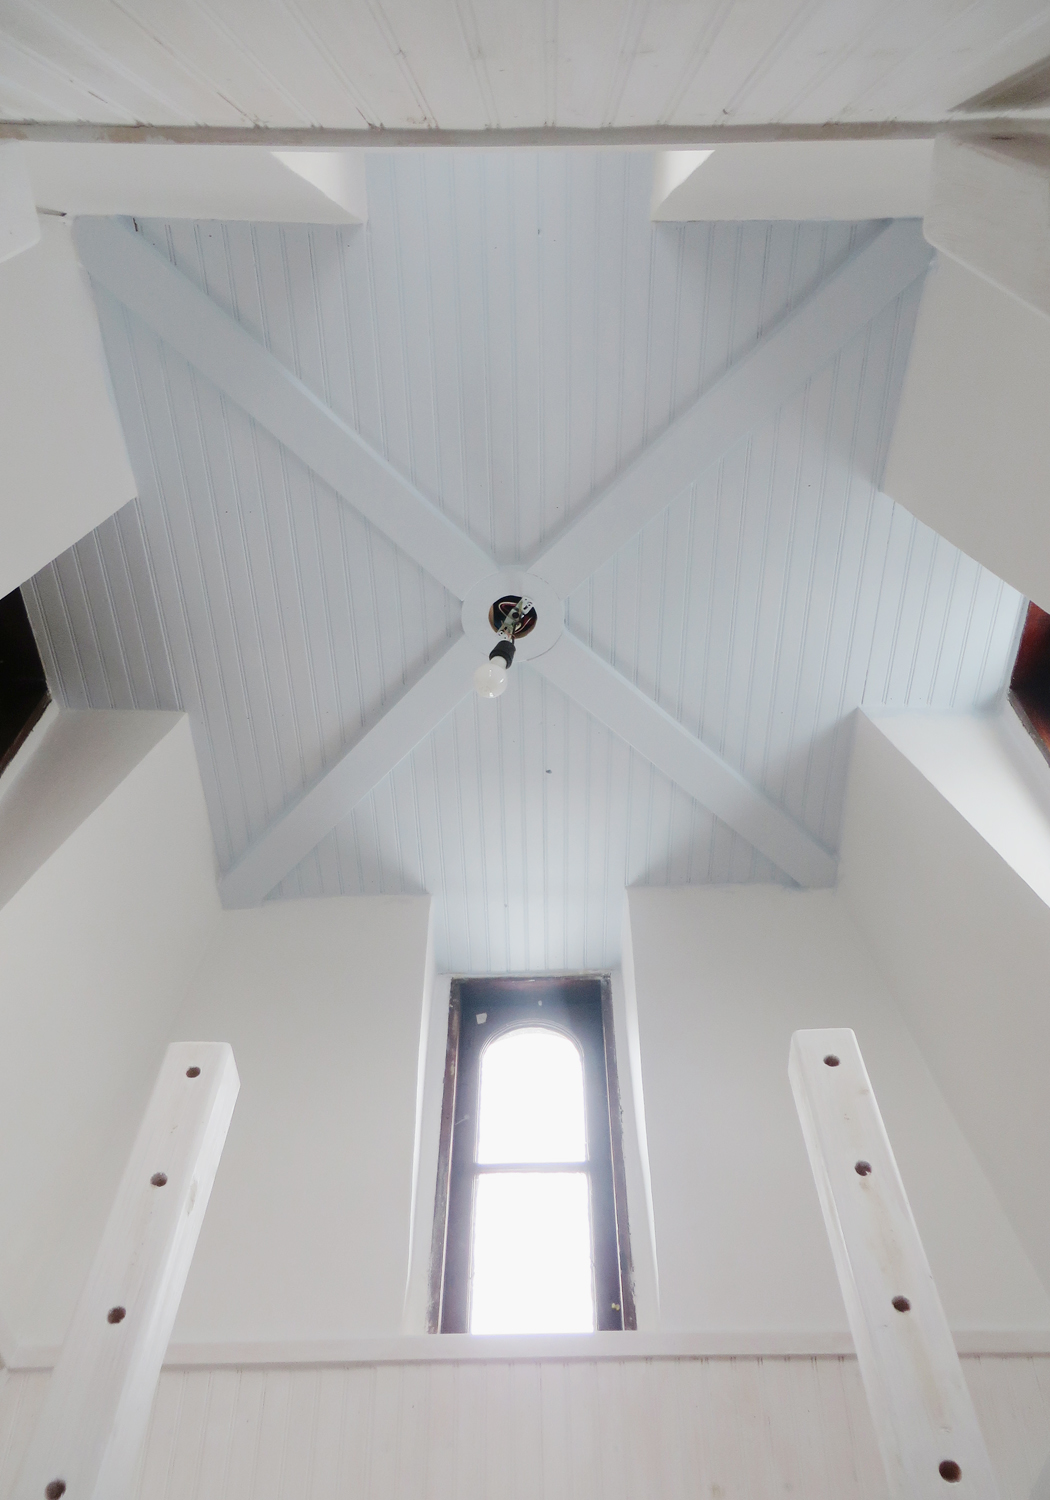
Finished Ceiling

Step 6: Paint. Okay so I should have painted the frame before putting the panels in, but I didn’t. Oh well. I really like how it came out.

Cost: I have also gotten several questions about cost. The materials themselves were not very expensive for this ceiling. Most of the cost is in the labor, for installing the upside down T-pieces (while dodging pipes), cutting the panels to fit and making the cross-pieces. It is also pretty slow going! If you are up for doing it yourself and you have the time, I think it is worth it. Paying for a contractor to do it, is definitely not cheap though.

More Questions? Just add a comment and I will do my best to answer them.

15 Comments

New Beadboard Doors for the Workroom

Until now we have not had any doors to our workroom in the basement. If we didn’t have little kids I probably wouldn’t worry so much, but since the doorway is on the way to the bathroom we decided that we needed to be able to close it off. It also will hide the hot water heater and boiler from view when you are coming out of the bathroom (bonus!). It is an odd doorway with lots of piping on the other side for our boiler and hot water heater. The head clearance is partially affected by these, so a full height door was not going to work. I also liked having only a partial height door to help with air flow.

Door Inspiration from Fab.com

I was a little stumped on what to do exactly. I was considering buying a premade door and cutting it, but after taking a look around, I couldn’t find anything I liked. Then I was looking at Fab.com for totally unrelated reasons and saw the picture above and was sold! The V in the top would allow the doors to clear the piping and it looked totally buildable. The doorway is approximately 32″ wide. I would loose 3/4″ for cleats on the one side (so I was at about 31″). I wanted to use the same beadboard that we had used elsewhere. It is a nominal 1×6. In actuality it is 3/4″x 5 1/2 (including the tongue) or 5″ on the ones where the tongue fit into the other pieces. So, if I used 3 pieces on each side of the door it should work almost perfectly (5″+5″+5 1/2″) x 2= 31″. If the dimensions didn’t work out I was prepared to rip a piece down to fit.

3 Boards Fit Together

1. I bought six 8′ boards. I only needed about 6′ but they don’t come in that dimension and I didn’t have the bigger SUV so using 12′ boards was out unless I wanted to make a separate trip (which I didn’t want to do). In the end 8′ boards were the better choice because I used the scrap for cross pieces. These are available at Home Depot although be prepared to go through a bunch of boards to get clean ones. The total was about $45 + hinges. I also bought 3″ gate hinges meant for outside (about $5 for a two pack).

2. I cut the first door pieces to 6′. Then I played around with the angle at the top to allow it to clear the piping. In the end I had it angle down a total of 8″ over the 15 1/2″. I marked it and cut with my circular saw.

Glue for the Joints &Â Deck Screws

First Door w/ Staggered Screw Pattern

3. Next I glued the tongue and grooves together and screwed in the cross pieces in a staggered pattern, making sure I had two 1 1/4″ screws in each piece. I made sure to align the cross pieces with the cleats that I had installed on the wall. I used my trustee star bit deck screws again here.

Second door

4. After testing it out in the doorway, I laid down the door and used it as template for the second door (checking to make sure it was reversed from the first one).

5. I cut the second door and glued and screwed the second door.

Testing the Door in the Opening

Testing the door to make sure it fits with the pipes

6. Now for the fussing. I brought the doors over and test fitted them. I quickly realized that I was going to need to cut down the tongues on the inside of  the doors (which fortunately can be done with a small planer).

Aligning the bottom of the door w/ the flooring

7. I then carefully installed the hinges. I first put down a piece of 3/4″ scrap to make sure that the door would sit well above the floor. I also aligned the bottom of the door with the edge of the flooring. Then I carefully marked the holes for the hinges and predrilled the holes.

8. Next I installed a couple of screws on each hinge (so that I could still tweak it a little bit).

9. After I had pulled, pushed and screwed, I planed the tongues on each side of the door to get a good fit. It is not totally perfect, but it is okay in my book.

Door from the Workroom Side

10. I still need to install a latch at the top and whitewash it to match the rest of the paneling.

I actually prefer the workroom side of the door, but it wouldn’t work very well to switch the doors, so it will be staying this way for now.

What do you think?

Next up is adding trim to the bathroom door.

* To see all of the posts about our basement click here.

3 Comments

Beadboard and Beam Basement Ceiling

My neck (and Mr. S’s) is a little sore but the ceiling is painted! Yeah! It took a couple of coats of ceiling paint but it is finished. We used 1 coat on the beadboard panels themselves (which were already white) and 2 coats on the wood beams. Mr S. manned the paintbrush and I used the small roller. The great news about this being finished is that we are one step closer to installing carpet. We still have a fair amount of trim to paint (mostly in the windows) but most of the large surfaces are finished, which feels great.

More White Ceiling & Trim

The Work Room

We also managed to clear out some space in the work room so our contractors can install drywall this week. Besides drywall they are going to relocate a few of our old florescent fixtures for the room and put them on a switch for us. We are not going to put a ceiling in here right now and I don’t want to spend more than we have to in this space, so we thought reusing the old lights in here made the most sense (at least for now).

The Work Room Plan

The plan for this room is that it will be for using all of our wood working tools and for house projects. It is hard to see the space right now because we have shelves awkwardly placed in the middle of the room but there should be space for:

Front Bay Area for Work Bench

1. Work Bench: This will go in the front bay and have some open shelving below to hold some of our power tools. I actually already own the legs for this and it should be a fairly quick install.

Long Wall for Shelving

2. Long Wall of Shelves: We haven’t decided what kind (whether we will reuse our old wood ikea shelves or the old wire shelves that were there before). This will hold paint, wood & miscellaneous house parts. The old shelves were never used very efficiently, so I hope to remedy this with the new layout.

3. Peg Board: We are going to install peg board on the short wall next to the utility sink. This will be good for some of the small hand tools. I plan on painting it blue.

4. Work Table: Fingers crossed there will be enough space for a medium size work table in the middle of the room. This would be on casters so it could move around. When we do some of our bigger projects there are times that I really need some space to set out my work.

Utility Sink

5. Utility Sink: This is already installed and ready to go! I’ve already made good use of this. It is a little alcove behind the shower. I went with an inexpensive model from Home Depot. I should have upgraded to a better made model. We had to shim the front legs to get the drainage to work at the bottom of the sink. It also required lots of extra support to keep it sitting firmly.

* To see all of the posts about our basement click here.

2 Comments

Faux Slate Vinyl Tile with Grout

Last night I managed to slog through and install the grout in my faux slate vinyl flooring (TrafficMaster Ceramica Resilient Vinyl Tile in Coastal Gray). I think it looks fairly convincing and it was certainly less expensive and thinner than using real slate. Plus I don’t have to worry about sealing it.

Pre-Mixed Grout in Delorean Gray

I used the recommended premixed grout in Delorean Gray. I can’t say I am a big fan, but they do not recommend the typical dry grout that you mix with water. I found the grout to not be as sticky as I would like and yet at the same time it really stuck to my hands.

Grout Stuck to My Hand

Anyway, it was not particularly difficult, just messy. I stepped in joints several times while I was cleaning the joints with a sponge and it got on my feet and pants leg. Yuck! I assume that they recommend this product because it is suppose to be more flexible. Fingers crossed it will hold up. I will also be putting in some grout sealer after I get the laundry area finished to help the grout lines stay clean. So stay tuned to see how it holds up!

Laundry Area w/ new lights & Faux Slate Floor Beyond

My contractors have been busy in the laundry area. We now have lights! I can’t say how excited I am about the concept of actually being able to see my laundry! The ceiling is moving along and part of the wall that hides the hot water heater is in! The radiator pipes will be staying (painted white eventually). I will also be adding shelves to the right of the dryer. I am not sure what to do with the visible side of the dryer.  It isn’t the most beautiful thing. Anyone have an ideas? Maybe some kind of fabric.

Ceiling in Main Room w/ LED Recessed Lights

They are finally done with the drop beadboard ceiling in the main room! It looks great. It still needs a couple of coats of paint to finish it off, but it really helps finish off the space. The brick wall in the picture is on a 45 degree angle and is for the fireplace in the kitchen above.  We will be mounting a TV on it (there is an outlet in the ceiling for us).

My contractors have been cranking away here in the bathroom today and we already have a working sink and shower (although the final brackets still need to go in). If all goes well we will have a toilet in by the end of the day. YEAH!

Still on the to do list is the beadboard ceiling in the second space (aka the future pantry), floor leveling and miscellaneous trim.

* To see all of the posts about our basement click here.

2 Comments

The Last of the Main Section of Beadboard went in! I love how it looks!

It was a productive day yesterday down in our basement. I did a little demolition on a couple of random old ceiling pieces that were in the way (a great way to start off the morning I might add), but the more exciting part is that they started working on ceiling in the main room. They also completed the last major wall of beadboard (there are still a few smaller areas to do).

My contractor and I went back and forth on the design for the ceiling since I wanted it to be removable to have access to all of the plumbing and electric up there. We ended up going with some extra “beams” spaced at about 3′ apart. These will have cleats to pick up the thin beadboard sheets that will make up the ceiling plane.

Another Shot of the Beadboard on the Back Wall and the Ceiling Grid

The ceiling cleats are made up of 1×1 for the wall edge and for the middle it is a 2×4 attached vertically (cut for all of the plumbing pipes) and 1×4 piece of poplar hung horizontally. I like that it is simple and effective. There will also be some pieces running perpendicular to pick up the sides of the beadboard panels about every 4′. This will also be a 1×1. The trim, cleats and boards will all be painted white when we are finished. At the light area you will need to pull down the housing to remove the panel, but they are just clipped in place, so that should be fairly easy.

A Small Section of the Beadboard Panel Ceiling is in Place!

The lights are one of the most exciting parts. This is the first set of photos down there where I didn’t have to do lots of color adjustment to make up for the horrible florescent strip lights (Yeah!). The new recessed lights are made of a standard 6″ ceiling can with a special LED light bulb/housing attached. The LED downlight comes with its own cover and is reasonably priced at $29.99. The standard recessed can is about $8, so for a total of $38 you have a super efficient, good looking light. Plus the light used 9.5 watts but is the equivalent of a 65W bulb, it will last for 20 years and not get hot (which is an added bonus for a space like this).

6" Halo Recessed Housing, $46.79 for 6

EcoSmart LED Downlight, $29.99 at Home Depot

When I started researching options for the recessed lights, I wasn’t sure how the system works, but basically the LED light and cover attach to the old school screw in socket meant for an incandescent bulb inside. It is also interesting to watch the price come down on these guys. The LED light and cover where priced at $49 last year. So by next year the price will probably go down again. For a price comparision if we had gone with incandescent we would have spent about $8-10 for the cover and bulb, so we spent an extra $20 per light. We are installing about 12 of these, so I am spending an extra $240, but I won’t have to replace them until the kids are out of college (kind of strange to think about!). I will give a more full report once they are all up and running to see how bright they feel.

* To see all of the posts about our basement click here.

The weather is beautiful here today, I think it is time to get weeding!

2 Comments

White Ceiling & Partial Whitewash on the Walls

Our contractors finished the beadboard on the walls and ceiling in the bathroom for us on Friday so we could prime and paint the bathroom over the weekend. We decided to paint the ceiling white and whitewashed the walls. Think subtle!  It is quite hard to see the whitewash clearly in the photos.

Whitewash applied to Beadboard Walls

Why whitewash? Well we are spending quite a bit of money to give the basement a nice rustic/ Victorian back of house feel with all of the beadboard. It seems like a shame (and lots of work) to cover up all of the pine wood grain with several coats of paint. We did decide on the ceiling we would try and maximize the brightness and go opaque white, but after some testing we decided to go with a whitewash (about 1/2 paint 1/2 water) for the walls. The color is actually a light tan (hard to read in the photos) because we wanted a slightly softer color. I also experimented with a blue, but the blue whitewash looked really strange, so we decided to stick with the neutral wall color and use color elsewhere. This is a pretty big departure from my normal preference of using lots of color on the walls, but given that these are small, short spaces it is probably for the best.

Paint & Primer: For the primer I went with a new product (at least for me), Kilz Clean Start. We used 2 coats for the ceiling to minimize any wood grain and knots. Then we used 1 coat of the Behr Premium Plus Ultra Ceiling Paint. For the walls I used a 50/50mix of Behr Premium Plus Ultra Flat Enamel in White Truffle and water.  The other nice thing is that the primer and paint are low VOC, so no smelly fumes which is great for those of us painting in the space and for our little ones nearby.  For the ceiling I used my favorite painting tool, a small roller (perfect for getting between the low hanging pipes) and a small angled brush for the edges. For the walls we just used a medium size paint brush, and it went on quite quickly which was another bonus.

Curvy Chrysantemum Vase, $28

Speaking of Color I did buy a beautiful vase for the bathroom (now I just need a shelf to put it on).

They are starting to install the tile for the shower today (so far so good). Hopefully  I will have an update tomorrow.

* To see all of the posts about our basement click here.


3 Comments


Beadboard Progress (as of yesterday afternoon)

My contractors have been busy downstairs! They are busy installing the beadboard, finishing up some of the electric, and getting further along on the bathroom.

I thought I would give you a recap on all of the process for getting to this point.

It is a little sad that the current state doesn’t look that different from the old walls (at least in the photos). However it feels totally different in person.  Before the details close up always looked patched together (the previous owner really liked to literally nail small pieces of board together). Now it is rock solid and detailed beautifully.

Detail at Window Sill

I let my contractor figure out the best way to detail the connection between the horizontal and vertical beadboard. He went with a simple 45 degreee cut that looks great! He has also been scoping out 3 home depots to find the best pine beadboard pieces for us.

Laundry Alcove

We finally have an actual laundry area (the washer and dryer has always been somewhat randomly placed in the basement). There is enough space to the right for a 2′ wide x 1′-6″ deep shelf which I am super excited about! There will be a soffit installed towards the top of the area and I am planning on painting the ugly PVC piping to match the walls. I think I may leave the metal dryer vent exposed, since I don’t mind a little bit of metal.

I have also started to play with some watered down paint samples. I might try a bigger sample behind the washer and dryer this weekend.

I hope everyone has a great weekend!

* To see all of the posts about our basement click here.

Leave a comment

The Beadboard Ceiling!

1990s Drop Ceiling (& Kitchen) Before

1950s Ceiling Covered up by 1990s Drop Ceiling

Florescent Light (installed in 1990s drop ceiling) and 1950s Ceiling Above

The beadboard ceiling is finally finished at Andi & Neil’s house! I haven’t seen it in person but from the photos that Andi sent me yesterday it looks lovely!

This is now the 4th ceiling that this kitchen has seen.

The History of the Ceiling:

1890s: Plaster Ceiling

1950s: Glued on 12×12 acoustic tiles with interesting turquoise crown molding

1990s: Drop 2×4 Acoustic Ceiling (with 2×4 Florescent Light Fixture): Dropping the ceiling by about 9″ in height (I don’t know what people were thinking when they did this!)

2011: Painted Beadboard and Beam Ceiling

Historically Accurate?

I get asked questions about whether beadboard is historically accurate to a kitchen (or other rooms in the house). The answer is yes, but probably not as detailed as this one. Traditionally secondary spaces such as the kitchen and bathroom used less expensive materials and trim. For example in our kitchen (now dining room) they installed beadboard on the bottom 4′ of the wall. They also used plainer window and door trim but they still used a plaster ceiling.  They would not of installed nice “beams” or crown molding, instead they would have probably trimmed these spaces with a simple straight piece or no trim at all.  Around here, I haven’t seen a lot of beadboard kitchen ceilings, mostly plaster. It is probably a matter of what the local tradespeople at the time were in the habit of using.

Now that the kitchen is such an integral part of our lives, I think it makes sense to design it to the same level of finish as the rest of the house. I also think you should have a little fun with the design. There are too many boring drywall ceilings out there.

Up Next:

The contractors are scheduled to spackle the walls and sand the floor today. It is nice to start to see some finish work.


Leave a comment

piano-valentinesday1 Things have slowed down up on the third floor (I guess that is what happens when it there isn’t a contractor here to keep things going and you have to go to work). So I will distract you with pretty pink things instead! I have been trying to keep the top of the piano looking seasonal since it is the first thing I see when I come in. I bought a couple of new plates from Anthropologie this week. I was looking for knobs for the tower (always nice to come up with an excuse for going) and I was nearby. Of course I visited the clearance section and I found that a couple of the plates that I had admired in the fall were on clearance. I also found some knobs on clearance, so I justified buying the pretty plates. The colors are really great with our Dining Room so I am quite pleased. I am considering hanging a mix of plates in the kitchen and I think a couple of peacocks would fit right in! piano-valentinesday2 I reused Christmas ornaments like I did last year in my bowl. Then I added the gold animals I bought at Target a while back and a pink jug that I bought on super clearance last year. tower-progress013114-1 Of course I can’t leave without giving you a little sneak peak of the tower.  We have been painting a little each night, but it is kind of slow for such a small space since it is hard to fit more than one person up in the loft without touching any wet paint. In fact I have paint in my hair right now! The good news is that we just have the lower wainscot and a last coat on the posts to do up there. Our contractor was here yesterday and installed 3 of the 6 beadboard doors! Our plan is to paint those up this weekend! That also means that I can bring in some of the many bins filling up the garage! tower-progress013114-2Did I mention how hard this space is to photograph? In person it is pretty cool though. It looks like a ship’s cabin. If all goes well this will actually get wrapped up in the next 2 weeks (fingers crossed). antrhopologieflowerhook I will leave you with the cutest flower hooks at Anthropologie. I bought the small one not realizing that they were on sale. Now I wish I had bought more at $2.95 for the small one and $7.95 for the large. I hope everyone has a great weekend!

1 Comment

tower-progress012714-1 Work is still moving along over here! Our contractors finished the ceiling in the tower and the fort is almost ready. We managed to prime everything and paint the ceiling over the weekend and we have nightly homework this week to finish painting the walls and trim. He is schedule to come back over later in the week to install the light fixture and the rope guardrail (in case you were wondering what the holes in the posts were for). We are going to leave the windows stained (at least for now). They need a A LOT of work, so once they are fixed up they may not be in a condition suitable for leaving unpainted, but we thought it is worth a shot. They have never had stops, a sill or casing, so we will be installing those in a little bit (in a matching dark stain). The interior storms will also have a dark brown frame. I am loving the ceiling. We used the thin beadboard that comes in packs from Home Depot. We were covering up a BIG hole, so we installed blocking for the light fixture and for something for the middle of the beadboard to attach to. Then we installed 1×4 diagonally with a circular piece in the middle. The circular piece was a happy accident, since we didn’t take into account the size of the cover plate for the light fixture we had to add that at the last minute. I am really liking the nautical feel. tower-progress012714-3It is such a hard room to take a photo in (13′ tall by 7′-2″ by 7′-3″).  This is view from the adjoining bedroom. The cabinet at the back is our old Ikea shelving unit from our bedroom. Our contractor cut it down by 6″ so it would fit. One of my favorite things is when you walk through this narrow passage way there is such a bright light coming in but you can’t see where it is from at first. tower-progress012714-4 The doors for the closets on either side will be beadboard (sense a theme?). They will hide the shelves on the one side and the clothing rod on the other side. We are also working on finalizing the design for the ladder. I think it is going to be pretty awesome. So the one random old thing in this space is the clothing rod, which is actually an original gas pipe. It was in this space when we moved in and I am pretty sure it has been a clothing rod since the house was built (I wonder what year clothing rods were invented). It has a really thin diameter, but it is super sturdy. I was glad that we could reuse it. I also have a piece of wood with old hooks that will be going back behind the rod as well. tower-progress012714-2 I am pretty sure that my contractor thinks I have lost my mind, making the third floor closet one of the prettiest rooms in the house.I think it is going to be pretty cool when it is finished, and if the kids don’t like it I think Mr. S. is going to move in.

2 Comments