Archives For -Basement

Stained Glass Options

April 5, 2013 — 4 Comments

hall-before-glass2

I’m in a bit of a holding pattern here while I wait for my regular contractor to get here and coordinating with the other trades. In the meantime I have been looking at some stained glass options for the bathroom. I can’t finalize this until I know the ceiling height which is based on the air conditioning but I have a reasonable idea of the space so I thought I would show you my latest photoshop rendering of the hallway. I also added in the ceiling fan that bought.

I stopped over at Philadelphia Salvage recently but was disappointed with their selection. I need a pretty specific size so I have been lurking on ebay. I really like a lot of the stuff that Bigsteveareno29 sells. He is in Pennsylvania about 2 hours from here. I don’t think I would trust shipping stained glass, but we could plan a trip. He also sells some interesting closet fronts that I have been admiring.

stainedglasstransom1

This is a close up of the antique stained glass that I am currently favoring. I think it would look pretty good with our existing daisy stained glass window which is on the adjacent wall. I am pretty close to being able to make this fit with the lowered ceiling. It will be tight but I think I can make it work.

daisystainedglass

We had this our original daisy stained glass window restored when we were having the siding done. As you can see we never got around to fixing the plaster and trim around it. I figured I would add that to the list on this round of hallway work.

What do you think? Should I scrap the stained glass and just go with clear glass?

4 Comments

aircompressor-portercable2

I am generally a big fan of power tools (heck, I am a master of the compound miter saw). So you think I wouldn’t get nervous using a new one. Well, you would be wrong! For my birthday last July, Mr. S. bought me a compressor and 3 pack of nail guns. Isn’t he the best! The box has been sitting unopened in the basement for months as I gathered the courage to actually use them. In my defense we haven’t actually been working on anything requiring nailing, but I certainly haven’t gone out of my way to actually making use of them. In fact the box had been sitting there long enough, that it had acquired a pile of stuff on top (please tell me that happens to other people too?).

Well this week I am going to be helping out one of my clients, and I could really use a nail gun to speed up installing some trim. So I decided it was time to face my fear and try it out, and trim out the door to the basement closet (another long overdue project).  While the rest of the family was upstairs and I was waiting for some laundry I cut open the box. Everything was packaged neatly and I went to work reading and re-reading the instructions. The compressor totally freaks me out (I guess anything that could blow up should do that). I made sure I understood how to pull the release valve and what pressure the dial should be set at. Then I unboxed the brad nailer. I picked it up. It was so cool! I read through all the parts and practiced unlocking and locking the trigger and installing the nails. Okay maybe this isn’t so scary after all.

So after a break and putting everything in place, I set up the compressor and plugged it in. I HATE the noise when the compressor starts up. It is so loud and powerful! I turned the adjuster knob and watched the pressure fill up in less than 2 minutes. I actually set the pressure too high and had to quickly lower it so I didn’t exceed the recommended range.

With the compressor set I decided it was now or never. I carefully plugged in my gun. The air whooshed out but I managed to click it in on the second try. Next up is putting in the nails. That was pretty straightforward! I very carefully released the trigger switch and put my trim in place. I pushed the nozzle (I’m not sure if that is what you call it) and pressed. It is actually really quiet. Phew, it worked! The nail didn’t go in as much as I wanted so I adjusted the depth gauge. The second one went in perfect! Awesome!

basement-doortrim2

Within 5 minutes I was done putting the trim on the door. That would have easily taken over an hour by hand, and not worked as well! As I went I started to come up with a strategy for installing this thin trim.

basement-doortrim1

I started with the bottom piece with 2 nails. Next I lined up one of the verticals. I nailed it a couple of inches from the bottom corner, making sure it was tight to the bottom trim. Then I nailed the other vertical the same way. Next I installed the top horizontal piece with 2 nails (after roughly checking that the verticals would align). Finally I connected the top of the 2 verticals near the top creating a tight joint and added a couple of extra nails in the middle for good measure. It worked surprisingly well. The nice thing about these nails is that once one is in, it stay tighter than with a traditional nail (so you don’t have to hold the trim very tightly).
basement-doortrim3

When I installed the same trim on the bathroom door (before the nail gun), it was really sloppy. Above you can see one of the corners on the bathroom door after I filled the holes. Not so nice! Granted I don’t stand this close to the door very often, but definitely not nearly as professional looking.

I am now actually excited now about using my new set. I know it will be really helpful on the third floor (once we get to trim). That reminds me there are some trim pieces around the house that need some help. Let me at them!

4 Comments

bottlecapbacksplash-3

I thought it was about time I gave an update on the basement. As with so many project around here we get 95% of the way done and loose steam (Does that happen to anyone else?). That was definitely the case with the basement. We got it far enough along that it was functional and let it be. Well now I am trying to finish up before we embark on the second and third floor adventure.

The Basement To Do List:
-Add a closet below the stairs
-Finish the counter and backsplash in the wine/beverage area
-Finish up the workroom
-Add artwork and decorate
-Decide on curtains for the washer and dryer area
-Decide on furniture/shelving/storage for the pantry area

I have been working on pretty much all of these (except the last 2) and we are definitely in the home stretch. Our contractor installed the closet a couple of weeks ago (Yeah!), I just need to add trim to the door and whitewash.

pegboard1

The workroom is definitely more organized and I can actually find most of our tools, although I still need to decide which table/bench to install the miter saw on. I have also started adding artwork and accessories. And for the last couple of weeks we have been concentrating on the counter and backsplash at the wine/beverage area.

winerack9-716x1024

This is where we left off over the summer. We quickly put the wood counter on top with some loose wood blocking and decided to let it be (after all there was a 5 year old birthday party to prepare for). Then of course it was easier to leave it then actually finish it.

woodcounter-install

Well we finally busted out some scrap wood and used some small brackets I had on hand and put this baby in. Of course with everything in our house it was not quite that simple. We did design this area to fit the longest Ikea wood counter but the portion that needed to sit on the victorian safe needed blocking to raise it to counter height  (and of course nothing is level down here). We also added a cleat on the back wall behind the fridge and freezer while leaving a gap above them to allow air to circulate. Finally we attached it to the drawer cabinet on the end. The upper cabinet just sits on the counter, so we just had to screw it to the wall to keep it in place.

bottlecapbacksplash-2

So after spending way too long messing with the counter, came the fun part. Sorting bottlecaps! We along with several of my friends and neighbors have been graciously collecting beer bottlecaps for us (I know it is a hard job but somebody needs to do it!). We have some nice ones now, although I now realize that we are still short. I am hopeful that beer drinking will continue and we will be able to finish relatively soon. We cleaned them up, sorted them by color and took out the ones that were too bent to use.

bottlecapbacksplash-1

So now where to start? I starting mixing the bottlecaps by color trying to keep a good mix. I also decided to start in the upper corner (which is less visible) to allow me to get the hang of attaching them. I decided to go with a premixed tile adhesive from Home Depot.

bottlecapbacksplash-4

After quite a bit of trial and error I determined that the best way to apply the adhesive was to put a thin coating on the wall with the trowel and then back butter the bottlecaps. This actually takes a lot of adhesive since you need to fill the cavity behind each cap. I also found out that the caps tend to slide, so I had to keep pushing them up. These took a couple of hours to set in place and by morning were nice and tight. Of course now I realize that I am only about 1/30th the way finished and this took me over an hour. Granted I think now that I have a strategy it will go quicker, but I will most likely be at this for a while. I thought it might be nice to do a little each night (although so far that hasn’t happened). If all goes well I will finish this up in about a month, unless I get some time on the weekend to work on it.  I do like how it looks and it does make me smile when I head down to grab something or do the laundry.

bottlecapbacksplash-3

The only other change I have to make, is that I was planning on using gray grout, but because of the thick white adhesive I will need to switch to a matching white grout. So drink up and wish me luck!

To see all of our basement projects click here.

4 Comments

basement-artwork1

As part of my New Year’s resolutions for our home, I am trying to try mix some small fun projects in with the big, expensive and laborious ones. So one of the first things on this list was hanging up the Moravian Tile that Mr. S. bought me for our Anniversary last year (or was it Mother’s Day). Moravian Pottery & Tileworks is adjacent to Fonthill (where we got married), so there is a lot of sentimental attachment to these, especially the one on the left, as it resembles Fonthill.

I picked up a frame at Ikea a few months ago (which appears to no longer be available). I liked that it had some dimension to it, so that the tile would be recessed in the frame. The first step was choosing a background paper. The frame came with either a white or black board as the backer, but I thought they were a little boring. So I went through a pad of scrapbook paper that I had on hand.

basement-artwork4

I tried a bunch of patterns including this crazy one but settled on this blue textured pattern instead.

basement-artwork3

I mounted the tiles with Scott Permanent Mounting tape (it is about 1/8″ thick and a little squishy) that I picked up at Staples.

basement-artwork5

I cut holes with an exacto through the paper to allow the tile to adhere directly to the backerboard from the frame. The tape claims that 4 pieces hold 1 lb so I should be well covered (I used between 2 and 3 on each depending on the shape).

basement-artwork2

I spent about a half hour on the project (not including going to the store to get the tape). I am pleased that the tile are up but I am not happy with the paper backing. It is a little puckered and the seams are visible. I think I am going to see if I can find a piece of scrap wallpaper or something and try again.  At least for now they are up and not sitting in the drawer.

Does anyone have any other ideas for mounting these?

3 Comments

Burlap Sack Reunited Part 2

September 7, 2012 — 2 Comments

Tunnell Fertilizer Sack

Today I thought I would share the end to a happy story. A while back we found 3 vintage burlap sacks stuffed in the top of the foundation when we were gutting and insulating the basement.  I wrote about them and plans to frame them (still on the to do list). Then a couple of months later I received an email from the great grandson of the founder of the company who made the fertilizer sack. He asked if I was willing to part with the vintage Tunnell burlap fertilizer sack. I gladly agreed, happy to have it return home. He had been searching for one for a long time and was excited to get it framed. Well this week I received an update! They framed both sides of the sack and had the red diamond on the back repainted.

Tunnell 5-8-7 Fertilizer Sack

Back of the Tunnell Fertilizer Sack (with the diamond repainted)

Pretty exciting! It actually cleaned up quite well. Now if I could just get around to framing the 2 remaining sacks. They only have printing on 1 side and the cabbage sack is ripped, so I’m not sure how I am going to deal with that. I think it may require gluing it carefully to a cardboard or foamcore substrate.

Cabbage Burlap Sack

Potato Burlap Sack

I hope everyone has a wonderful weekend! I am looking forward to some time with the family.

2 Comments

Basement Beadboard Ceiling Details

The most popular question I get on my blog, is about the beadboard ceiling in the basement. I have promised to write a more detailed post. So here it goes…

I am become sort of a beadboard expert over the years. I didn’t start out this way, but our house is old and already had a good bit of beadboard, and I have had to patch some over the years as well as installing new. Beadboard and wood planking comes in all sorts of sizes and dimensions and range in price from totally affordable to kind of expensive. I’ve used a bunch of different varieties for different uses. In the basement we have used 3 different types.

Beadboard Detail at the Window

1. Walls: We used a classic full size tongue and groove beadboard for the walls. This is 3/4″ thick and approximately 6″ wide. One one side there is a “bead” in the middle and on one end, giving you about a 3″ repeat. On the back it is smooth with a simple v-groove at the joint. The basement already had some of this board on the walls, so we actually salvaged what we could for re-installation. The nice thing about this is that you don’t need any backup. This is strong enough to act as the wall surface. It is simply nailed to the studs. This is also what is installed on our porch roof (which is what this type of board was originally meant to be used for). Fortunately Home Depot sells it in 8′, 10′ and 12′ lengths.

Thin Plank Ceiling in Bathroom. This is permanently attached.

Our Dining Room Ceiling: Beadboard & Beams attached to a plywood substraight

2. Ceiling Option 1: For our Dining Room Ceiling and the Ceiling in the new basement Bathroom we used a thinner beadboard product. It is still tongue and groove but it is only about 3/8″ thick. This will tend to warp, so it usually requires a back up material (in our case 1/2″ plywood). This nice thing is that it is really light weight and easy to cut. These come in shorter length and are packaged in sets. They are available in pine unfinished and white, as both a beadboard and a plank product. For our Dining Room we used the beadboard and for our bathroom ceiling we used the plank. In both cases we went with the less expensive pine and primed and painted it ourselves. However this isn’t a good option for a removable ceiling since the piece are flimsy and have a tendency to warp if not attached to a substraight.

Basement Beadboard Ceiling Details

3. Ceiling Option 2: For our removable ceiling we want with a sheet product. This is about 1/8″ thick and is available in a 4′x8′ sheet and primed white. This is easy to work with and inexpensive. However because it is so thin it will tend to sag, so we had to be careful about not making the spacing too large. This also meant creating a “grid” out of wood for the panels to sit in. The nice thing about the thin panels is that it helped us maximize the ceiling height. We even bent one panel about 1/2″ to allow for an extra low pipe.

Ceiling w/ T-Shaped Pieces Installed

Step 1:We started by creating an upside down T shape out of 2 1×4 pieces and attaching them perpedicular to the floor joists above. This gave us enough space for the miscellaneous plumbing to fit.

Step 2: Rough in lights as required. We centered our in each “bay” of the ceiling. This took a lot of effort to come up with a pattern. Our ceiling was full of pipes and other obstructions (we are below the kitchen). I stood there for about a half hour with my contractor and a piece of paper trying to come up with an acceptable pattern.

Testing Panel Locations before Installing the Cross Piece

Step 3: Figure out the spacing on the panels and test fit.

Step 4: Install the cross pieces. We used 1×2 with a groove cut for the panel and notches out on either side for them to sit on the 1x4s running the other way.

Ceiling Before Painting

Step 5: Install all of the panels. Because everything is pretty snug it definitely takes a little adjusting to get them into place. We installed the ones with lights first,since the trim piece goes over the panel.  I have to say that it is kind of pain to move them, but I don’t plan on doing it very often (maybe once a year to tops). The one advantage I do see is that if I get a leak above (i.e. the dishwasher) it would most likely only require taking 1 panel out.

Finished Ceiling

Step 6: Paint. Okay so I should have painted the frame before putting the panels in, but I didn’t. Oh well. I really like how it came out.

Cost: I have also gotten several questions about cost. The materials themselves were not very expensive for this ceiling. Most of the cost is in the labor, for installing the upside down T-pieces (while dodging pipes), cutting the panels to fit and making the cross-pieces. It is also pretty slow going! If you are up for doing it yourself and you have the time, I think it is worth it. Paying for a contractor to do it, is definitely not cheap though.

More Questions? Just add a comment and I will do my best to answer them.

10 Comments

Tunnell’s Fertilizer Burlap Sack

I hope everyone had a great weekend! I am super tired from Sam’s Birthday Party. We managed to make and cook 28 kid size pizzas in about an hour, along with fruit kabobs and cookie and apron decorating. The good news is that everyone had a great time. The bad news is that I think it will take a few days for me to recover.

So anyway, back to my story for today. A while back I posted about the burlap sacks that we found stuffed against the sill plate of the foundation when we were demolishing the basement. We were planning on framing them and hanging them in the basement. I hadn’t thought much about them, since that project is still on the “to do” list.  So I was very surprised to get an email from the great-grandson of the founder of the F.W. Tunnell & Company (who made the fertilizer). He was wondering whether I was willing to part with the sack.  For once my procrastination paid off and I hadn’t gotten around to framing (and potentially cutting the sacks) yet. He still lives near us so I was happy to return the sack to him. He has been looking for a sack like this for a LONG time without any luck, and remembers one hanging in his grandparent’s home when he was a child. Interestingly the F.W. Tunnell & Company was in business from the 1890s to the 1950s. We think our sacks date from the 1910-1930 range.

My guess is that he will have his hanging up before I do. Who would have thought that the balled up piece of burlap would make someone’s day and end up framed in not one but two houses.

Leave a comment

New Karlstad Sofa Bed

I hope all the dads out there had a great Father’s Day!

This weekend was really busy while we tried to get the house ready for 25 kids + parents for Sam’s 5th Top Chef Birthday Party (more on that later this week). We also celebrated Father’s Day (which included Mr. S. working hard on the house + some quality time with the kids). Plus on Saturday afternoon our new sofa bed for the basement arrived along with a new wood countertop from Ikea. Gotta love $59 delivery (into the house no less) for both.

We went with the Karlstad Sofa Bed in Sivik Dark Gray (based on several recommendations). Ikea is also running a special of 15% back on a gift card (to be used for the last upper cabinet for the basement). It arrived in 2 big boxes + 1 small box (for the slipcover). Delivery took about 10 minutes (once we convinced them to pull into the driveway).  It took the 2 of us about an hour and a half to put  it together (including unpacking and sorting). It was a pretty easy install with no major hiccups. The bed pulls out sideways (so your head is at the armrest not at the back). We tested it out in the store and though it was reasonably comfortable. The sideways layout also works well for our space (leaving enough room to walk around when it is pulled out). We can already imagine pulling it out for a movie night with the kids. The seat cushions are a bit stiff at the moment, but the sample in the store was quite comfortable, so I am assuming with 2 kids jumping on it, it will soften up in no time. And as an added bonus the slipcover is machine washable.

New Pillow from Homegoods & Napkin from West Elm that will be turned into a pillow cover

I picked up these pillows at Homegoods a couple of weeks ago. I think they look great with the sofa. The black outlines in the fabric work well with the dark gray fabric (which has almost a denim feel to it). The napkin is from West Elm last year. I bought 4 thinking that they would make a nice pillow cover, not knowing where I was going to use them. Fortunately the orangish-red looks great with the pillows. Not sure when I will get around to sewing these up though.

This week’s post will probably be a little sporadic as I try to get ready for this weekend, but we did finish up a lot of long overdue projects on the house, so I will try and get at least a few sneak peaks of the updates.  I hope everyone has a great week!

New Wood Counter (temporarily supported) filled with stuff for Sam’s Party!

Here is a little peak of our new wood counter (Lagan, $59). We temporarily supported it with some scrap wood, so that we could start using it. We will be adding a wall cleat to the back, creating a better support for above the safe and screwing it to the base cabinet on the right.

1 Comment

Finished DIY Wine Rack!

It is finished! Yeah! After looking at options and more options, it is done and I love it. Of course I would have changed a few things if I had to do it over again, but overall it was pretty straightforward and I really liked how it came out.

AutoCAD Drawing of Space

I started out with this AutoCAD drawing above, laying out the wall.

Ikea BESTA Option

Then I considered this Ikea Besta Option (but was concerned that it could actually support the weight of the wine. Plus Mr. S. thought it looked too “kitcheny” and not rustic enough for our wood wonderland. Which lead to me looking for a design, only to be out of luck. So I ended up making up my own design.

Sketches for the Wine Rack

This is pretty much what I went with, with the toughest decision being whether or not to rout out the horizontal pieces and diagonal pieces. In the end I decided that the pressure from the diagonal pieces holding the wine meant that I really wanted a durable consistent joint in the corners of the main box, so it meant getting out the router to do it. I have to say that I have a love-hate relationship with our router. I love what it can do, but it is a beast, definitely designed for someone with big hands. It actually takes both Mr. S. and I to make the height adjustments, and it is very difficult for me to switch blades. Additionally, I can use it, but the on/off button is out of my reach, so I have to temporarily support it while I turn it on, which is annoying and a little bit dangerous. Ours is a Craftsman (although I think it should be call CraftsMANonly). We bought it on short notice at Sears years ago. I should have ordered a Makita one that had better features, but it meant waiting a week to get it in the mail, which at time was too long. This model was also less expensive. Oh, well, someday maybe I will get a new one, it is not like I use it THAT often. And I have other tools on my list first (i.e. a nail gun).

Materials

2-2x12x6′ (for the top and bottom). Look for pieces that are as flat as possible, to allow for a good fit.

1-2x12x8′ (4 vertical pieces)

3-2x8x6′ (for the back)

3-2x10x6′ (for the diagonals)

Wood Glue

Wood Screws (I used my 1 5/8″ deck screws)

Finish nails/brads

Tools

Circular saw for cutting the wood

Router for creating grooves in the wood

Directions

Step 1: Cut the 2x12s for the top, bottom & sides. The top and bottom are 6′ long, while the sides were 1′-11 1/2″ (to allow for a 1/4″ groove at the top and bottom)

Top and Bottom Boards marked for Routing

Step 2: Mark, tape (to protect the wood), set up the fence and Route the top and bottom pieces using a 3/4″ bit, set at 1/4″ depth (at 2′ intervals)

Mr. S. Test fitting one of the vertical pieces in the groove

Step 3: Test fit the vertical pieces. The 1x12s tend to be slightly bowed, so we found it worked best to start at one end and slowly push the wood into the groove (using a mallet if necessary)

Step 4: Glue and nail the top and bottom together. I pre-drilled for the nail holes to avoid spliting. You could also use screws, depending on whether they will be visible.

Box finished w/ Sam’s help

Step 5: Check to make sure that you are plumb. The easiest way to do this is to check the diagonal dimension of each of the squares.

Install the back of the wine rack w/ screws

Step 6: Cut the wood for the back of the winerack. Install with screws at each vertical and at the top and bottom. This is going to really help with the rigidity, so I made sure to use quite a few screws. You are also going to use the top one, to mount it to the wall. In my case I had about an inch gap between the back boards. I installed the top and bottom first (also to allow for any straightening) and then centered the middle piece in between.

Winerack w/ the first of the Diagonals in place

Step 7: I had roughly measured how long the diagonals needed to be (at least so I could pick up the wood). But for actual measurements, I measured each one individually (there was about 1/4″ difference amongst the 3 sections). First I cut the 3 long diagonals and test fit them in place. I used 1x12s just like the box. In retrospect I should have used 1x10s so that they would sit back from the face. I think that would create a much nicer look.

Step 8: Mark the diagonals (to keep straight which one is which) and pull them out and mark for the grooves for the shorter diagonals.

Step 9: Rout the grooves for the shorter diagonals. It is at this point that I was really hating the router. In this case we routed out only 1/8″ thick since we were routing on both sides of the wood.

Step 10: Reinstall the diagonals and measure for the shorter diagonal pieces.

Winerack w/ all of the pieces in place

Step 11: Cut the short diagonal pieces and test fit, one by one until they are all in place. I was planning on glueing/screwing these in place, but I decided it was better to leave them unattached. Then installation would be easier and if I ever wanted to replace the diagonals with shelves I could.

Step 12: Remove the diagonal pieces (marking them so you can put them back in the same spot). Predrill the holes for the mounting screws (we decided to drill behind the diagonal pieces). I also partially screwed the mounting screws in place, to make it quicker and easier to get it on the wall.

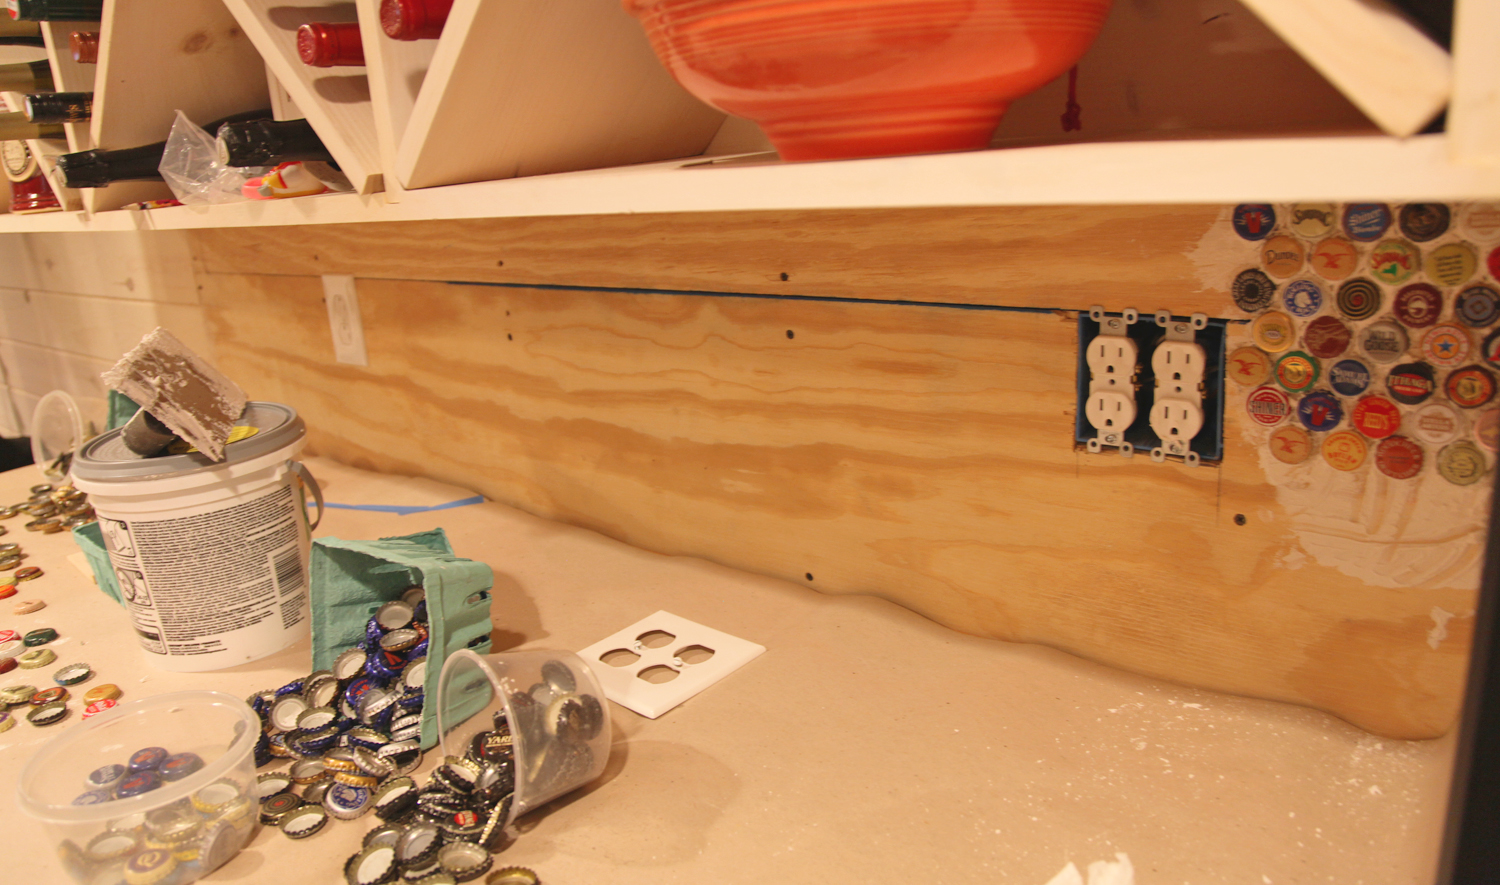
Step 13: Paint the wall behind (since there are openings in the back you will see part of the wall).

Step 14: Mark the wall. In our case I marked the bottom corners, using a level to draw a line for the entire bottom.

Step 15: Lift and screw in place. We are lucky because the walls are wood, so we could just use wood screws. If you have a drywall or plaster wall you would need to find the studs (similar to a kitchen cabinet). The advantage of this design is that you could mark your stud locations and use a longer screw at any location on the back, since it is nice and strong.

Winerack in Place!

Step 16: Finish the wood (this could also be done ahead of time).

Step 17: Place wine in rack! Yeah!

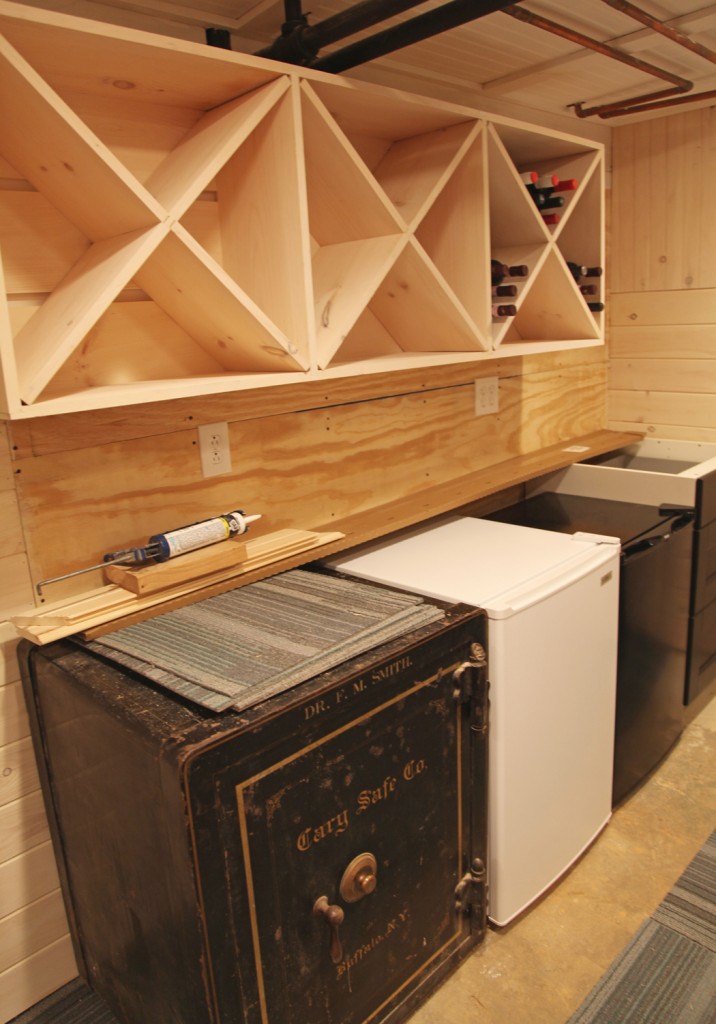
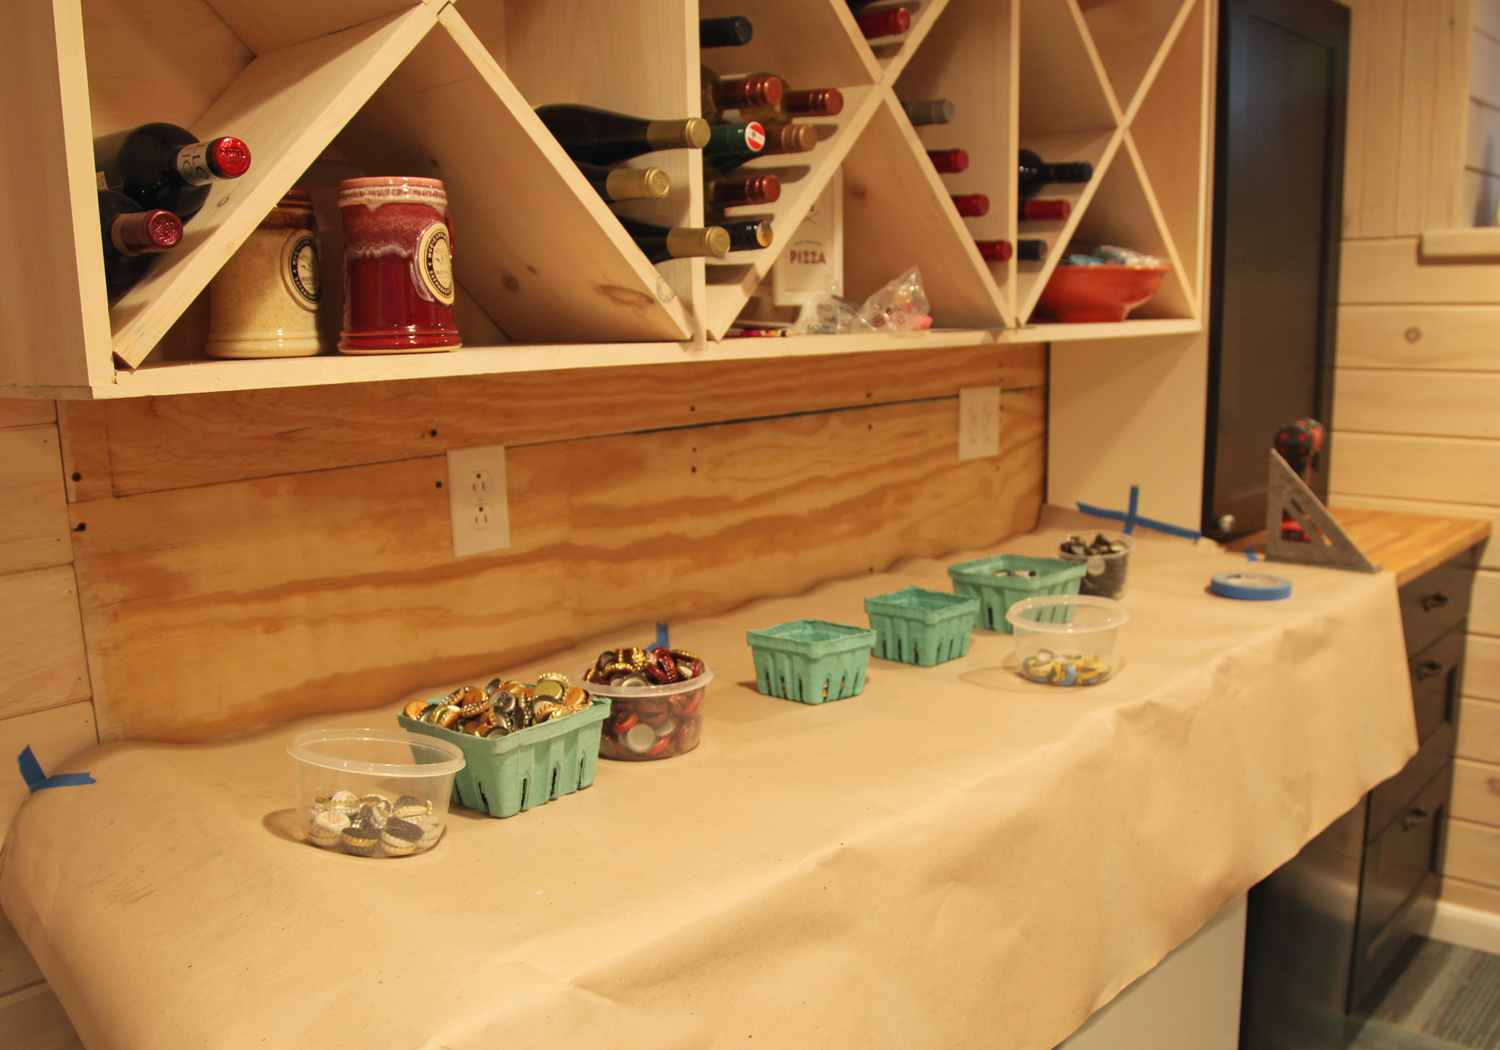
Winerack finished w/ whitewash & fridge and freezer in place

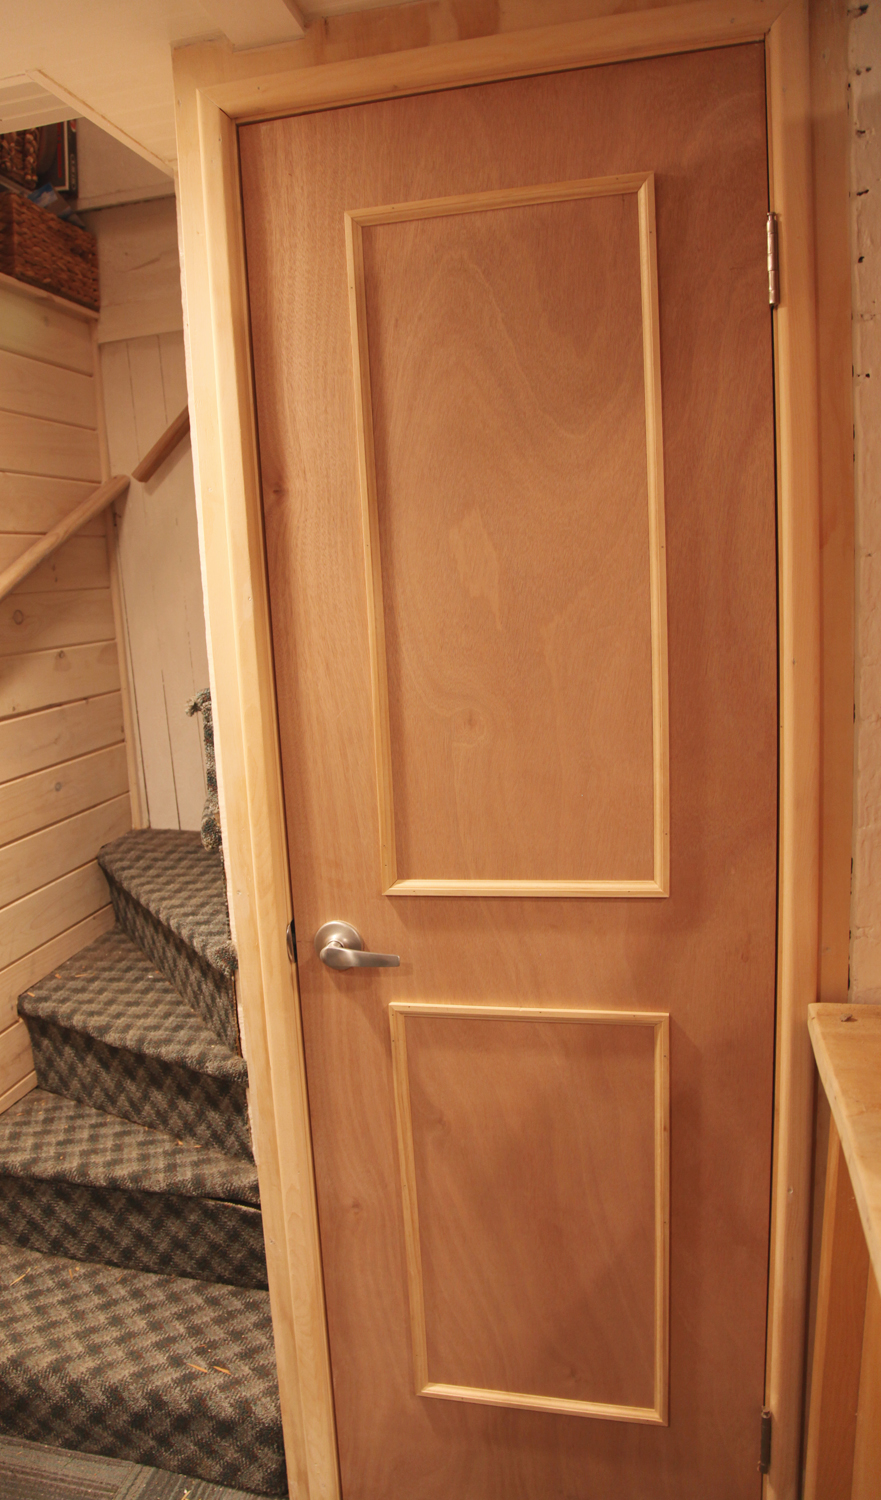
So now it is in and whitewashed! We also installed the freezer yesterday. It was a total pain, because the floor is very uneven and it required lots of shims (which is difficult when you don’t have access to the sides). The counter is arriving on Saturday. I still need to come up with a plan for the white door (which I hate). I am thinking of spray painting the plastic top and bottom and adding vinyl chalkboard to the face. I think once the wood counter is installed it will look much more finished. We also need to buy an upper cabinet from Ikea (to match the lower drawer unit) for the right side.

What do you think?

* To see all of the posts about our basement click here.

Leave a comment

New TV Console/ Floating Shelf with Guitar Amps Below

It was a busy DIY weekend here! I think this is the most woodworking that I have done in a single stint in a LONG time, certainly in the last 5 years. The good news is that the TV console and the wine rack are done. I still need to whitewash the wine rack, but it is up and in place, which is great. I made the TV console on Saturday and whitewashed it Saturday night. Then Mr. S. hooked up all of the TV components on Sunday morning, so this project is actually complete! I spent most of the day Sunday working on the 6′x2′ wine rack, which I will write about later this week.

So anyway, back to the TV console. I have been tinkering with the design in my head for a few weeks, but Friday night I decided that it was now or never and spent some time drawing up the “perfect” shelf. I measured our new tiny speakers, the small computer (a mac mini with all of the hookup on the back), the giant power strip and some miscellaneous smaller bits. I wanted to minimize the dimension that it stuck out from the wall (since it is in a major pathway), while provided enough depth for the computer. I also needed quite a lot of space for allowing wires to go up and down and all of the plugs and electrical bricks. Somehow the idea of a sleek TV set up still seems pretty elusive. In the name of minimizing its size we don’t even have a cable box down here, and have to rely on the computer for everything (which is a whole different experiment).

Close Up of TV Consule

The Design

I decided to keep it simple. I went with a box with enough height on the inside to accomodate the speakers (I went with an inside height of 7 1/4″ to allow for the front cover plate to be a 1×8). The depth is 10″ including the mounting blocks. This allowed enough space for the computer and the hookups on the back (approximately 9 1/2″). I used 1×10 pine for the box (9 1/4″) plus the depth of the 3/4″ mounting blocks. The width is 44″. The TV is 42 1/2″ so I started with that width and added a little to make sure that I could fit the speaker and computer on one side of the wood cover plate. In the middle there is an 18″ wood cover plate to hide the 17″ power strip. It is funny that the power connection takes up almost 3 times the width of the computer. On the right side there is space for the other speaker and a little bit of miscellaneous storage.

Materials

1x10x10′ Pine (3/4″ x 9 1/4″ actual)

1x8x6′ Pine (3/4″ x 7 1/4″ actual)

Kreg Tool w/ Pocket Screws

Wood Screws

Glue

Masonry Nails (to attach it to the wall)

Total about $40

Kreg Tool for Making Screw Pockets

Instructions

1. Cut the top, bottom and 2 sides out of the 1x10x10′ (in our case: 2 @ 44″ and 2 @ 7 1/4″)

Side of shelf attached to the top with pocket screws

2. Use Kreg tool to make holes for pocket screws to attach the sides to the top. This way there are no exposed screws. I also glued the pieces together.

3. Screw the bottom with regular wood screws (since the bottom won’t be visible it doesn’t matter if they are visible).

4. Cut the back corner pieces and front cover piece out of the 1x8x6′. I used 6″ wide pieces for the back and 18″ for the front piece. I also cut 2 extra 6″ pieces for spacer to attach to the brick wall.

Shelf with the back pieces test fit in place

5. Test fit the pieces.


Back of Shelf w/ Pocket Screws Installed (upside down)

5. Using the Kreg tool add pockets in the 2 back pieces (I went with 2 on the top and one on the bottom). The back pieces will be supporting the shelf so I wanted to make sure it was totally secure to the shelf.

6. The front cover piece is to be secured later after installing the shelf to the wall.

Blocking/Spacer installed on Wall with Masonry Anchors

Installing it on the Wall

Our old brick wall is VERY difficult to  drill into. The Masonry Anchors we used require pre drilling 1/4″ holes to the proper depth. After blowing through more than one bit anchoring the TV we decided to align the holes with the softer mortar.

7. We decided where we wanted the shelf (high up enough to allow the amps to fit below and low enough to be able to use the keyboard on top).

8. I roughly measured the placement of the wood blocking with the mortar joint. Then we predrilled the holes in the wood with a wood drill bit. This left a mark on the wall and we drilled with a masonry bit.

9. We hammered in the masonry anchors through the wood blocking. This left everything a bit wonky, but we decided to proceed.


Shelf in place w/ Power Strip Slid Through the Rear

10. We screwed the shelf to the blocking. We actually had to do this twice because we released that the power strip needed to go through the back first (and the other end was located in the outlet above the TV).

11. At first this wasn’t as secure as I would have liked. Then I realized that by tightening the screws we had actually pulled the blocking away from the brick wall at the bottom (while keeping it tight at the top). The anchors were still secure, so I was a little unsure what to do. Then I tried a shim underneath the bottom of the blocking at it was suddenly nice and tight and secure. Phew! Just a little caulk to cover the seam and we were good to go.

New Shelf filled with equipment

Finishing

After the shelf was in place we used the gloss white to match the wall for the blocking on the back (along with the caulk). For the rest of it I white washed it similar to the walls. Then I let it dry overnight before installing the equipment.

What would I do differently?

After I do these projects there are normally a few things that I would do differently. The main thing is that I would have made the blocking for the wall smaller than the back corner pieces on the shelf. In the end they didn’t end up aligned very well and you can see one side of it sticking out if you are looking at the inside of the shelf. Otherwise I would have been more careful about the various plugs and making sure that I had put them through the rear of the shelf before installing it.

All in all this was a pretty easy and quick project. I think it is something that most people could do. It also cost less than anything  I would have bought at Ikea which is always a nice feeling.

Shelf w/ gap left at the rear for wires to run

Finally, I will leave you will a detail of the shelf and a sneak peak at the wine rack in the distance. Later this week I will break down how I made it.

* To see all of the posts about our basement click here.

Leave a comment