Pink Polystrene Insulation w/ Tyvek Tape
I hope everyone had a good weekend. We were busy in the basement and it is starting to look pink! We started installing the 2″ tongue and groove extruded polystrene insulation against the foundation walls. We had to set them a little bit out from the wall since there is a lip at the ground from the basement waterproofing/drainage system. We also are leveling these so we need about 1/2″ of space anyway to allow for the variation in the old stone rubble foundation and the parging that was troweled on top. We didn’t get quite as much done as we would have liked, but it is relatively east work. Our contractor is due to start next week on actually putting up walls! Yeah! We should be able to get most of the insulation in by the end of this weekend (or at least the areas that he will be starting on).

Mr. S holding the old column
We also took out the old column in the middle of space, which was pretty cool! It is amazing how HEAVY this small column was (I guess that is what happens when you are using virgin pine stock). The smell of pine immediately filled the air! We are going to keep up, not sure what we are going to do with it though. The photo at the top now is also much easier to take since the old column was right in the middle of the space.

Gap between wall and rigid insulation (bottom gray lip is from the drainage system)
Here are a few things we learned installing the rigid polystyrene insulation:
-It is expensive at about $16 for a 2′x8′ sheet. (we estimate that we will need 45 sheets)
-2″ extruded rigid polystyrene insulation comes with a tongue and groove. 1 1/2″ comes shiplapped.
-You want to tape the seams to provide a tight seal. The general recommendation is to use Tvyek tape (which is readily available). Duct tape is not going to cut it here (especially after you shell out all this money for the insulation itself). The point of adding this insulation layer continiously is to maximize the R-value and seal it completely, so this is very important.
-After experimenting with cutting, a long utility blade works best (with a metal guide). We have one made by stanley, but several companies make them. The nice thing about this blade is that it will extend the whole 2″ so you can get a good cut. You do need to change the blades fairly frequently, or it get tougher to cut.
-We had heard several recommendations for cutting with an electric meat knife. This did NOT work very well at all, and started to smell pretty quickly.
-We attached the insulation with a screw at each floor joist above. Since the boards are all connected and taped they stay pretty stable with minimal attachments.
-It is important to keep in mind that this stuff is flammable, so the code requires that it does not stay exposed (you must cover it with drywall or other suitable finish material). We will be finishing with a 2×3 stud wall in front and varying finishes for the walls in front to seal it off. We are also going to use mineral wool in our electrical closet area (on the right of the picture at the top) and at the top of the extruded insulation to close it off.
-You want to level each board as you go, since if you are off on one board the issues will compound as you move down the wall.
-We recommend installing them vertically rather than horizontally.
-This is totally doable as a DIY, as long as you have the patience. We estimate that this will save us around $400-500 in labor.

Wall after Parging

Wall after Waterproofing

Wall after Insulation
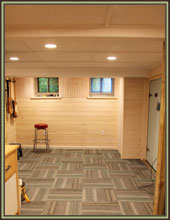
It is time for me to order the faux slate flooring today! I need to get moving on actually getting materials here! I can’t believe we will actually start to have finish spaces in the near future.
* To see all of the posts about our basement click here.