Search Results For "beadboard"

I stopped over Andi and Neil’s house on Tuesday to see how everything looked. The contractors finished up on the previous Friday so they are officially up and running! We still have to work on accessories and a window valance. After that I will actually have a photo shoot. In the meantime I know that there are some people anxiously awaiting to see how it came out. I don’t think Ikea cabinets have looked this good in a while. So without further ado…

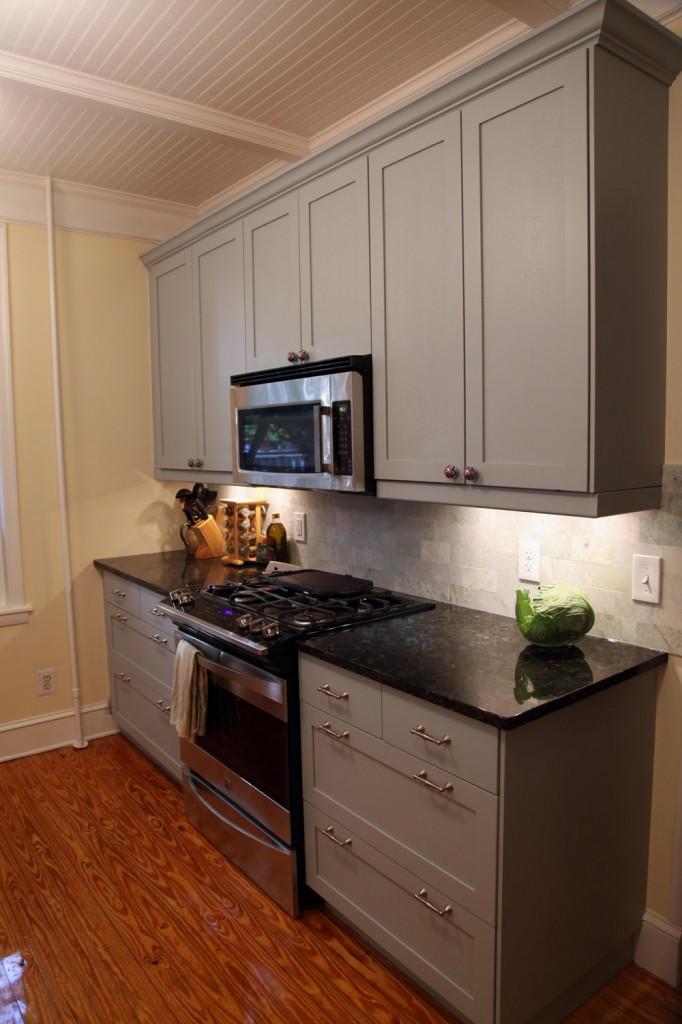
North Wall with marble tile backsplash

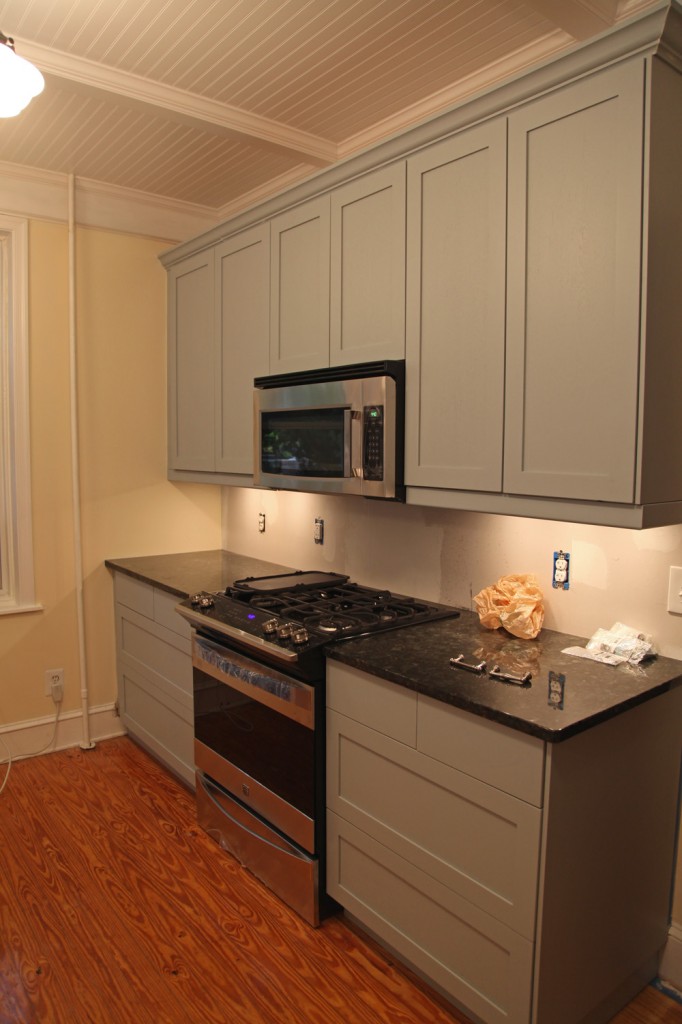
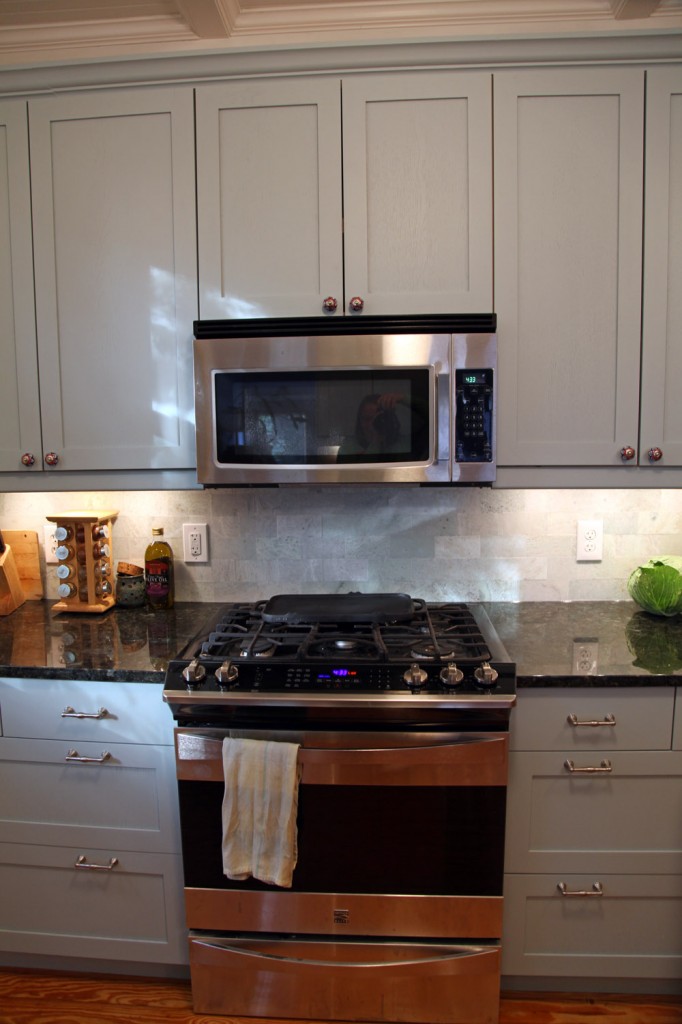
North Wall, with new gas range and mircowave. You will also see the beautiful "Ming" Marble tile. The contractor installed these super tight, so there isn't a grout joint to clean.

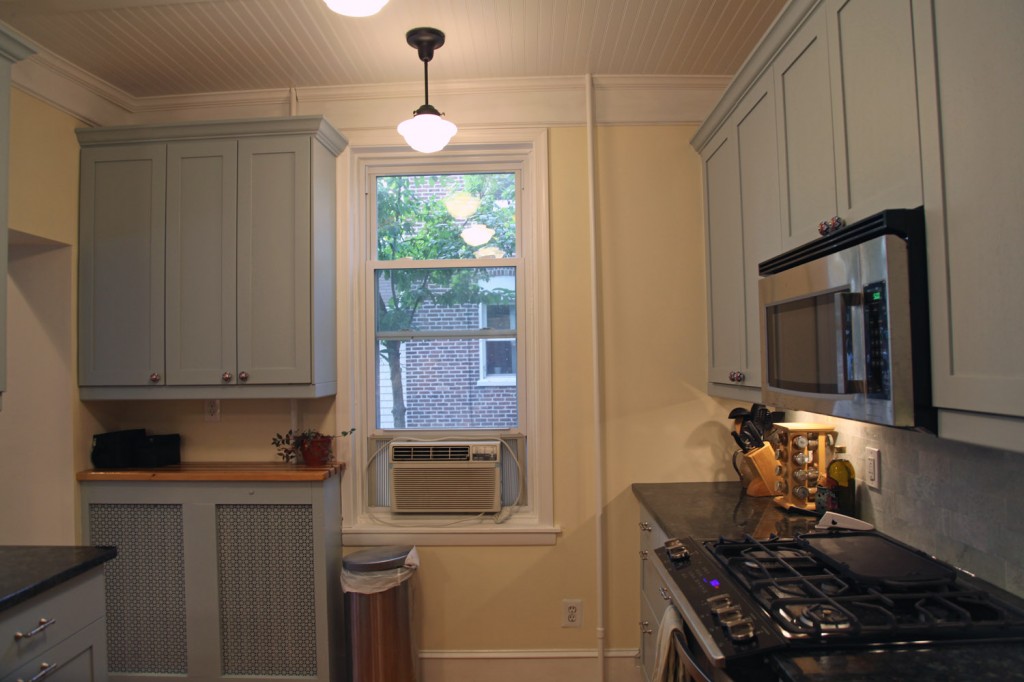
West Wall (window valance still needs to be added). Custom butcherblock over the radiator cover

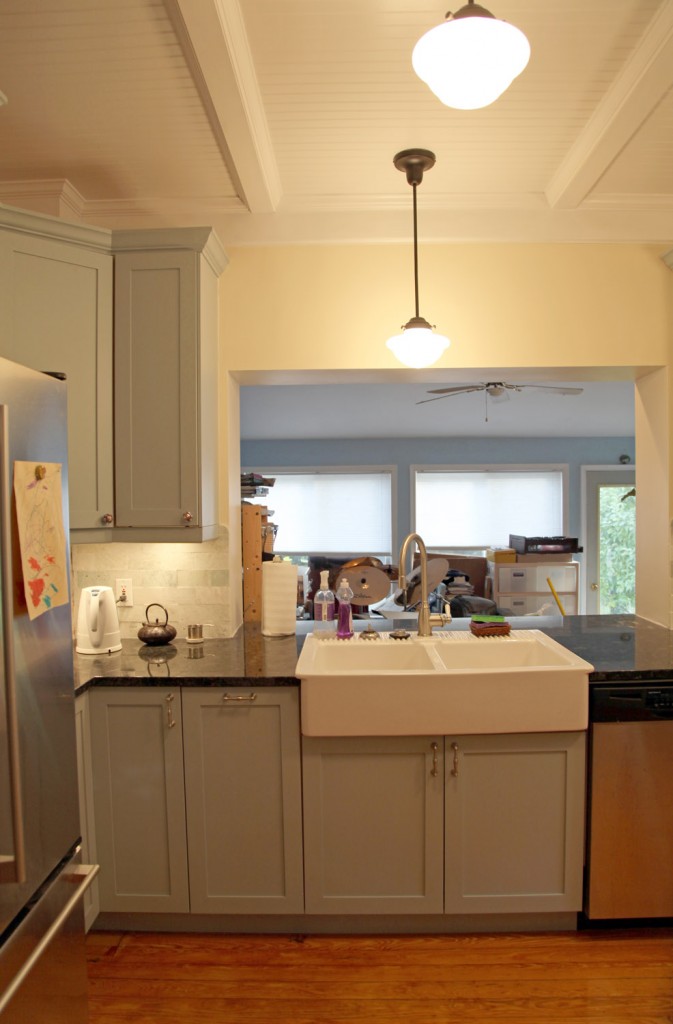
South Wall with new giant farmhouse sink. They had enough extra tile that they were able to tile the walls on either side of the sink as well.

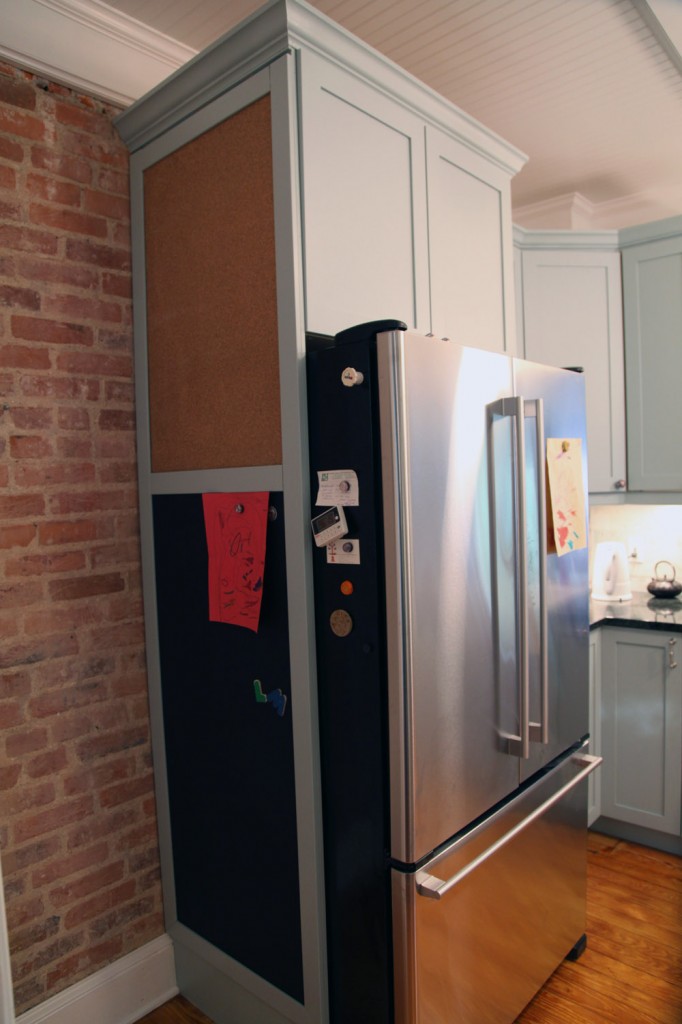
East Wall: Custom chalk and cork side panel. This unscrews from the inside in case they need to take it down to move stuff in and out of the basement. Andi also painted with a metalic primer under the chalkboard so that magnets will stick.

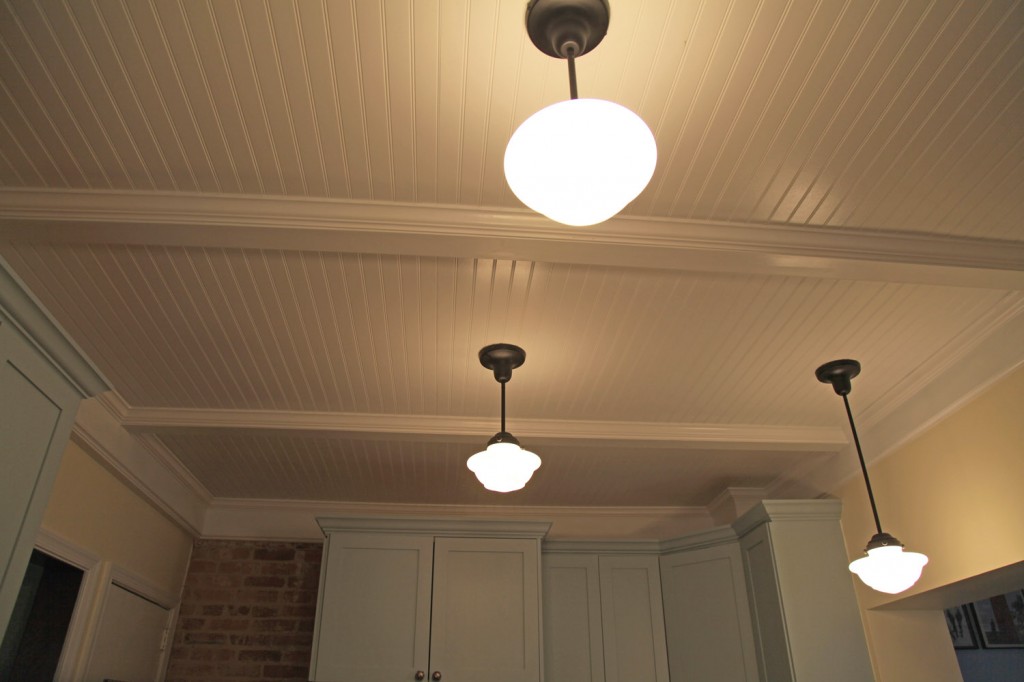
Beadboard and beam ceiling with schoolhouse lights

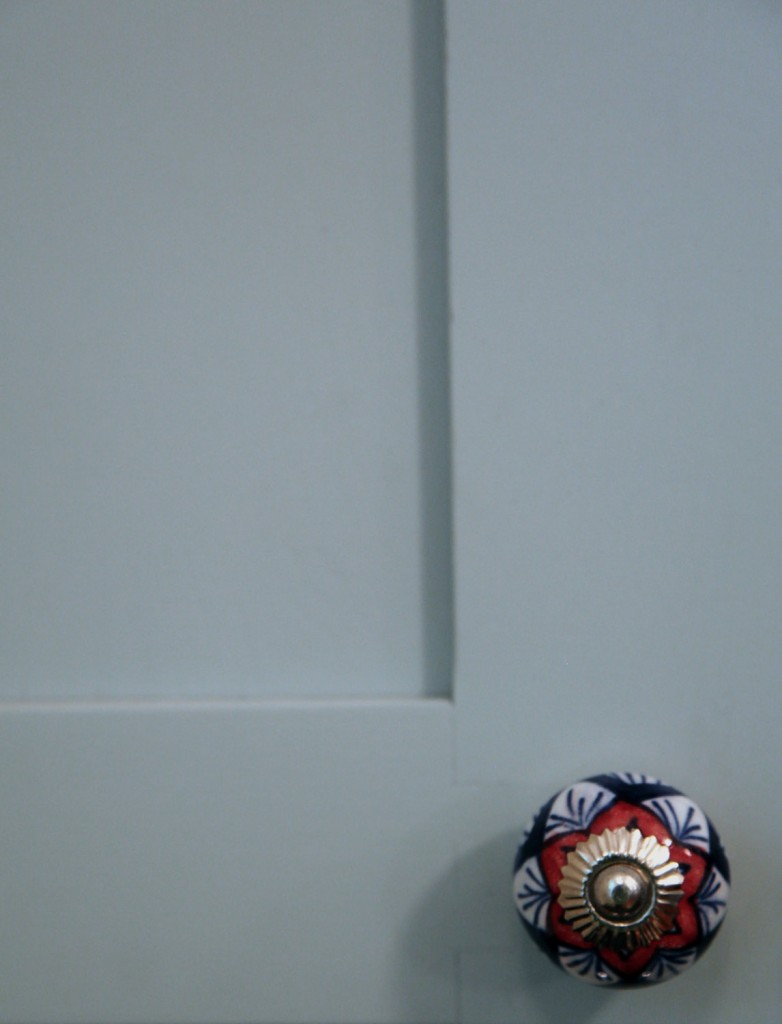
Detail of painted dovetail cabinet door with final knob

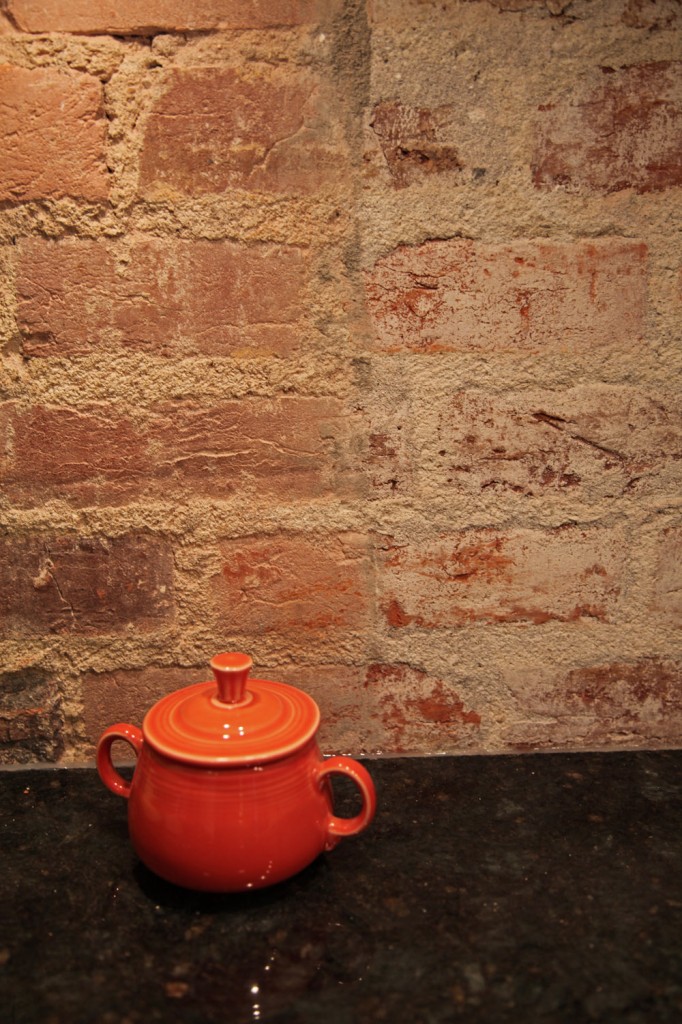
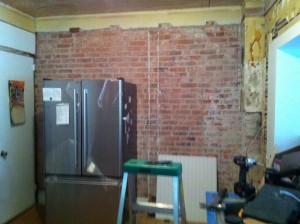
Existing Brick wall with granite counter and fiestaware sugar bowl

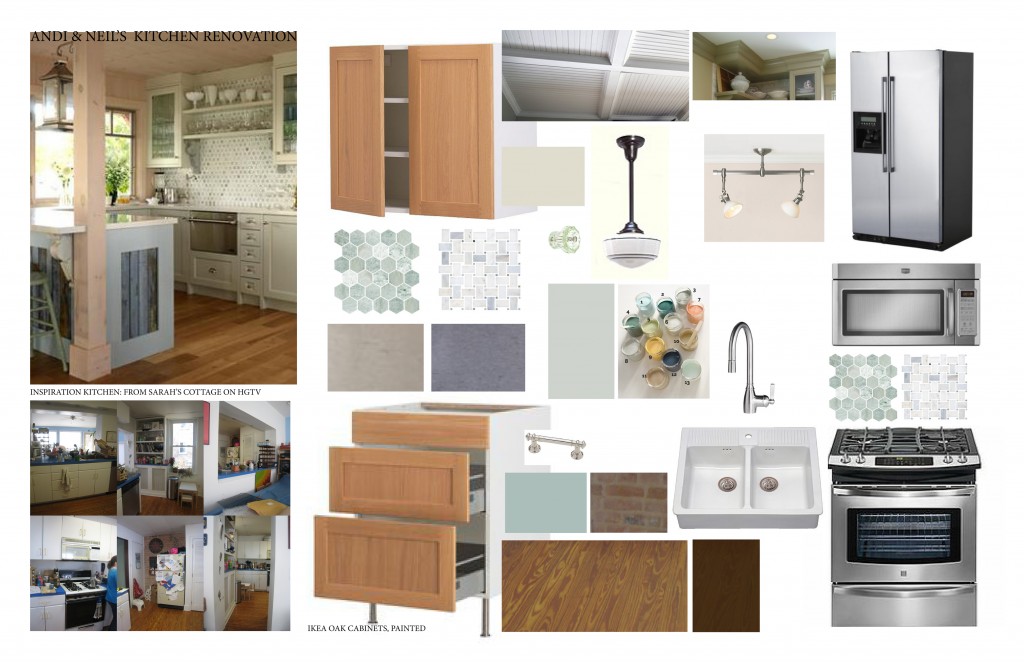
Original Mood Board

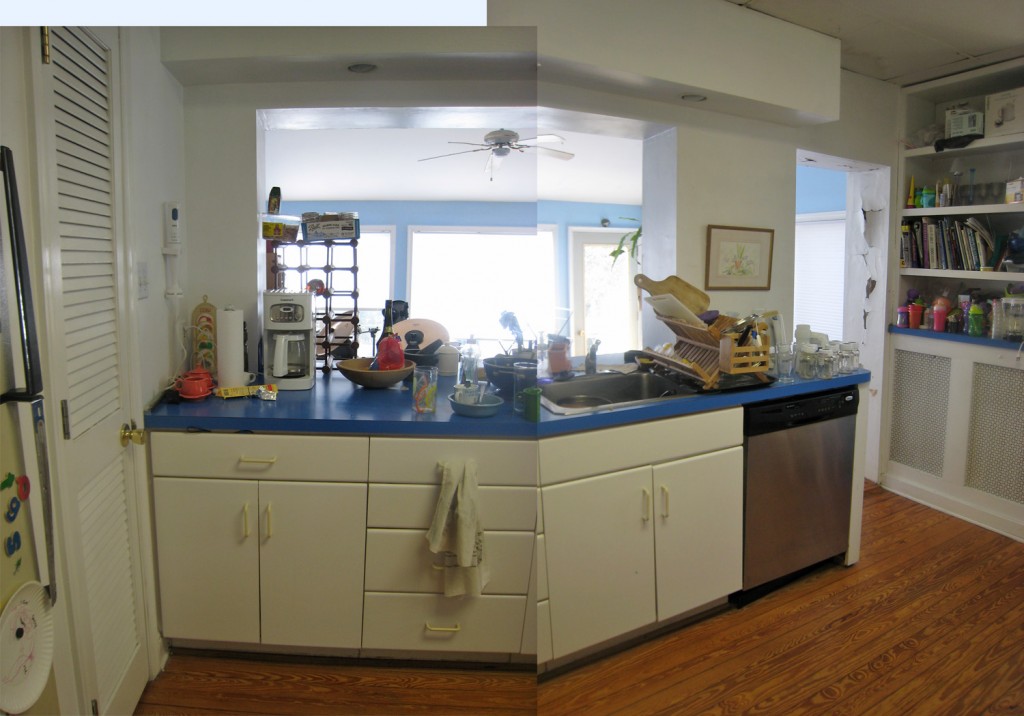
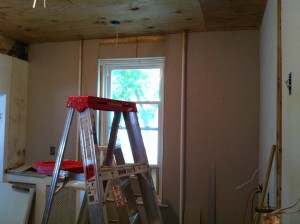
North and West Wall Before

South Wall Before

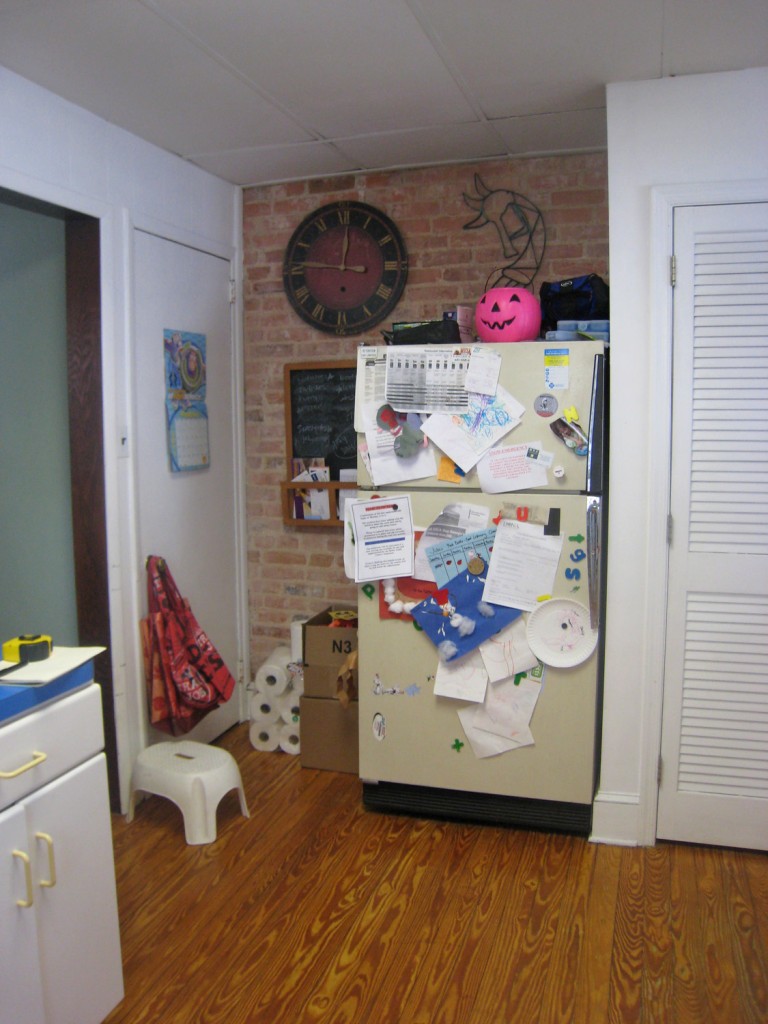
East Wall Before

P.S. Tomorrow I will have a post on some options for accessories for the space.

3 Comments

It has been a crazy couple of weeks here. I had a big presentation to put together at the office, had to call lots of contractors for work (not a fun job!), taught 2 architectural studio classes, had a Zoning Hearing Board meeting, worked on the basement, had a long overdue Mom night’s out with my Mom Group, and tried to keep the kids happy all while not pulling my hair out. Mr. S was really helpful with the kids, including putting them to bed without me several times (it is really hard for me when I miss bedtime). My head is still a big swirly mess, but I am hoping to regain my sanity starting today.

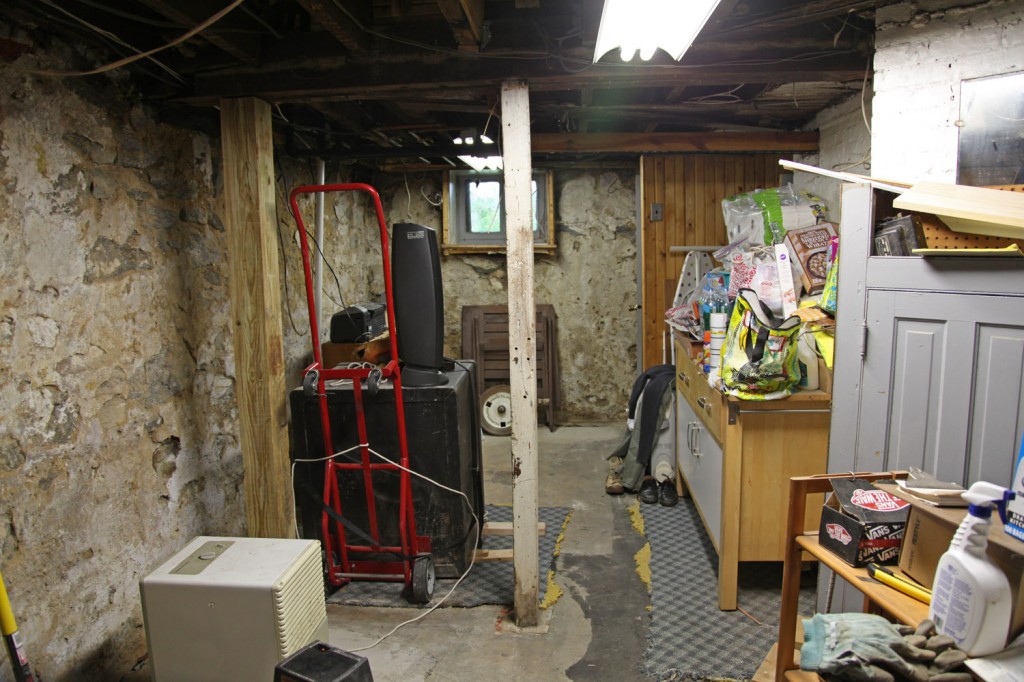
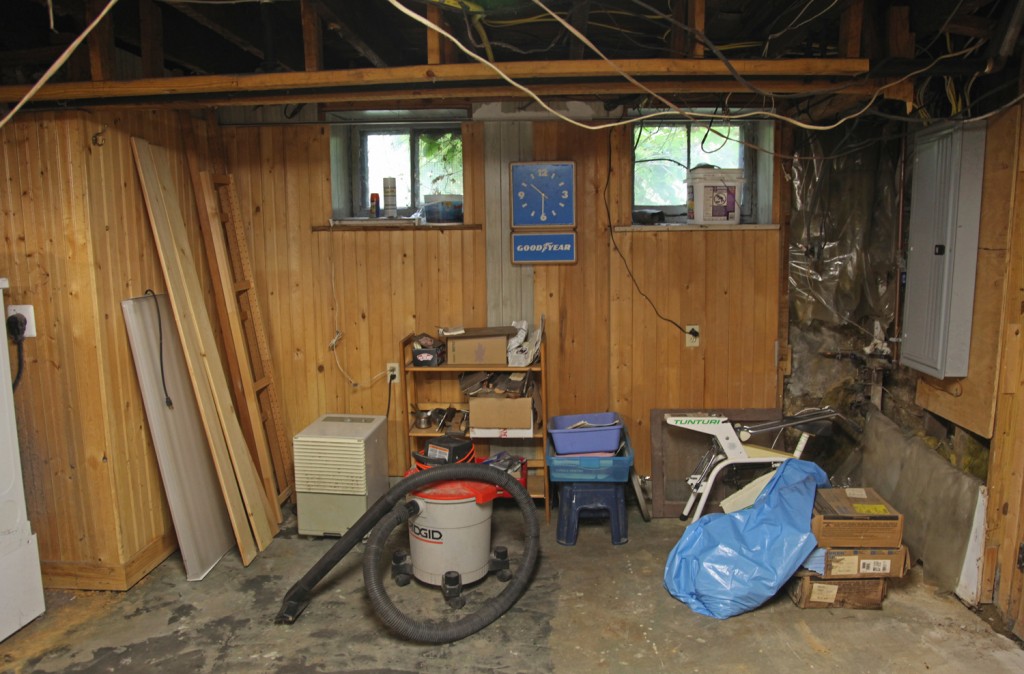
Basement Progress: The non-load bearing part of the wall between the 2 main spaces has been removed as well as the rest of the wall on the left. The column on the left is the temporary one we added in September. The one in the middle is original. We will be adding a new column near the temporary one and one to the right (near the Ikea island) and removing the one in the middle per our structural engineer's recommendations.

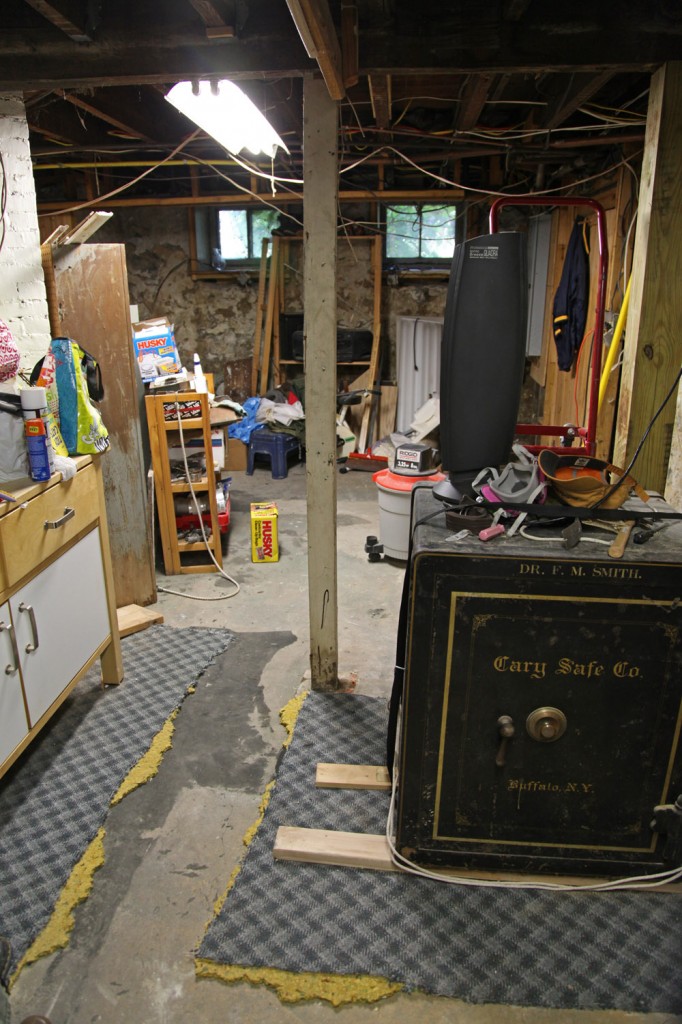
Basement Progress: The wall in the distance has been completely stripped. You can also see our lovely (but extremely heavy) vintage safe (it came with the house). Column in the middle to be removed after the 2 new columns are installed.

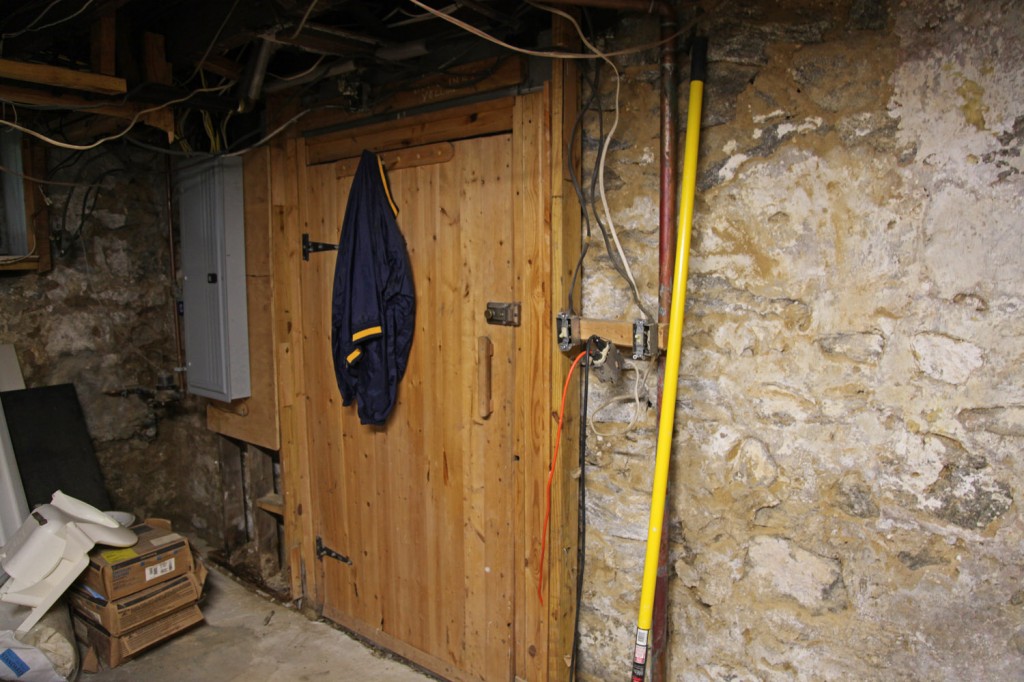
Back door with stripped foundation walls. I actually kind of like the looks of this. Although we need to seal off these walls, they have a beautiful quality to them. I also like the beadboard and stone together. Very rustic farmhouse!

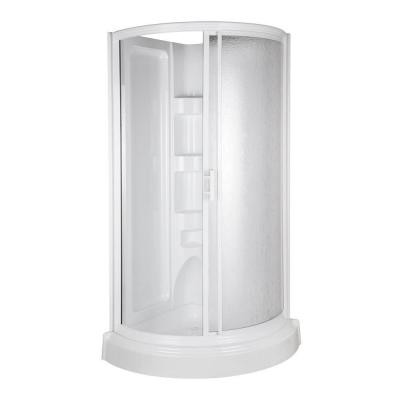
Mr. S was also busy this weekend in the basement! He has been very inspired to get the basement stripped back to its original foundation and I have been finding it is surprisingly rewarding to clear out the basement. We also had the plumber over to start mapping out the demolition of the old plumbing in the disgusting basement bathroom (so ugly in fact that I can’t show you a picture). Once we get the bathroom plumbing capped (hopefully later this week) we can start to figure out the new plumbing arrangement for the bathroom down there (which has to be done before they install the french drain and new skim coat on the floor). I also need to start looking at shower stalls. I am thinking of that opens at the corner. Maybe like this…

Round Corner Shower by ABS, $560 at Home Depot

For the bathroom we will also be using our old vintage sink that use to be in our upstairs bathroom (yeah, free and cute!). We are still deciding whether or not we will reuse the existing toilet. hmmm…. More decisions to make!

Also on the list this week is getting our Electrician over to remove some of the old wiring and our contractor to see about adding the new columns and their foundations.

P.S. Andi and Neil’s kitchen is finished (well except for the pretty accessories) and I am going to head over there to take some pictures. So stay tuned for an update later this week!

Leave a comment

The largest Basement "room" under the Kitchen (walls to be demolished)

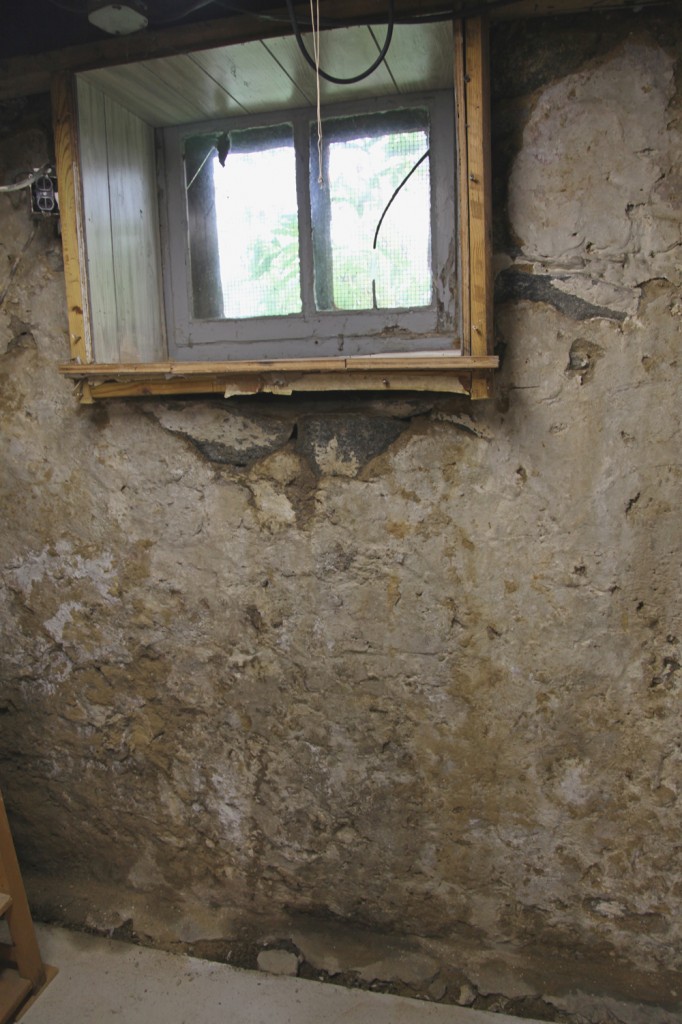
I wish I had more exciting images to show today but we spent a good part of the weekend working on the basement (and emptying out what we could to the garage storage loft). Basements in old houses are a funny thing, they were never meant to serve a purpose except house the boiler/furnace. They usually only had dirt floors and very low ceilings. The walls are typically stone rubble with a parge coat on it to keep the water out. Our basement has unusually high ceilings for a house of our vintage (that may be because it was built up on a mound). The previous owner (aka Tony that Cheap SOB) “finished our basement” back in the 1970s. That meant that he covered the exterior foundation walls with a stud wall, filled it with insulation, put up a plastic vapor barrier and covered with paneling. Unfortunately before he did this, he did not find a way to remove the inevitable moisture build up from the walls. Instead that moisture has been stuck behind these walls for 30+ years, creating a nasty mess! We have known of the potential issues for a while, but with the summer rain (20+ inches in August alone) we have had to make the basement a priority. So for the time being the plans for the Master Bedroom are on hold while we do some demolition and come up with a game plan for the basement.

Foundation after stud wall was removed. You can see the parging is still partially there.

What to do with an old basement?

Ideally in a basement like ours, which gets damp in the summer and wet in extreme weather (when the water table rises to a high level) you would parge the walls, install a french drain around the inside perimeter, connect this to a sump pump, seal the slab with a water barrier and call it a day.

In our case we need to use the basement, not for every day living but for:

-laundry (oh, how I wish we had space for an upstairs laundry)
-storage and use of our various tools
-extra pantry storage
-bathroom (there is one down there now, I don’t think I would have added one otherwise)
-My dream of an extra space for possibly an elliptical machine or for working on larger projects
-or Mr. S’s dream of a space to play drums and rock out with the kids

Inspiration Image from Martha Stewart Living

The Game Plan

Create a rustic but usable basement! Kind of like the image above from Martha Stewart Living (image from Designer Tricia Foley‘s basement. Photographed by Eric Piasecki). I first saw this basement on doorsixteen.

October:

-Finish Demolishing the stud walls in front of all of the foundation walls (we always wear special replaceable cartridge masks that are recommended for both mold, lead and asbestos and clothes that immediately go into the wash after working).
-Salvage beadboard where possible for re-installation
-Demolish the old shower and prep the connections for a future bath
-Demolish the couple of interior walls
-Remove all of the old electric, including lights and outlets
-Install 2 new columns and footings (per my structural engineer’s recommendations)
-Install new angle per structural engineer’s recommendation
-Have Drainage contractor out (it took over a month to get an appointment to have him even look at it!)

November (somehow I have a feeling this may be later then this):
-Clean up and parge foundation walls
-Cut out foundation at exterior walls and install french drain system (this will have a special lip to collect water from the walls and send it to the sump pump)
-Install new sump pump system w/ battery backup (drain out front of house)
-Install new skim coat to concrete floor w/ waterproofing layer

December:
-Have my general contractor install new walls in front of foundation walls using an air gap, pressure-treated sill plates, mineral wool insulation (which isn’t affected by moisture) and cladding walls with horizontal beadboard, using a plastic baseboard product that will have exposed screws, such that we can check the condition of the wall behind
-Install new electrical outlets and lights (I am thinking LED downlights)
-Install new interior partitions to create a bath w/ shower, laundry nook, workroom and large double room space for storage and multifunction use.
-Install new plumbing fixtures
-Install a new ceiling using a beadboard system that would allow access above in certain areas (i.e. where the electric and plumbing come into the building and where there are water connections)
-Whitewash all of the beadboard
-Install a yet to be determined floor (Mr. S. likes cork, I’m still investigating whether it will be suitable for a basement application installed over a plastic and plywood sub-floor product).

Phew, I’m tired just thinking about it!

2 Comments

I was VERY excited to stop over at Andi and Neil’s yesterday to see how things were going. So without further ado here is a peak (I will take more detailed photos once the kitchen is truly finished).

View from the Dining Room (looking south). Sink doors haven't been installed yet.

East Wall (missing cabinet doors are being painted). Look at the shiny refinished floors and the beautiful brick!

North Wall (stone tile backsplash will be continuous on this wall). You can also see the creamy wall color.

Close up of North Elevation w/ new Kenmore Slide-In Range

Beadboard Ceiling and Beautiful Schoolhouse Pendants

Detail of Brick w/ under counter lighting and granite counter

There are a bunch of miscellaneous items that need to be ordered and installed in the next couple of weeks but all of the big stuff is done! The contractors cleaned up most of their stuff yesterday (minus the paint cans for final touch up) and removed the tarps on the floor. They will be back once the last of the panels are painted and delivered, the handles and knobs are ready, and the tile backsplash is decided on and delivered. In the meantime, Andi and Neil can start using the kitchen! It is REALLY nice to see the kitchen without all of the construction clutter. And with another day or two of work it will be completely finished!

Handle choices (left is bright nickel, right is brushed nickel) & granite counter

I think we decided on the handles for the drawers, a traditional style handle with a brushed nickel finish (to coordinate with the faucet). We are still reviewing knob options. I think we should go with something fun and colorful for the knobs. They are at eye level and are the one thing that can be changed out quickly at a later point. For most of the choices on the kitchen we went fairly safe with the finish and coloring (which is good for items that you can’t change easily) but the knobs I think could start to bring some of Andi and Neil’s colorful style back into the room.

"Biltmore" Marble Tile in 2" Hexagon Pattern

"Biltmore" Marble Tile in Basketweave Pattern

Carrera Marble Subway Tile, 3"x6"

We are in agreement that we should use a marble tile for the backsplash behind the stove. The backup is to use a carrera marble subway tile but I prefer the hexagon or basketweave “Biltmore” Marble from The Tile Shop, but Neil is not convinced (at least not yet). I think we should be able to come to a consensus in the next few days though.

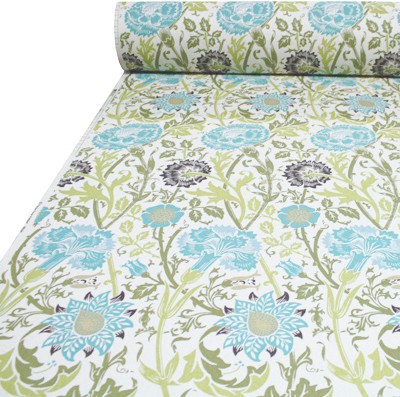
William Morris Inspired Fabric for Window Valance

We still need to look at accessories for the kitchen too. We all love this William Morris inspired fabric, that I think will make a lovely window valance. We also need to look at the space above the opening to the Sunroom and figure out what would look nice above there. I like the idea of vintage plates hanging or possibly a long shelf holding some fun accessories.

2 Comments

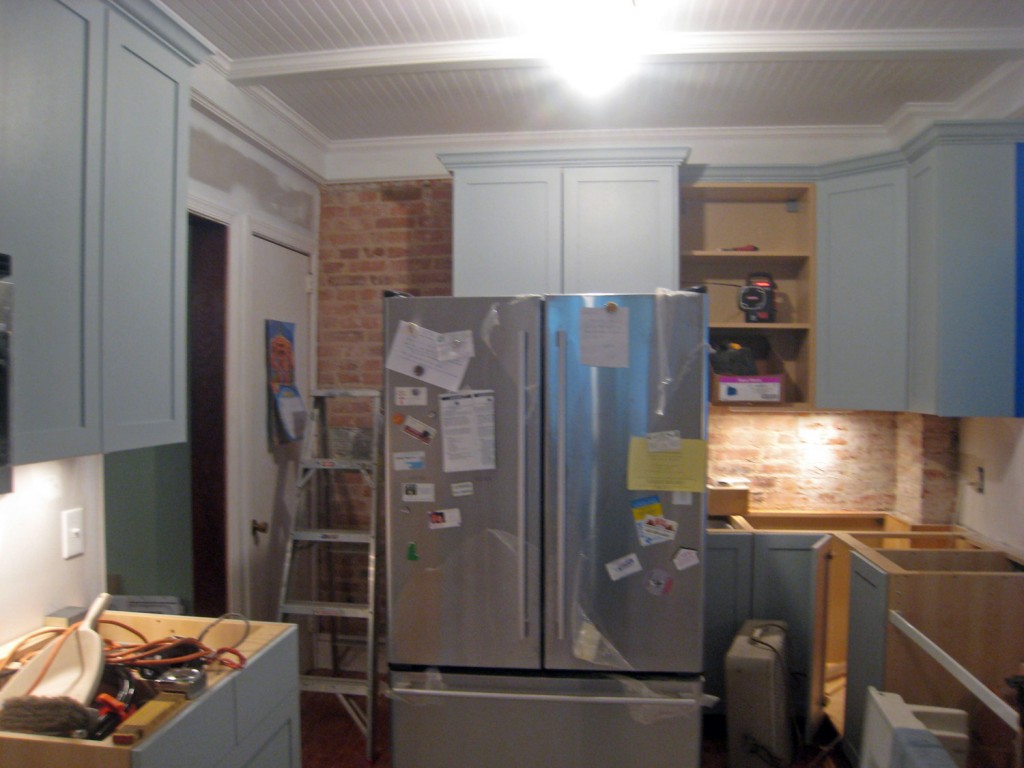
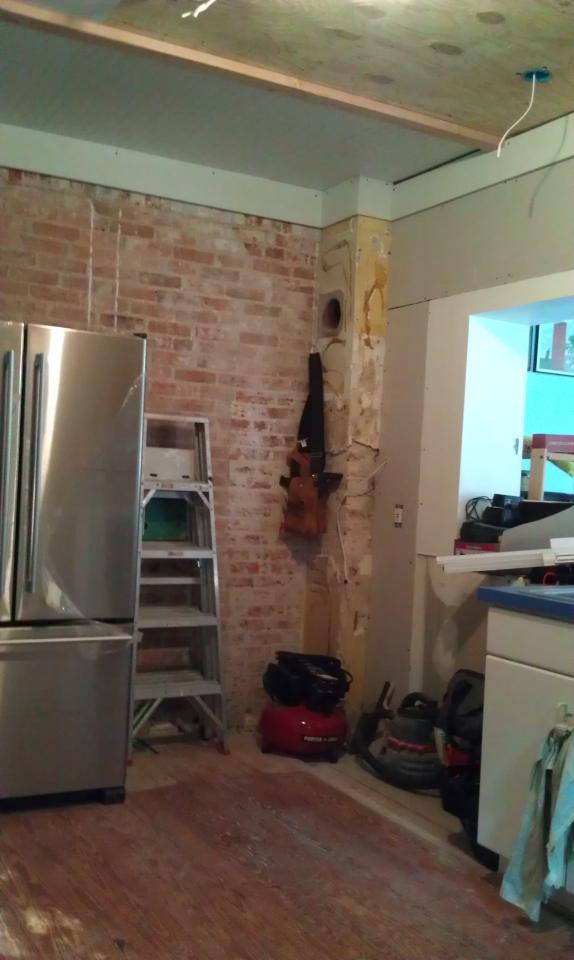
East Wall: The fridge is currently pulled out so it looks more jumbled then it actually is.

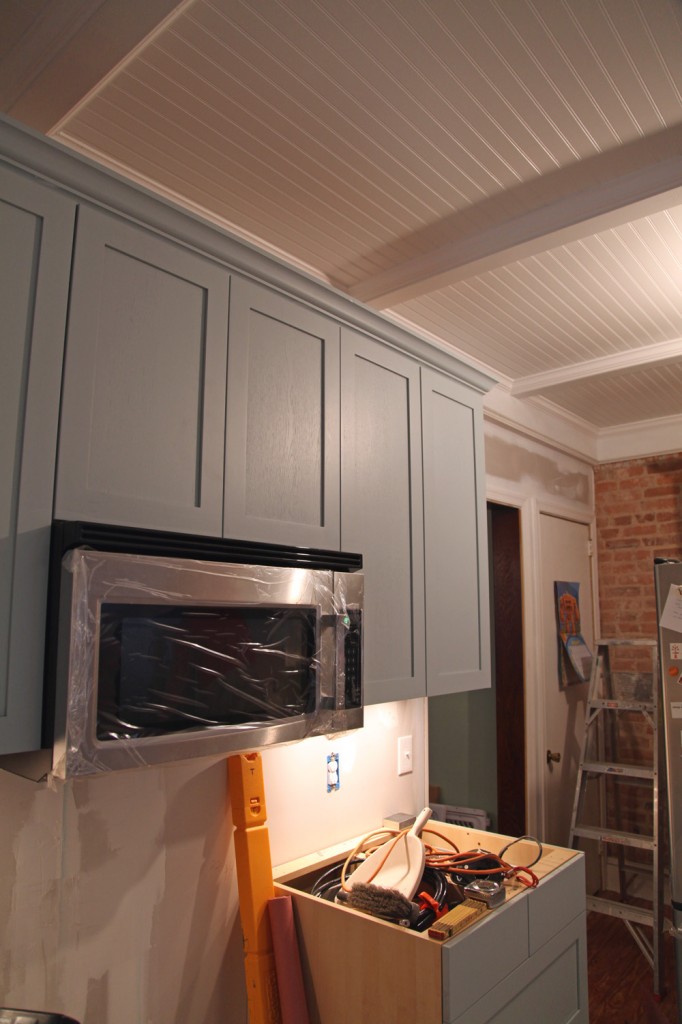
North Wall w/ new microwave (the trim for the underside of the upper cabinets has not been installed yet)

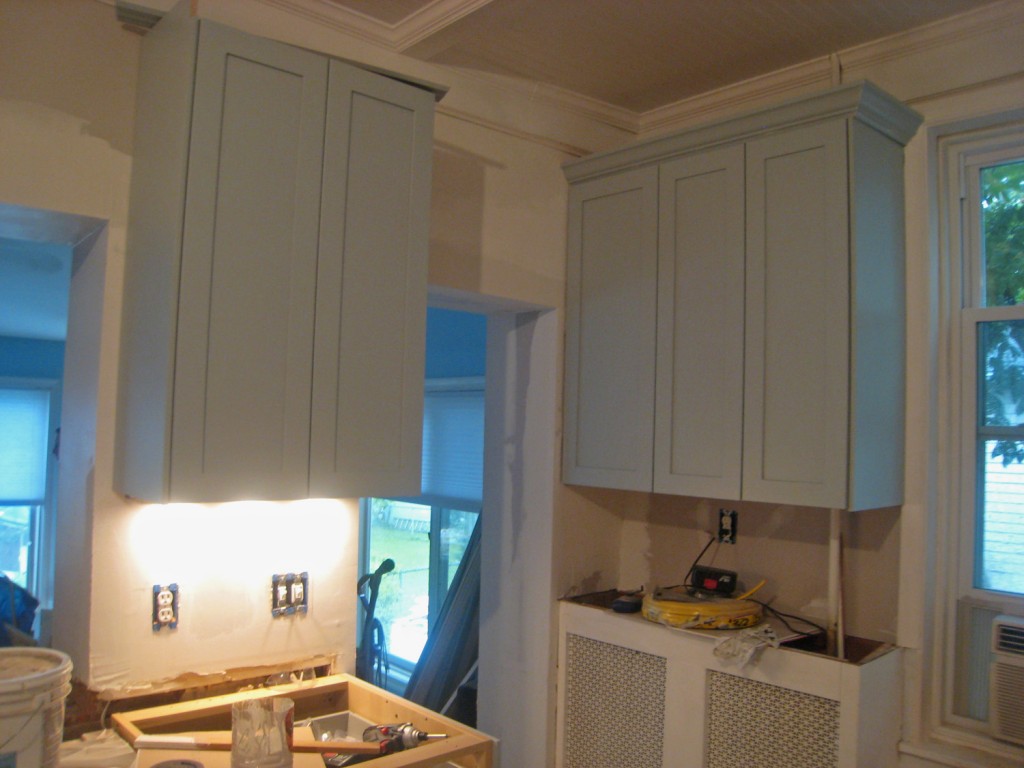
West Wall w/ new window casing

Southwest corner (need to pickup butcher block for the existing radiator cover)

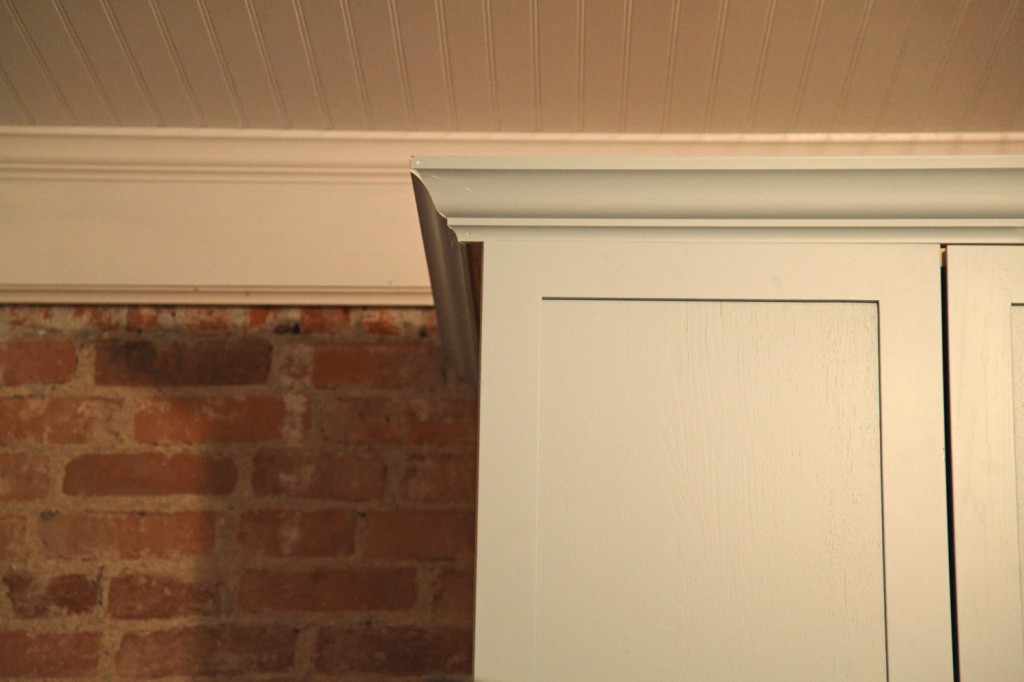
Detail of Cabinet w/ brick and beadboard ceiling. I think the combination of these look great together! (touch up painting for the crown molding still needs to be done)

I stopped by Andi and Neil’s house yesterday to see how things were going. They are getting close to being done! The cabinets and trim look fabulous thanks to all of Chris & Kent’s hard work.  The to do list is getting much shorter and the end is almost in site (although I’m not sure Andi & Neil would agree with this right now). The countertops were templated last Friday, unfortunately we are looking at another 1-2 weeks before they can actually be installed (it appears that one of the downsides of using the Ikea countertop companies is that their cue is quite long). The contractors will be finishing up most of what they can do until the countertops are installed today.  The items left on the list:

Miscellaneous Trim:

-Undermount trim for the upper cabinets (we need to get the clips for these, for some reason Ikea didn’t supply them like they should have).
-Missing side panel for one of the upper cabinets (we need to get this and then have it painted)
-Last of the crown molding for the upper cabinets (waiting for missing side panel)
-Make removable side panel for fridge. This will have a tackboard on the upper part and a chalkboard on the lower part.
-Pick up last set of doors and drawer fronts at painters

Walls:

-Finish Priming Walls (scheduled for today)
-Paint walls creamy yellow

Floors:

-Finish sealing wood floors

Ceiling:

-Install pendant lights (after a couple of weeks on backorder they are finally ready to be picked up at the store)

Countertop:

-Install countertop
-Pick out small piece of butcherblock for counter above radiator (possibly at Home Depot or Ikea)

After countertop:

-Install sink and dishwasher
-Install range
-Patch walls after counter in installed around opening to Sunroom

Miscellaneous:

-Decide on knobs for upper cabinets and handles for drawers. We decided to wait on this until we see the countertops in place.

Backsplash:

-We decided to wait on this until the counters are installed.  Tile will go on the north wall backsplash behind the stove.


2 Comments

Ceiling & Drywall Progress: the first bay has the beadboard plywood installed & they have added drywall to the wall

Andi and Neil’s kitchen is still in the not so exciting to look at phase. The contractors should be there all week which is good news! The ceiling is partially done. They ran into a small hiccup, the the old florescent light that is providing temporary light is hooked into the old knob and tube wiring. They are getting ready to disconnect this, but the new lighting has not arrived yet. So they can’t finish the rest of the ceiling until the new lights arrive. Fortunately they should be here today (fingers crossed). They have installed the 1×8 trim piece around the top of the ceiling. I had them put this in to make sure any uneven wall conditions would be covered up. We will be adding 3 “beams” at approximately 4′ intervals. Not only will this provide visual interest but it will give us a place to seam the beadboard. Most beadboard paneling comes in 8′ lengths (although you can get longer 3/4″ thick pine beadboard pieces in up to 12′ lengths).  The kitchen is about 9 1/2′ wide (so we couldn’t run the beadboard in that direction). The 4 “bays” that are left are designed to have lights centered in them (except for the one over the fridge). We centered the bays such that the light over the sink could also be centered in the bay. It is always a little tricky to get the beadboard spacing right. Unless you have a perfectly symmetrical room you usually have to decide what takes precedence. In our Dining Room we centered the ceiling on the room (and the light fixture) but our windows were not centered on the room, so they don’t align with the ceiling. Andi & Neil’s case is similar. The door openings and opening to the sunroom don’t align with the panels but the lights will all look nicely centered in the ceiling.

The beams will be created out of a 2×4 and then covered with a 1×4 piece of mdf or poplar. Then crown molding will cover the sides. It is a pretty simple system that provides a lot of interest.

1 Comment

East Wall

West Wall

 
I stopped by Andi & Neil’s house yesterday to see how things were going (sorry about the photos being blurry, they were taken with my phone). We are now at the point in the renovation where things appear to slow. It is not that things aren’t happening but electrical work and prepping for the final surfaces is not very exciting to look at! The contractors were busy yesterday putting in the electric for the light fixtures and electrical outlets. They have also finished furring out the north wall where the stove will be, patched the floor and installed the plywood on the ceiling for the beadboard.  They were also finishing up some miscellaneous drywall patching. Next on the list is the beadboard/beam ceiling. Then comes paint (which there isn’t a whole lot of) and refinishing the floor. Then finally the cabinets can be put in.

Leave a comment

I thought I would step back a little and give everyone the background for Andi and Neil’s kitchen. It was stuck in a 80-90’s time warp. Their twin was built over a hundred years ago but you wouldn’t know it from the kitchen. Fortunately the majority of the house still has its original charm and the previous owner added a nice sunroom behind the kitchen. The cabinets were white laminate particleboard in bad condition and not worth keeping. So we knew we were looking at a full redo of the kitchen. So where to begin. Lets start with the first category from my previous post…

Martha Stewart Living Kitchen Cabinets @ Home Depot
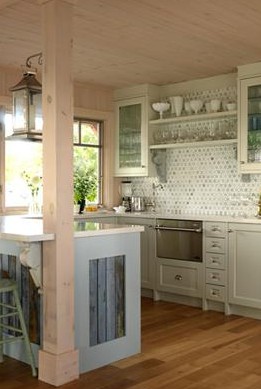
From Sarah's Cottage on HGTV

1. Collect images you like of kitchens, appliances, details and colors

Overall Look & Feel: One of the first things I gave Andi to look at was a brochure from the Martha Stewart Living Kitchen Cabinets at Home Depot.  She loved the look of the “painted cabinets” (they are not actually wood but some other man made product called “Purestyle”) and a simple framed door style . For some reason Home Depot doesn’t show very many photos of the Martha Stewart online, but they have a nice brochure at the store that I recommend picking up. One thing I will give Martha is that her taste in color is always spot on. The cabinet colors are the right mix of modern with a classic twist, so they will hopefully stay in style for quite some time.

Another kitchen that I think is a great inspiration is the kitchen from  Sarah’s Cottage (a really interesting show on HGTV where Sarah Richardson renovates her summer cottage).  In her large kitchen she uses 2 different color painted cabinets and an amazing tile backsplash. It has a nice mix of vintage paired with modern. The website also conveniently lists the paint colors for the kitchen cabinets!

Ikea Tida Oak Upper Cabinet

Ox Hill Cabinet by MSL for Home Depot

Ikea Tida Oak Lower Cabinet

Cabinet Colors based on Sarah's Cottage

Cabinets: The challenge is to find a simple door style that is painted/can be painted that is affordable and has enough options and sizes to make the kitchen work efficiently.

Caesarstone in Pebble

Caesarstone in Misty Carrera

Counters: We started by looking at Quartz Options. These were my first recommendations because you get a durable surface that does not require sealing. Also granite requires looking at actual slabs to get a better understanding of the color variation.
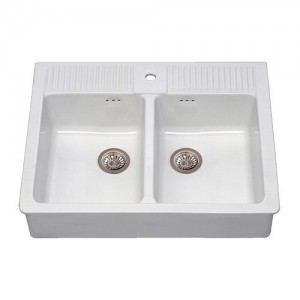
Ikea Domsjo Farmhouse Sink $312

Ikea Eleverdam faucet w/ pull out sprayer $179

Farmhouse sink: They like the classic look and good functionality of a big farmhouse sink.

30" Gas Range, Sears Kenmore Elite $1300-1700

Ikea Nutid Counter Depth Fridge $1399

Appliances: They also already have a pretty new stainless steel dishwasher, so it made sense to use stainless steel  for the fridge, range and microwave. Ikea’s appliances are made by whirlpool now, so it is more appealing to buy them with the cabinets. They also offer the least expensive counter depth fridge on the market. However I don’t like their gas range options. We have a Kenmore Elite range that we love. It has a lot of the features of a “professional” range like really powerful burners but is more moderately priced.

Biltmore Polished Marble Tile, The Tile Shop $13.99 sf

Marble Backspash, The Tile Shop $11.99 sf

The Backsplash: I LOVE the tile backsplash from Sarah’s Cottage. Unfortunately that tile is REALLY expensive. It is also probably a bit too busy for Andi and Neil’s kitchen. These are a few sample that I found. However these can’t be finalized until the counter is determined. The good thing is that these are one of the last things to be installed so we have time.

Coffered Beadboard Ceiling (from our Dining Room)

Ceiling: Andi wanted a beadboard ceiling (similar to the one we have in our Dining Room). Fortunately this can be installed fairly easily with beadboard (or beadboard plywood) and some simple pieces of lumber. Then it is finished with some small crown molding.

The Mood Board: I already showed this a few weeks ago but now that I have broken down the selections you can see how they look together. The final selections of some of the materials are a little different than shown, so you will have to stay tuned to see everything installed!

Mood Board

P.S. Stay tuned for some updated demolition photos!
Leave a comment

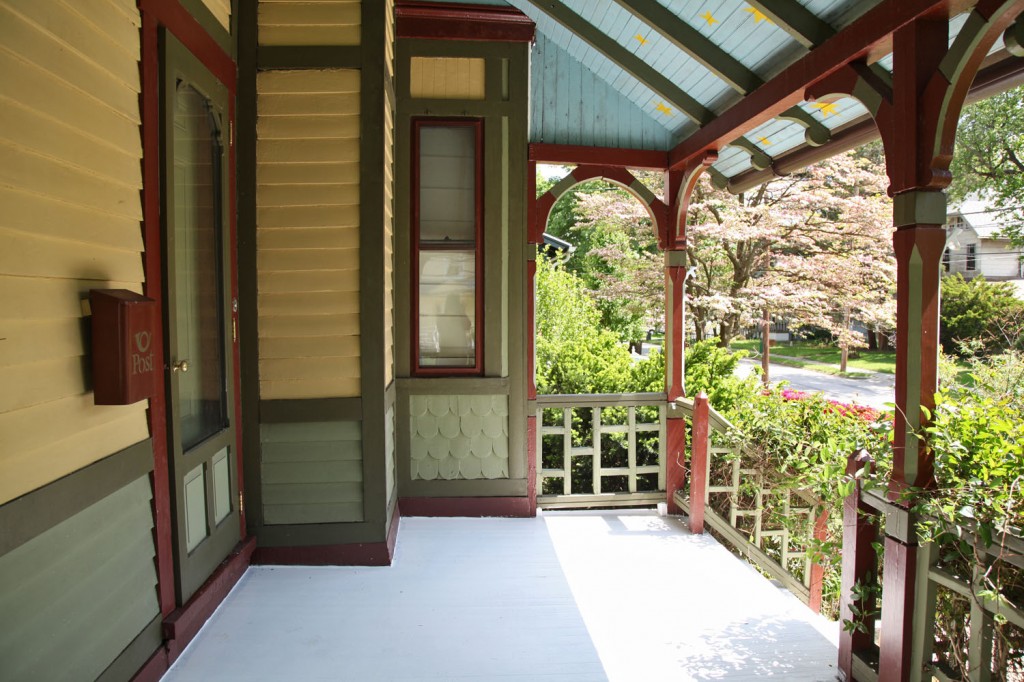
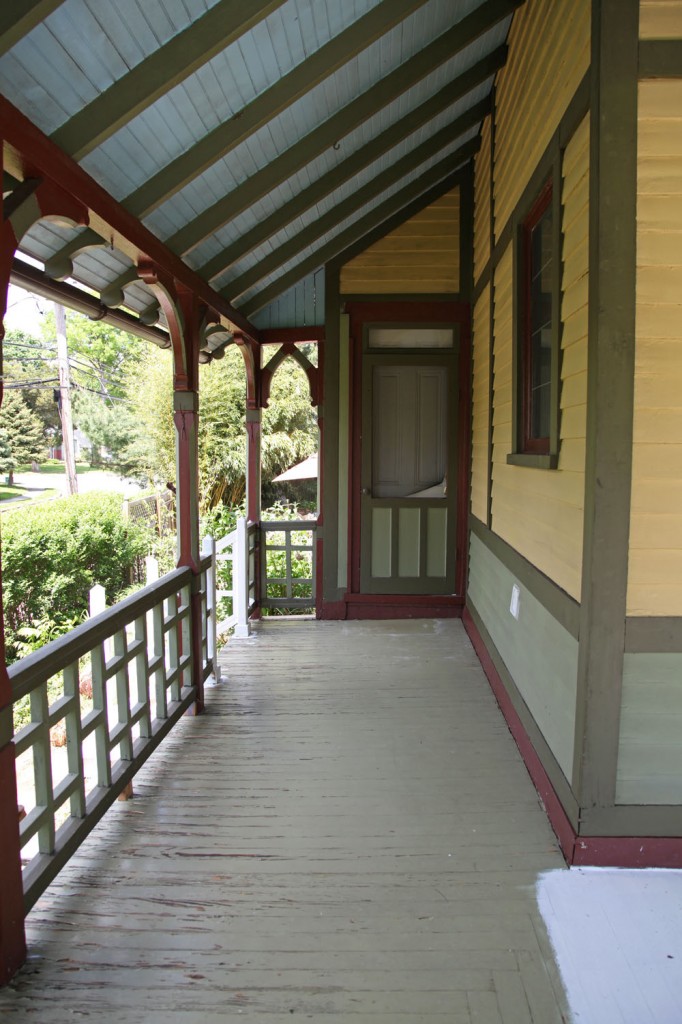
The guys are busy working on the porch again. If all goes well they should be done tomorrow. As you can see they are working their way from the front to the back. In the meantime, Mr. S cleaned the porch ceiling and walls yesterday. Both had a lot of dirt (thanks to the siding project and the road being redone). There was also some mildew in the higher areas of the ceiling.  Mr. S developed an interesting technique for cleaning the ceiling. We used stuff we already had on hand so the project was basically free.

Technique for Cleaning the Porch Ceiling

1. Purchase a deck cleaner or something similar that will remove dirt as well as mildew. Also purchase some foam bath cleaner that works on mildew (we used some scrubbing bubbles that we already had on hand).

2. Clear off porch.

3. Get hose ready with a nozzle that has a jet setting (we could have rented a pressure washer but I was concerned that it would hurt the pine beadboard)

4. Use a large broom that can attach to an extendable paint handle & large tub that will fit the broom

5. Mix deck cleaner in large tub

6. Wet down ceiling.

6. Use big muscles (this also works better if you are tall like Mr. S) and scrub the cleaner onto the ceiling with large brush

7. Rinse

8. Scrub again, this time leave cleaner on ceiling for a little while

9. Rinse.

10. For the areas that still have mildew, spray foam bathroom cleaner on brush. Then brush on and let sit.

11. Rinse. Remaining Spot should dry lighter.

12. Dry. Now our front porch smells like a freshly clean bathroom ; )

1 Comment

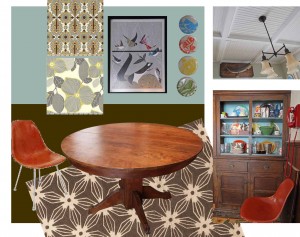
Mood Board: New items include carpet, fabric for valance, and wall color


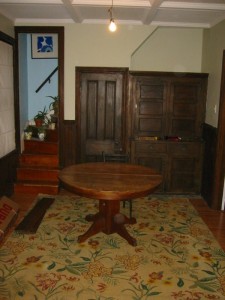
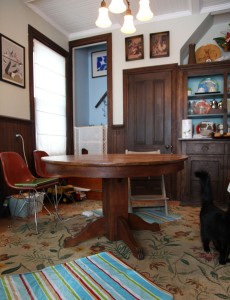
Dining Room circa 2007

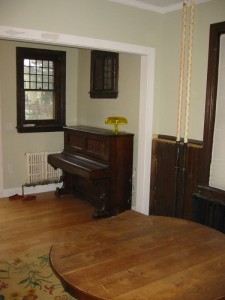
Dining Room looking towards back of house

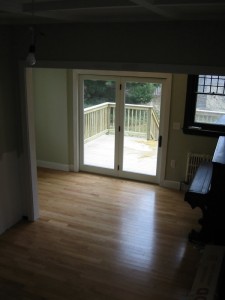
Looking from back stairs


2011-Dining Room (with splash mats)

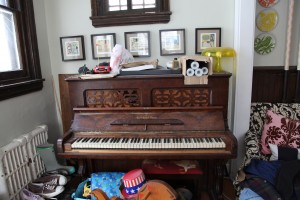
2011-The piano as dumping ground.


Our Dining Room/ Study/ Piano Room is in need of a little love. We renovated the former kitchen, ice box room and back porch into the Dining Room 4 years ago (while I was pregnant). This included opening up the back of the room to the former ice box room and back porch, adding a “bay” for our desk, putting in french doors and replacing the wood floor. We had a contractor do the big stuff, but we designed and built the beadboard ceiling, we replaced missing wainscot, built a desk and we painted the room.  We were excited to have a functioning Dining Room again but never got around to making it everything we wanted. Now with 2 small kids, we needed to rethink the space.

Stats:
The “room” is actually 2 rooms divided by a large opening.
-Dining Room: 11’x10’6″
Uses: Dining, Arts & Crafts, Circulation, Storage
-Study/Piano Room: 7’x14’L
Uses: Desk, Piano Playing, Toys, Entrance to the driveway, Shoe Storage

Current Problems with the Space:
-Lack of cohesion between the Dining Space and the Study/Piano Space
-The Study/Piano Space is feeling cluttered, especially with the kids toys and shoe pile
-The rugs are looking pretty shabby (the floral sisal rug in the
dining room is 10 years old and is showing its age)
-The Ikea shades in the Dining Room are torn from the kids & cats. Plus we had to cut the cords on the back because of a recall.
-No shades in the desk area

Goals:
-Find a rug with an interesting pattern, that is continuous between the 2 spaces
-Repaint the walls a more saturated color
-Find a window shade solution, that minimizes the view to the
neighbors house but still lets in light. Use coordinating shades for
the desk area.
-Find more storage  for kids toys, arts & crafts & office related items
-Refresh the colors and artwork in the spaces

Leave a comment