Birthday

July 9, 2012 — 2 Comments

So today is my birthday. I am feeling a bit tired after a long weekend of running around. I also have lots to get done today, but I feel very blessed to have such loving family and friends. xoxo

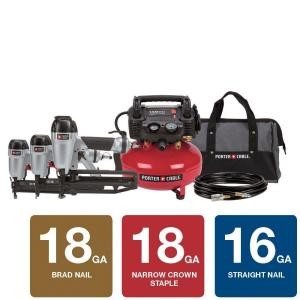
Mr S. let me open my presents yesterday. We have already made use of the ice cream maker (I am in love with Buttermilk Ice Cream) and my big present is an air compressor and nail gun kit by Porter Cable. I haven’t taken it out of the box yet, but I am already imagining the projects I can take on with it, including trim and uphostery. Does anyone have any tips for using an air compressor nail gun? I have only used the ones with the cartridges before (which I find too loud and heavy to use regularly).

2 Comments

Sarah’s House Currently

I first spoke to Sarah about her front steps last year when we were working on her bathroom. She was looking for low maintenance, pretty front steps to replace her old steep concrete steps.  We then had a few discussions about her front yard and steps over the past year. We tend to have periodic discussions on and off about things before a decision is ultimately made, with some pinterest thrown in for good measure. Although once she makes up her mind, she is all in, which I really admire. Below are the main issues that needed to be addressed on the front of house to give it the curb appeal that it deserves.

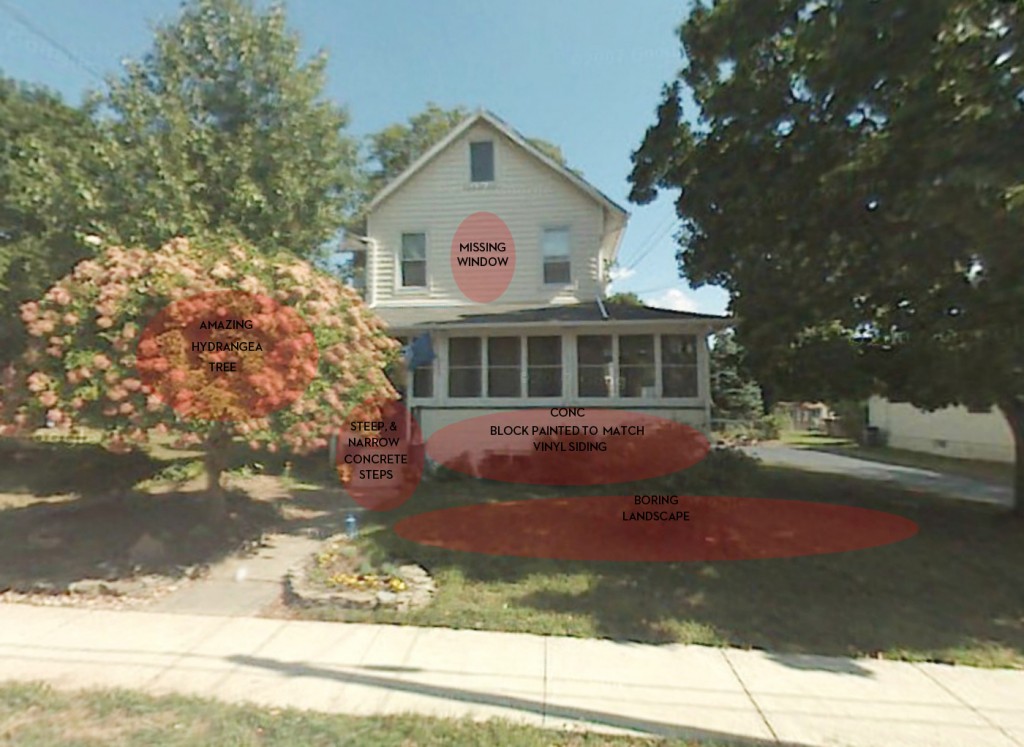
Sarah’s House before with Areas for Improvement

Areas for Improvement

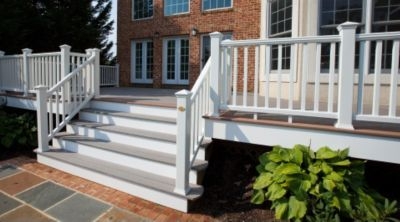
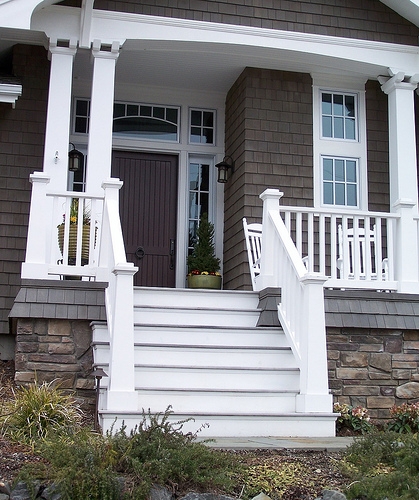
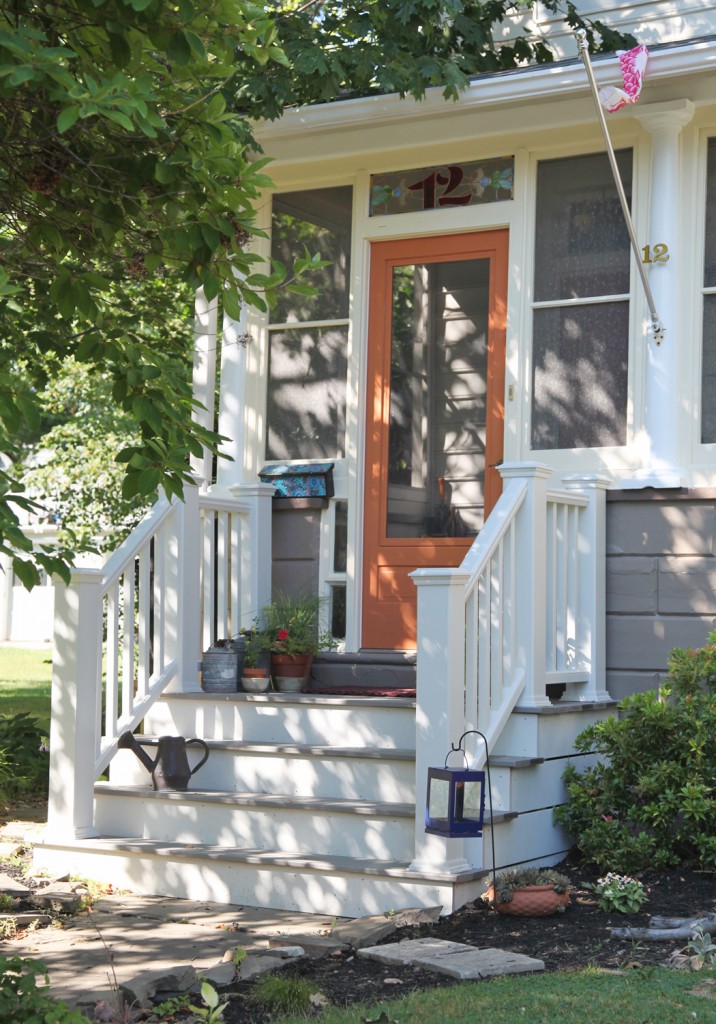
1. Front Steps: The old steps were not only not very attractive but they were also not very safe. She was looking for low maintenance. When we first talked she was thinking about slate. The problem with slate in this part of the country is that it needs to be resealed frequently and you can’t use salt on it. They are also quite expensive and require a lot of construction work and digging. Then we discussed more of a “porch” look but she didn’t want to be repainting it frequently. After several months the idea of trex decking came up. She liked that idea a lot. So I went to look for inspiration. Here is where I started:

From Trex

Fortunately Trex and several of the other manufactured wood products have come a long way. They now offer railing options with hidden fasteners and nice detailing. It is not cheap, the material cost is 2-4 times the cost of wood, but it won’t require maintenance, which in a southern facing location like this would be frequent. Fortunately Sarah was looking for a simple gray flooring and white railing and vertical pieces, which are standard colors.

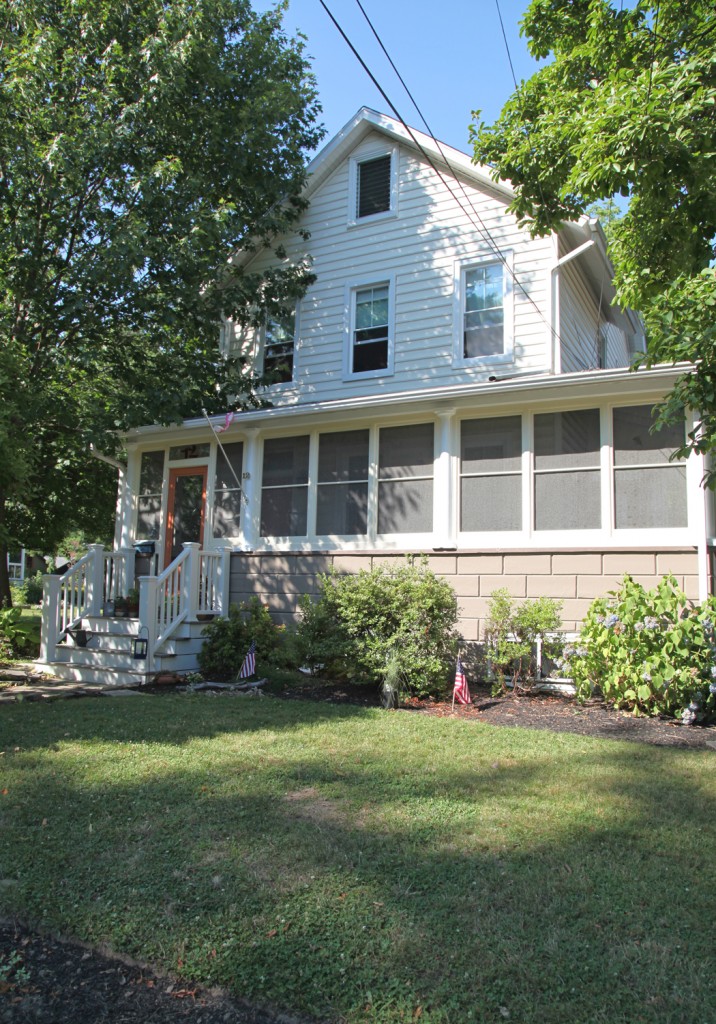
Sarah’s Front Porch

We designed the stairs to fit comfortably in board of the two adjacent columns. This gave enough space to have a comfortable landing along with space to accessorize. Fortunately Sarah was quick to add some lovely details like a couple of vintage watering cans and some bright annuals.

2 Paint: The house has lovely round columns, but they were in need of scraping, patching and paint. They were painted the same color as the surrounding trim, so they disappeared into the screened porch. Also the concrete block front 0n the existing porch was painted the same white as the columns and trim with a strange green stripe on top. I thought this brought too much attention to the block, which I wanted to be more recessive. Also a darker color would help ground the house, have it blend with the screens above and provide a better backdrop for the new plantings. The main body of the house has vinyl siding in a creamy white-yellow. It is fairly new (installed by the previous owner) and in good condition so it had to stay so the color palette had to work with it.

New Paint Color Scheme

The cream (Cream Puff from Behr was used on the columns) now works with a color palette that is more interesting and cohesive. The bright white adds a nice freshness, along with the light pumpkin colored door. Meanwhile the warm gray grounds the house just like I hoped. This will make a nice backdrop for the new plantings.

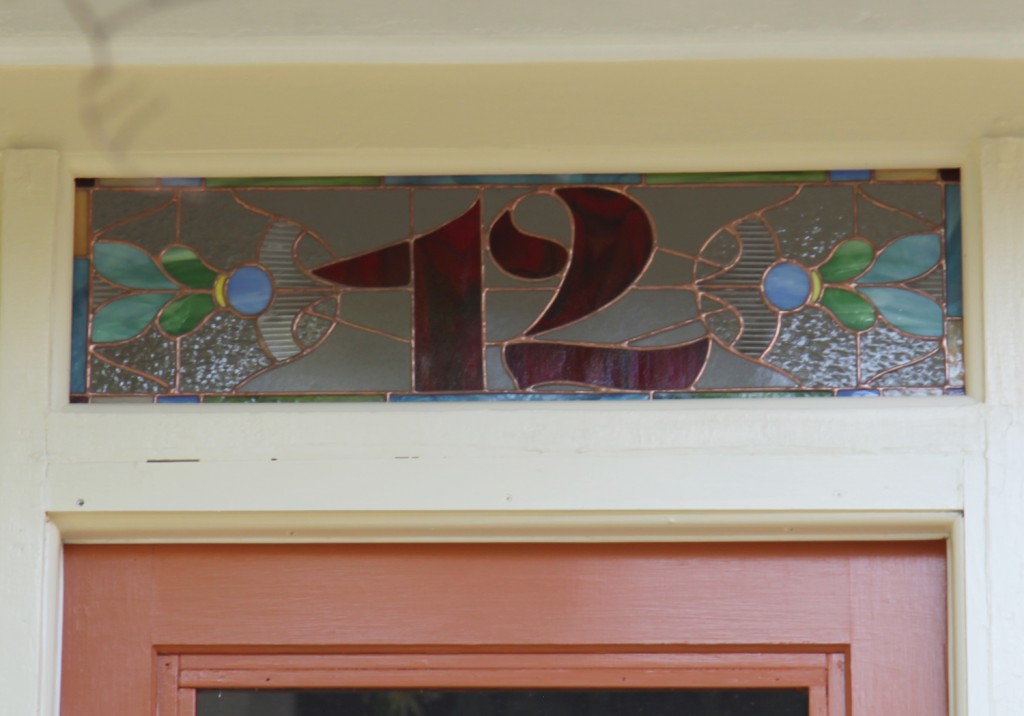
3. Windows: The previous owner added new vinyl siding over some old and dilapidated diamond asbestos shingles. This was an improvement, but installed less than ideal vinyl windows. Sarah has since replaced the windows that face the front with a higher quality window with historically accurate 2 over 1 pattern. While she was at it, she added the long missing middle window on the second floor. This made a major improvement to the front facade. She also had an artist design new stained glass numbers for above the door.

New Stained Glass Above the Door

I really like that the glass style has hints of Victorian but paired with a more modern font style.

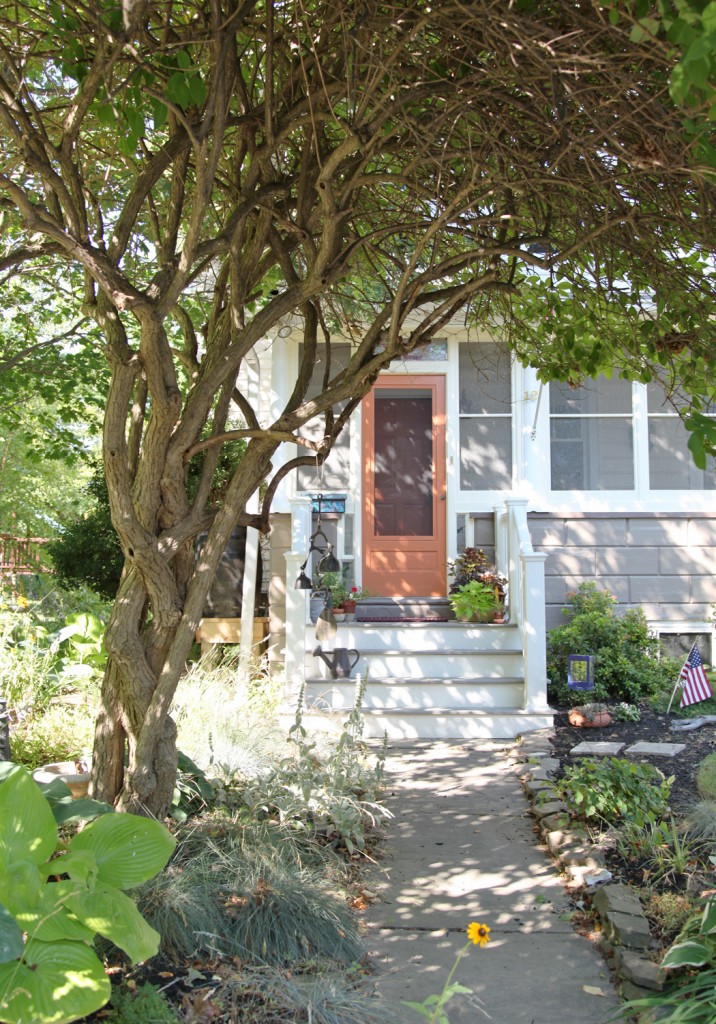
4. Plantings: Sarah has also been spending the summer slowly removing grass in the front yard to create a lovely cottage garden. She was fortunate to start off with a stunning hydrangea tree. It frames the front entrance and adds so much character. It has to be at least 40 years old.

Sarah’s New Front Entrance w/ Hydrangea Tree

She is infilling with a mix of classic cottage perennials such as hollyhocks, daisies and coneflowers. She is also mixing in some grasses, which give nice volume when the perennials are not in bloom. Her shade garden under her hydrangea also has a lovely mix of hostas, ferns and shade loving low grasses.

The curb appeal on her house has gone through the roof and I smile whenever I pull up.

I hope everyone has a great weekend and stays cool! We are not looking forward to the heat and will most likely be hiding inside.

Leave a comment

Front Yard: It is feeling very “cottage garden” right now

I am having a bit of a post Fourth of July hangover. It has been HOT here, so I have been bad about photographing the garden. Fortunately there are still some flowers blooming!

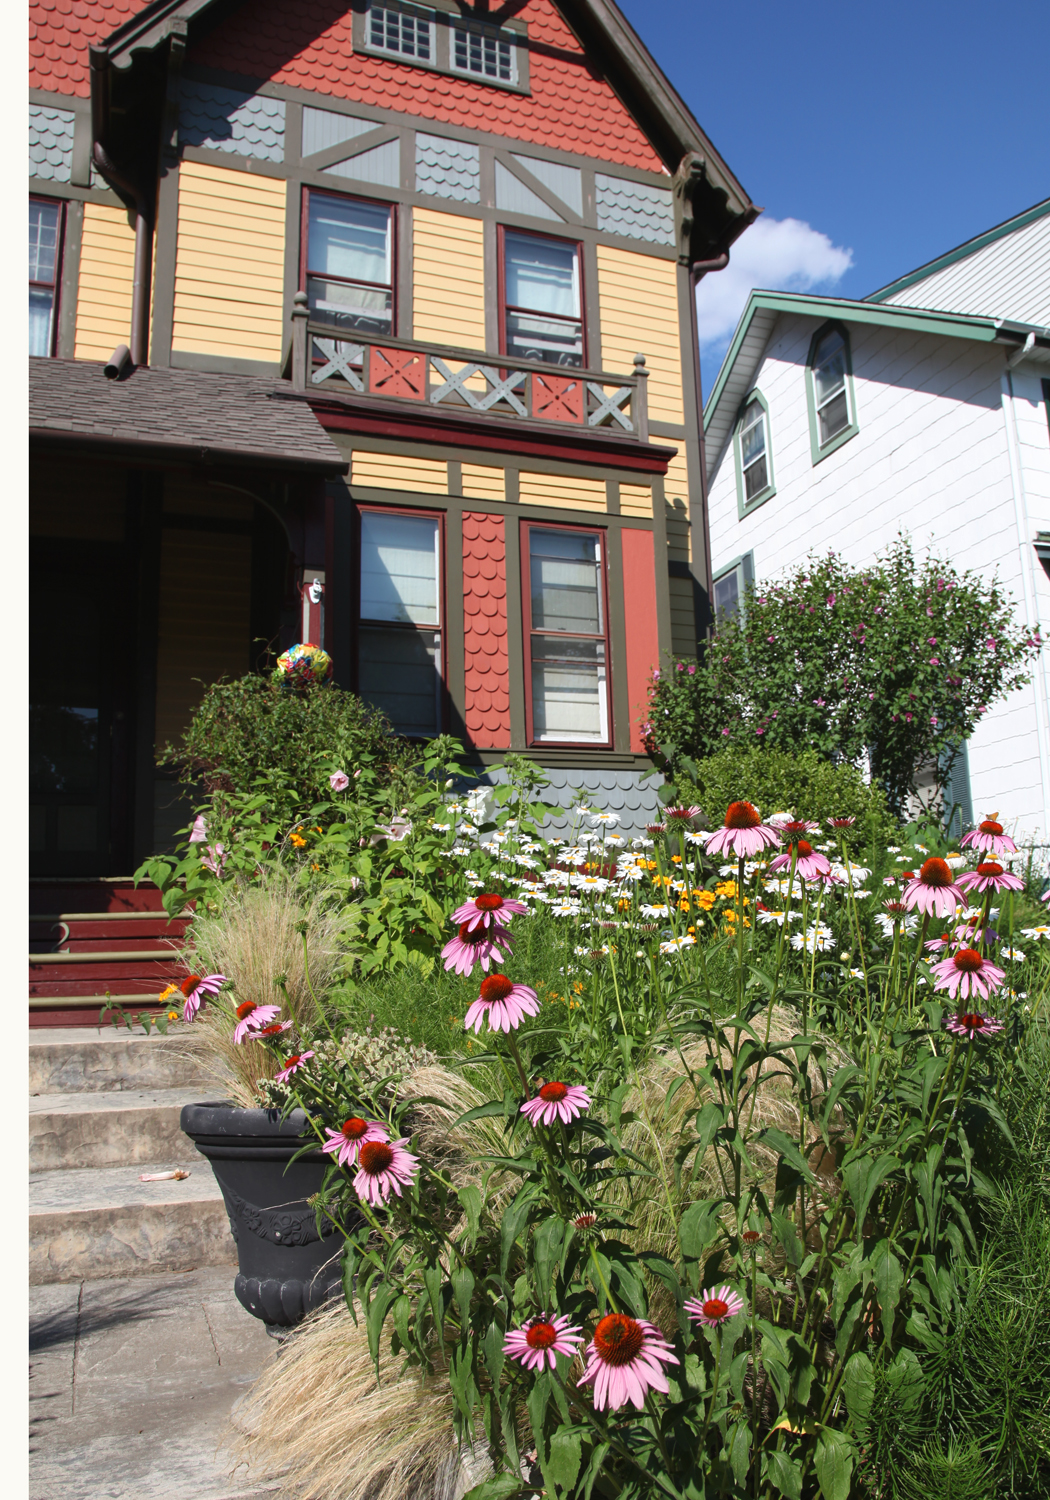
The super sunny front garden is in its summer glory. The coneflowers, daisies and hardy hibiscus could care less that it is literally 100 degrees out. There is definitely something to be said for native plantings.

Hardy Hibiscus Disco Ball

Balloon Flower (short variety)

Red Beebalm

My hardy hibiscus is back and beautiful. These grow quite well from seed. If anyone is interested in any seeds, let me know. I have found planting them in the ground rather than in a pot is the most effective way to grow these. They are perennials, although I have noticed that some of the older plants (4-5 years old) don’t do quite as well. Fortunately I have a lot now thanks to reseeding them. The flowers are large (7-8 dia) and although each one only lasts for a day, they are so stunning!

My balloon flowers are mostly in the backyard, but these are another flower that will self seed nearby (no need to do it yourself). I am not sure which variety this is, but I do know that it is one of the shorter species. I have a neighbor who has the taller (24-36″ tall) variety and he always has to stake them. Mine are only about 6-12 tall and work well at the front of a planting bed. My only word of caution is that they come up LATE. I have more than once dug them up accidentally thinking that there isn’t anything growing.

My bee balms are blooming in all their weird wonderful glory. These are a little aggressive with runners, so I try and keep them by themselves since they have been known to take over beds. They tend to grow into our lawn, but Mr. S. just mows them over and enjoys the nice scent. These are supposedly good for making tea (but I haven’t tried it).

Red Lily

Ruffled Peach Lily

My Little Helper

The lilies are still going strong. I don’t know the varieties of either of these, but the ruffled peach one came from a grower in SC from my inlaws.

Maisie was “helping” when I took the pictures and asked if she could be included. How could I say no to my favorite flower of all?

I am still working on my post of Sarah’s front porch and yard. Hopefully tomorrow I will be finished. I am trying to spend some time highlighting the changes in detail. Can’t wait to show it to everyone!

2 Comments

Margaret’s Revenge! The pirates are ready to board the other floats.

We decided to have a pirate themed fourth this year. Sam says that pirates are patriot. Who knew?  I hope everyone has a great day and Happy Birthday to America!

We reused our boat from last year’s parade (George Washington crossing the Delaware) and added some cannons and port holes.

Pirate Maisie

Pirate Sam

Happy Pirates

More Happy Pirates

Sweaty Pirates!

Argh America!

Leave a comment

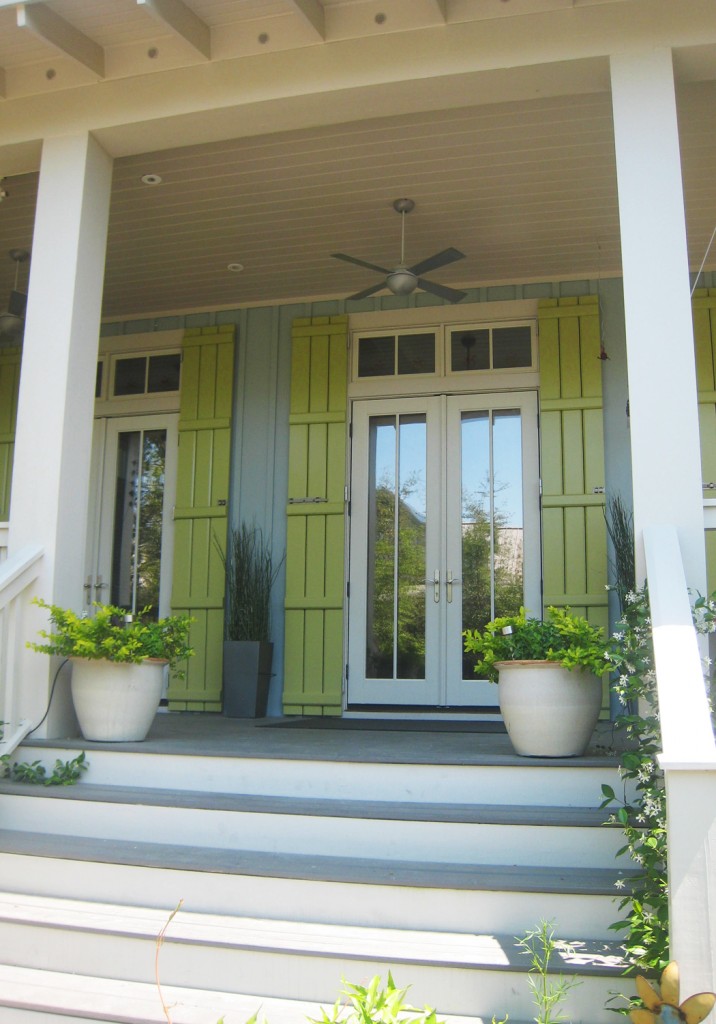
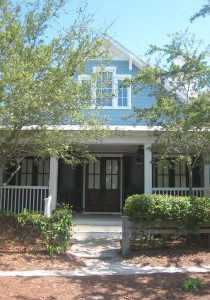
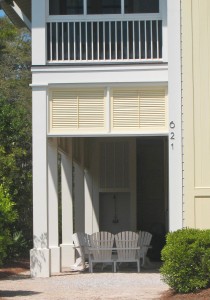
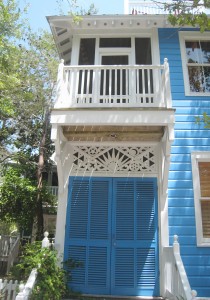
Blue-Gray Vertical Siding Paired with a Citrus Green Shutter and Creamy Trim

I have some new photos of Sarah’s new front steps and paint job to show off tomorrow, but before I do that I thought I would share some more cottage inspiration from our vacation to Seaside and Watercolor Florida (some of which I used for inspiration for her new front steps). So without further ado here is some more summer cottage inspiration. I think the one above is my favorite. The subtle blue-gray paired with the bright citrus green is really striking.

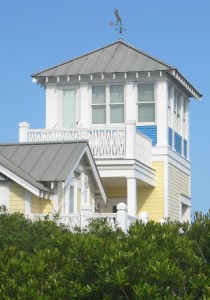
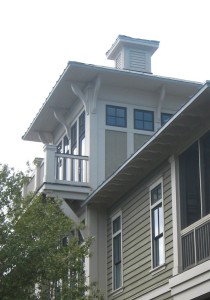
Cottage Towers

Yellow tower

Tower w/ balcony

Tower w/ balcony

4 Story Tower

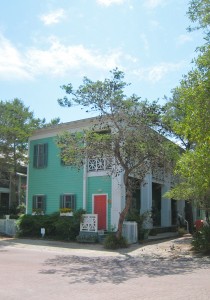
Aqua Tower

Roof Trellis/Arbor

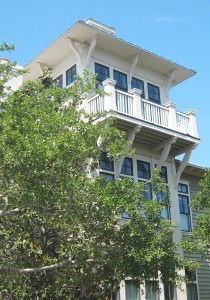
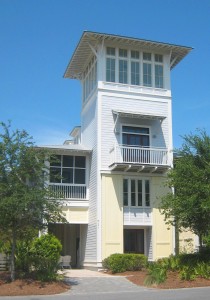
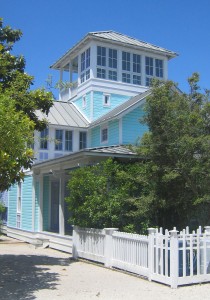
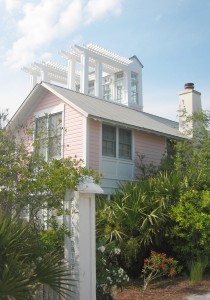
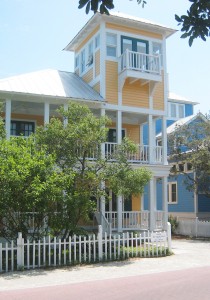
Seaside is famous for its new urbanist style and planning. Part of this plan included detailed guidelines for the houses. The guidelines actually encouraged interesting designs including the use of towers. These are a few of my favorites, but they are all over the small town.

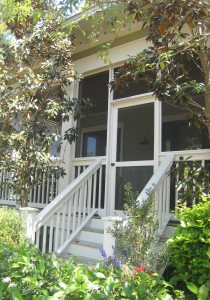
Porches

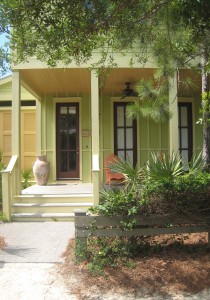
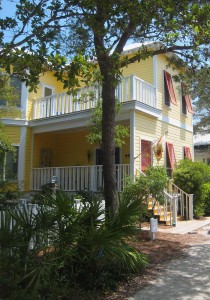
Yellow Cottage w/ Lime Green Shutters

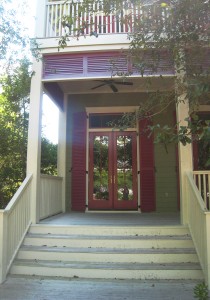
Olive Green Cottage w/ Rasberry Shutters

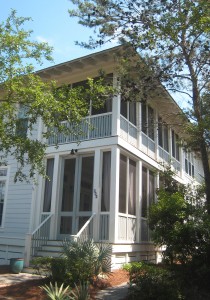
Two Story Screen Porch w/ gray-blue paint scheme

Symmetrical Cottage Porch w/ blue and white paint

Nicest Carport Ever used as a Covered Patio

Screened-in Porch w/ Lush Landscape

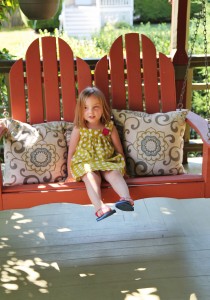
These porches are so PRETTY! I can’t get enough of them! Of course I am bad about actually sitting on our nice porch. I think I need to make it more of a priority to sit on our porch swing.

I will leave you with this last one, another one of my favorites for its more rustic design.

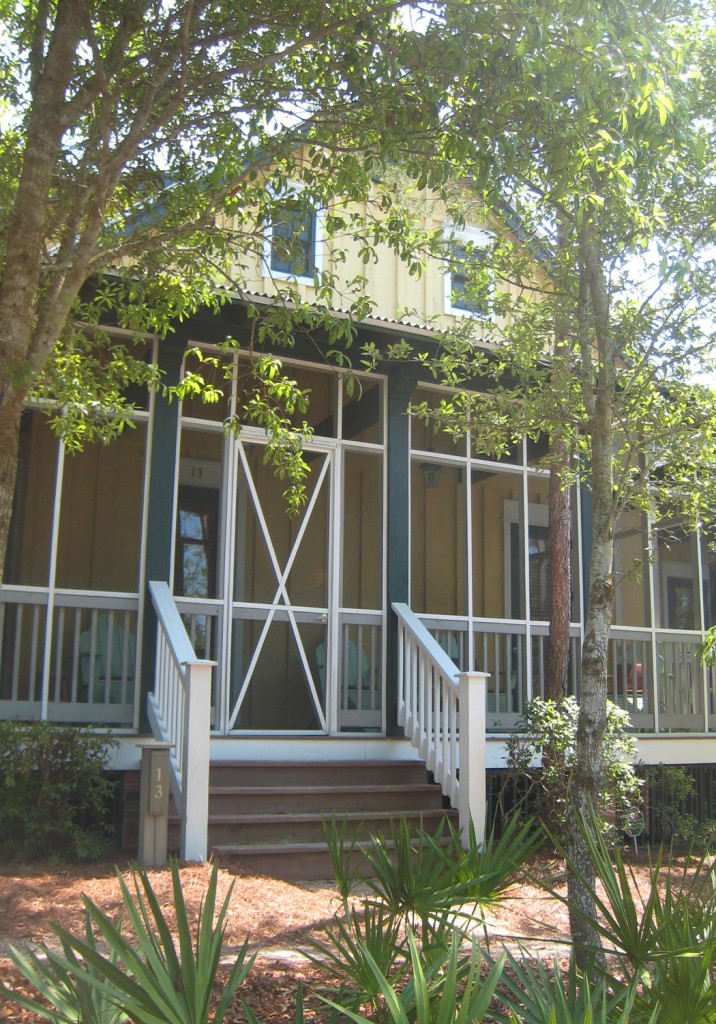
Nicely Detailed Screened-in Porch w/ yellow and green paint scheme and corrugated metal roof

For more cottage inspiration click here.

1 Comment

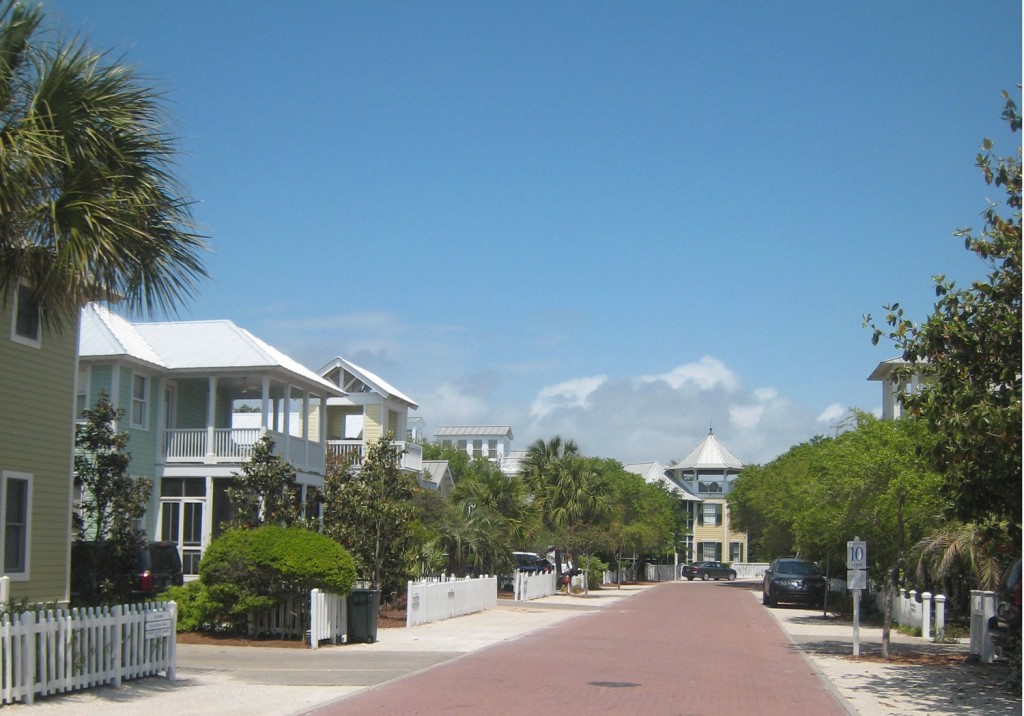
Beautiful Street in Seaside Florida

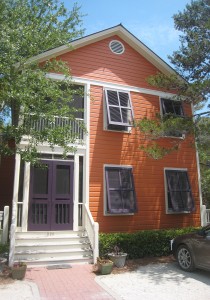
I just remembered that I had never posted up the cottage pictures that I took while on vacation of Seaside and Watercolor Florida. So in honor of summer I thought some lovely beach cottages were in order. Enjoy and stay cool!

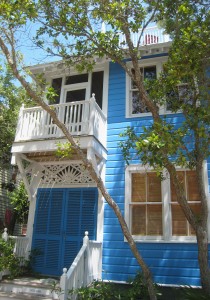
Bright Blue Cottage

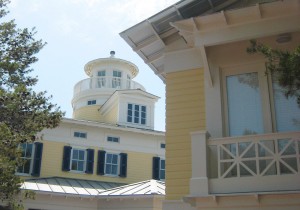
Love the Balcony & Woodwork

Yellow Cottage w/ Red Shutters

Mint Green Cottage

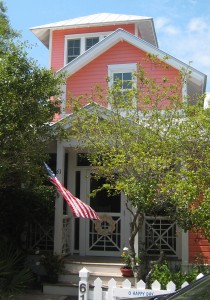
Pumpkin Colored Cottage

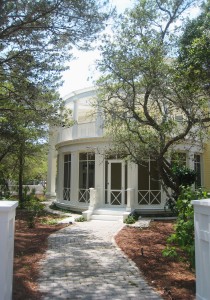
Beautiful Round Porch

Large Cottage w/ Cupola & Balcony

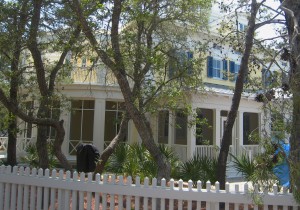
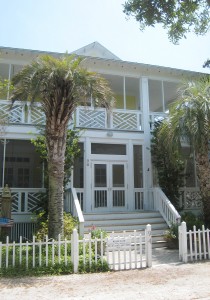
Yellow Cottage w/ Picket Fence and Porch

3 Story Yellow Tower

2 Story Screen Porch

Melon Colored Cottage

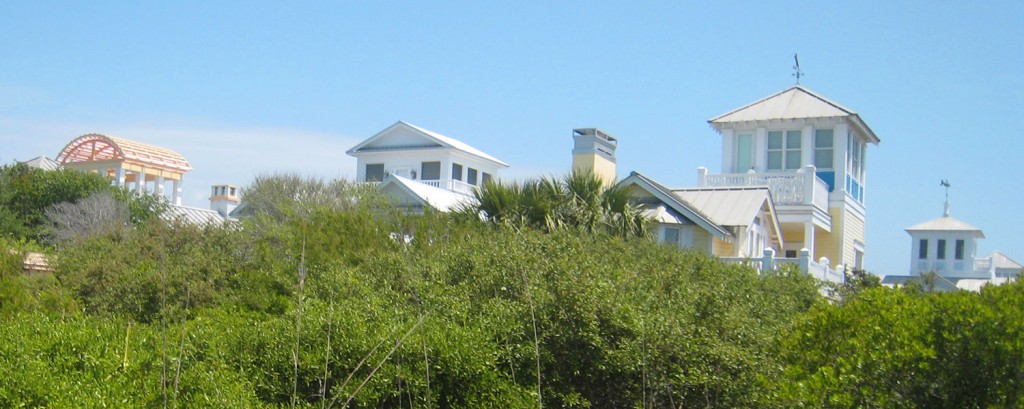
Towers of Seaside in distance with native plantings in foreground

I hope everyone has a lovely relaxed summer weekend.

2 Comments

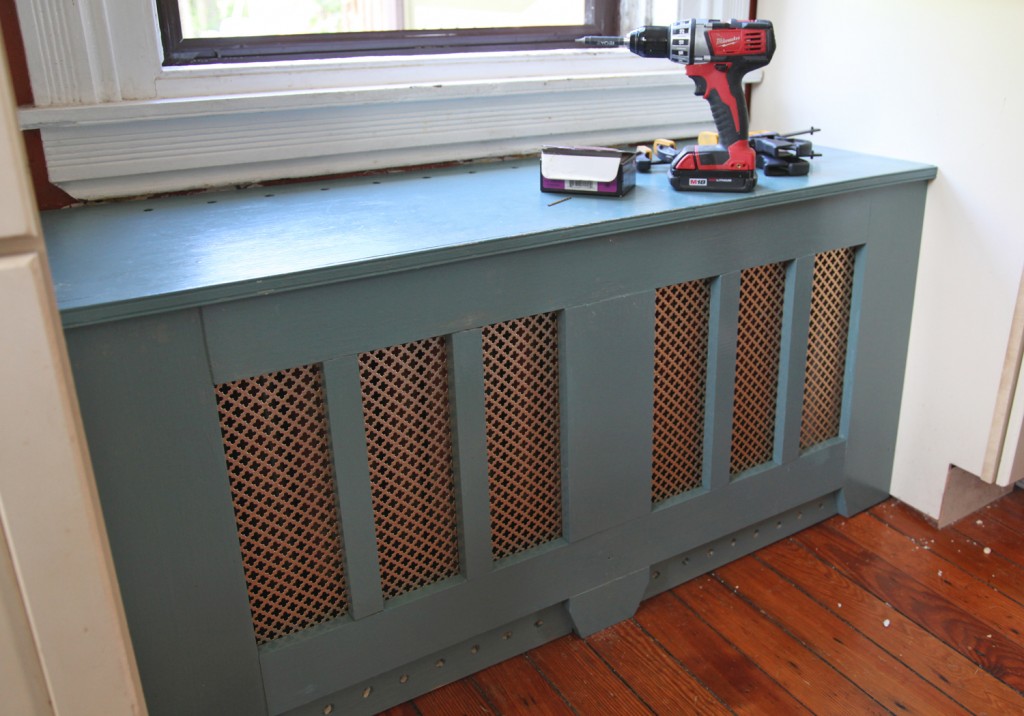
Radiator Cover & Bench after Repairing and Fixing it

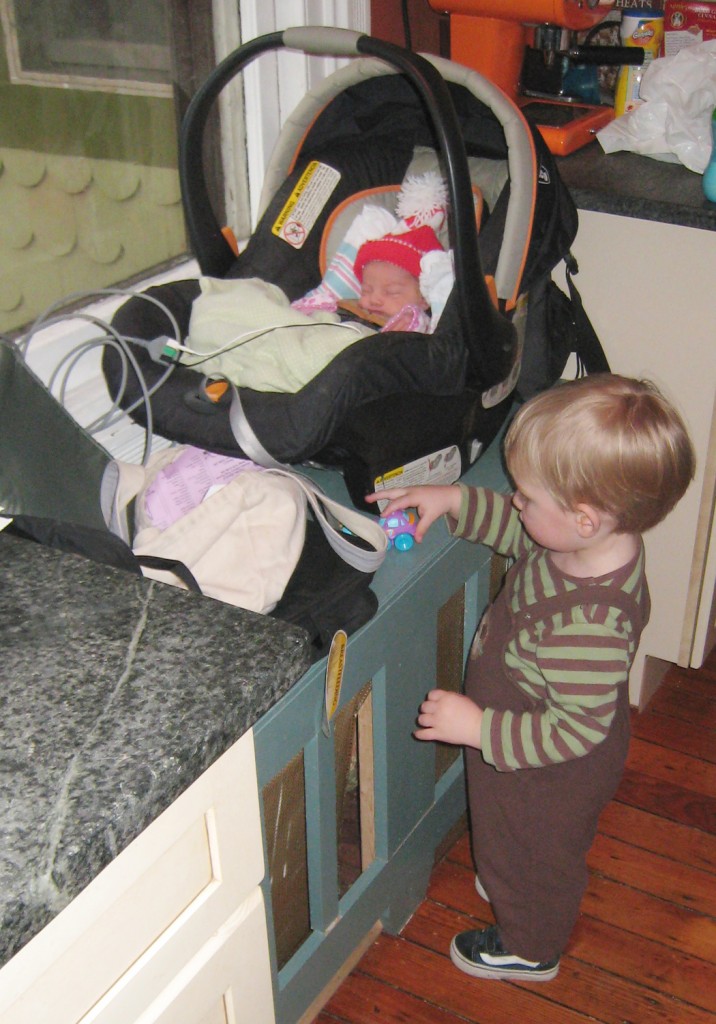
One of the things I wanted in our kitchen when I was designing it 6 years ago was a window seat. I think I looked at too many interior design magazines where I saw kids sitting happily on the window seats while their mom’s cooked. Well, I managed to fit one it, which was great. And I have to say I really do like having a place to sit while we cook. It has been used everyday since we put it in. It was where the babies took naps in their carseats, where they play with their toys and where they spend lots of time looking out the window. It is also a favorite spot for our cats (especially in the winter when the radiator is going).

Maisie in her carseat sitting on the bench  the day she came home from the NICU with Sam

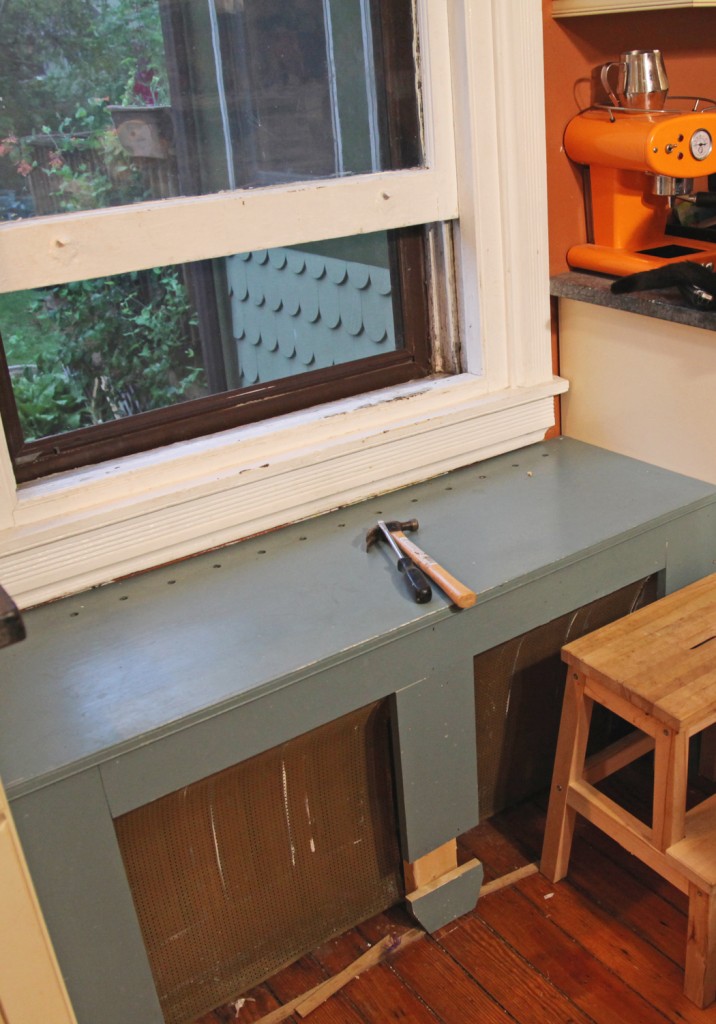
We installed an old giant radiator underneath the back window it to heat the room (and replace 2 smaller ones that were in the way).  It also meant that we could keep the large window that overlooked the backyard (something I was pretty adamant about), while replacing the windows that faced the road with smaller windows that allowed for more counter space. When I made the cover I was in a bit of a hurry. I think it was before a holiday. Anyway, I made a 2×4 structure with various 1″ thick poplar pieces for the face. We also installed bronze grill in between the finished wood and the backup structure to hide the radiator. While the backup structure was screwed in, the cover pieces were nailed and glued. This held up fine until my kids started walking, since then it has been taking a beating from both kids and it didn’t pass the test!

Bench earlier this month before fixing it! (the extra pieces were in a box in the Dining Room)

It has been deteriorating for the past couple of years, as I tried to ignore it (and even managed to keep it out of the photos). Well with Sam’s Party approaching we put it on the list of items to fix. The good news is that my wood working skills and tools have improved since then! So I was able to take the pieces and reassemble them using my Kreg tool. Then I bought new bronze grill and added extra wood at the bottom to provide some extra structure.

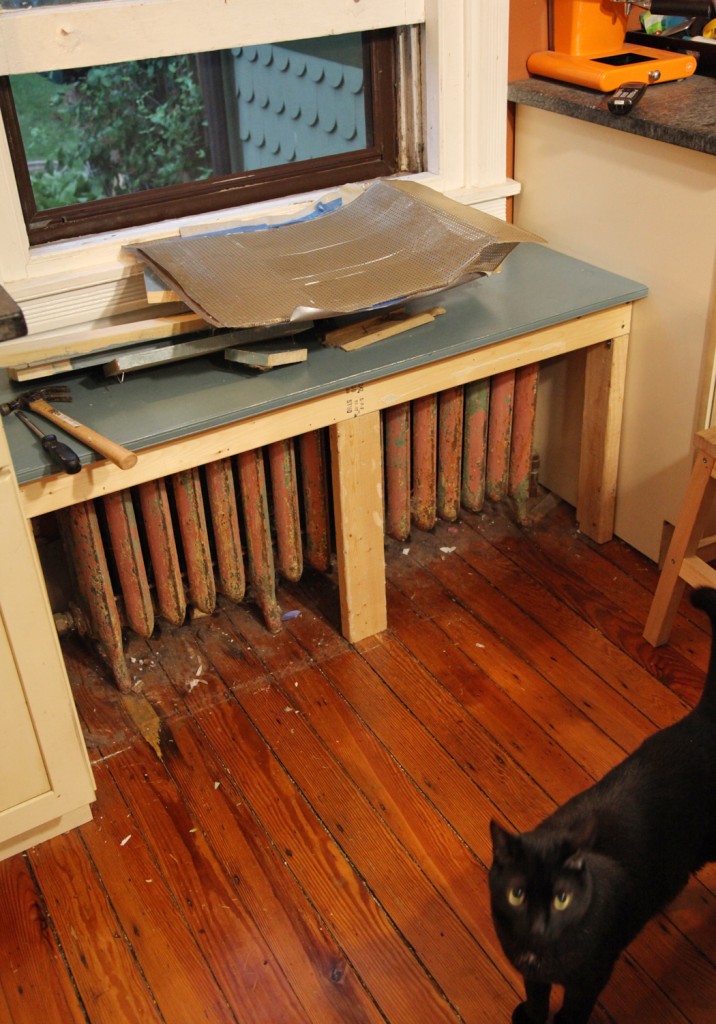
Bench striped back to its structure (with Spike)

I took off the remaining pieces (which took about 10 minutes). Spike our cat was very suspicious. I then took out all of the old nails and screws. While I was at it I added a couple of extra screws to the back up structure.

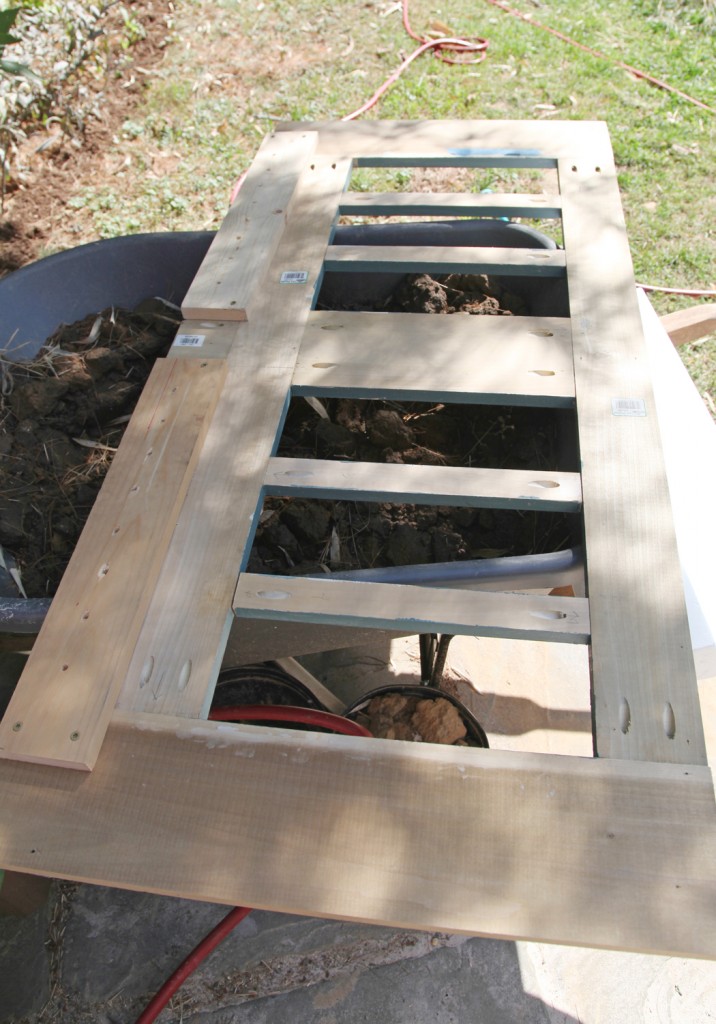
Bench front after installing pocket screws using the Kreg tool

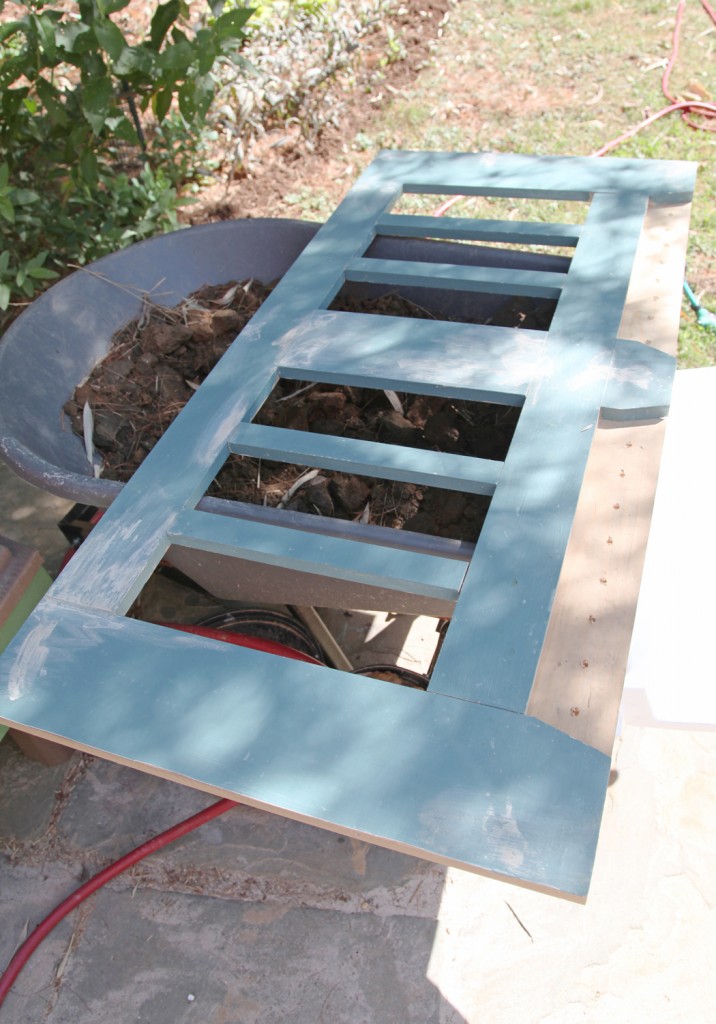
Previously I had installed the pieces 1 by 1 onto the frame. This time I decided to make the frame one rigid piece with pocket screws (and the Kreg tool). As you can see, I used a LOT. I really don’t want this falling apart again. I also added 2 pieces at the bottom (with holes) to make it more rigid and prevent the kids from kicking the bottom of the bronze lattice. After this I tested to make sure it would slide into place (which it fortunately did).

Then I patched and painted the front (the same color as before so 1 coat was enough).

I patched and painted the front (which I had previously done it place). It was a lot easier to paint this before installing the bronze lattice. Plus the off-gassing from my old school oil paint was done outside.

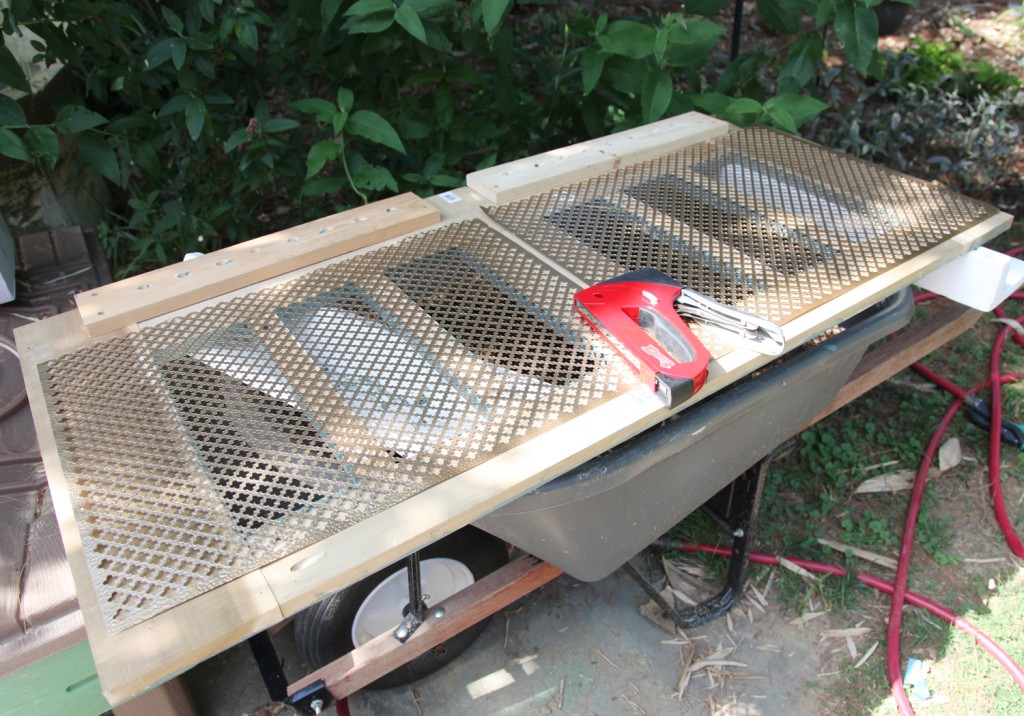
Stapling the bronze lattice to the back

After it was dry I flipped it over and installed the bronze lattice. We choose a quatrefoil pattern (from Killians Hardware in Chestnut Hill). I used my staple gun with 1/2″ staples and went to town. I used a LOT of them in both directions (I REALLY don’t want this come apart again). The good news is that this new lattice is stiffer then the old sheet, so hopefully it will hold up.

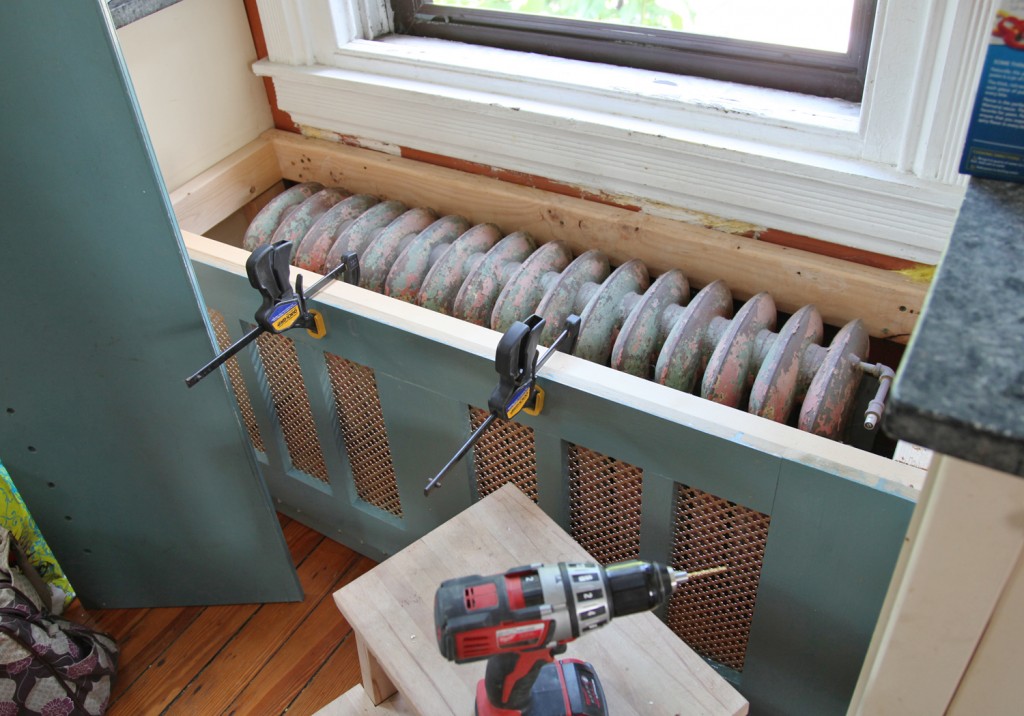
Reinstalling the front of the bench

Then I reinstalled the bench. On the top I screwed it in from the back. Towards the bottom I used several screws and countersunk them. The top has always been removable (to access the radiator).

Radiator Cover & Bench after Repairing and Fixing it!

So there you have it! The project took several hours over about 5 days. I don’t think I spent over an hour on it any one day. The new lattice is really nice (the photo doesn’t do it justice). Hopefully this one will hold up until the kids are old enough to fix it themselves.

Leave a comment

Sam’s Top Chef Birthday Invite designed by Mr. S.

This was our first time hosting a kids birthday party. Sam first requested his Top Chef Birthday Party after seeing an episode last fall. We thought that sounded like a fun idea and have spent the last few months mulling it around in our heads. I thought I would give you some of the highlights. I won’t lie, it was a lot of work, but Sam had a great time and was super excited to have his friends over (including both his preschool classmates, his Friday friends and neighbors). Unfortunately, we didn’t get as many pictures as I would have liked because we were so busy. Mr. S. tells me that it is more important that Sam and his friends had fun then getting good photos. I agree in principle, but I am a little sad that I don’t have better pictures of some of the activities and the awesome food and aprons that the kids made.
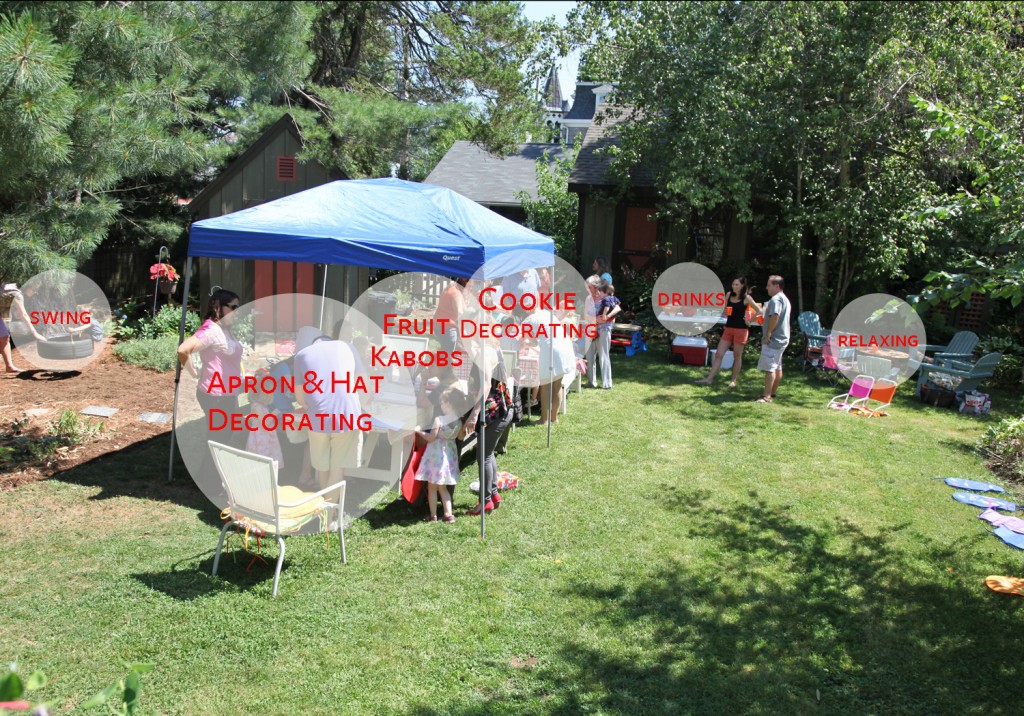
Backyard Set up with Activities

The Plan

I wanted to create several activities for the kids. Given the number coming I thought it would make sense to divide them into 3 groups of 8-9 kids and then rotate them after about 15-20 minutes. After the activites, the kids would eat the lunch they made and have cupcakes. We decided against having an actual competition, to avoid hurt feelings. There was one request to be Padma though.
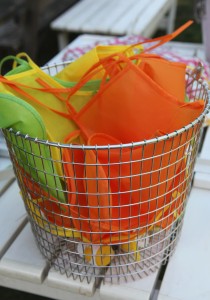
Kids Aprons

1. Decorate Aprons & Hats: I thought this would be a good activity while we waited for everyone to get here. I bought the hats and aprons from Oriental Trading. I also picked up puff fabric paint and markers from the craft store.  One thing I hadn’t accounted for was the paint drying (especially in the warm sun). Most of these ended up drying in the sun for the rest of the party. I also bought a bunch of foam stickers for the kids who didn’t want to paint. I bought pirate stickers, so not surprisingly most of the boys used markers and stickers and most of the girls used the glittery puff paint. Fortunately the aprons came in lots of colors, so everyone managed to get a color to their liking. A lot of the kids were not in favor of the hats (which definitely require additional double stick tape).
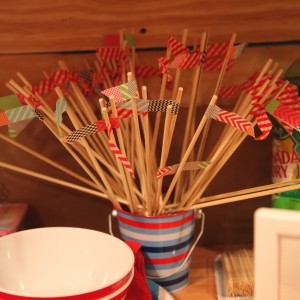
BBQ Skewers for Fruit Kabobs
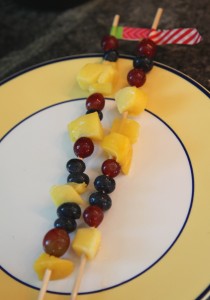
Fruit Kabobs made by Sam

Sam eating leftovers

2. Fruit Kabobs: I wanted to offer something besides just junk food (although plenty of sugar was eaten). So I decided that fruit kabobs would be fun. I used 12″ wooden BBQ skewers from the grocery store. To add some color and keep the fruit from sliding off I added “flags” made of washi tape. This also gave us a space to write the kids names. Then we put them on big platters w/ mesh bug covers. I choose fruit to have all of the colors of the rainbow: red/strawberries, orange/mangos, yellow/pineapple, green/green grapes, blue/blueberries and purple/red grapes. The strawberries (all 3 pounds) were the first to go.
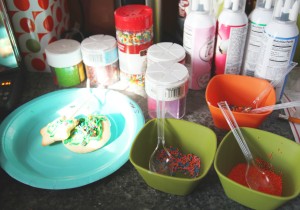
Cookie Supplies (after the party)

Maisie’s Cookies
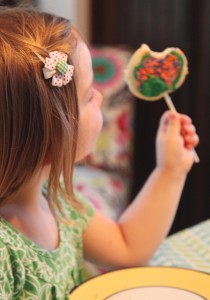
Maisie eating her creation

3. Decorate Cookies: I decided rather than a lot of favors, I would have the kids decorate cookies and then have them bring them home. I made the cookies on lollipop sticks. I made 3 varieties of sugar cookies: chef hats/cupcakes, stars and circles. I also made a frosting that hardened well in several colors, in addition to lots of jimmies, sprinkles and decorative frosting in a can. I also tried small chocolate chips but they started to melt so we had to give up on those. I made the cookies ahead. It was pretty time consuming (especially battling the hot weather to keep them from getting to melty).
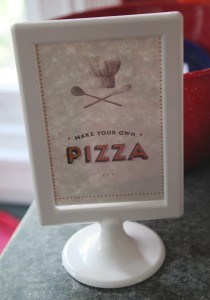
Pizza Sign

Pizza Making in Action
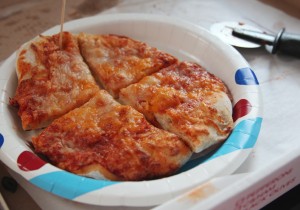
Maisie’s pizza
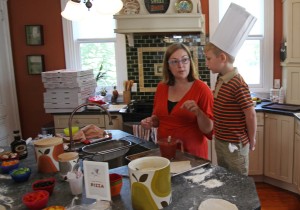
Sam & me working on his creation
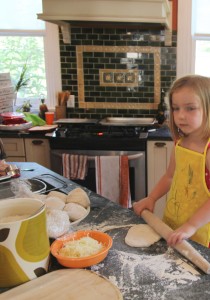
Maisie working on her pizza

4. Make Pizzas: This was definitely the most work and required careful timing, but I was really amazed at how well they came out. We divided each ball of pizza dough (from the local pizza shop) into 4 and wrapped each in plastic wrap the afternoon before. We preheated the oven to 525 about an hour before the party (and jacked up the AC). We were able to fit 2 pizzas per shelf (for 6 at a time). At that temperature they cooked in about 8 minutes. Given how some were full of sauce and thin and others were thick, I was pleasantly surprised at how well they all came out.  We offered tomato sauce, bbq sauce, mozzarella cheese, cheddar cheese, mushrooms, olives, red peppers, yellow peppers and green peppers.

Sam with his cupcake!
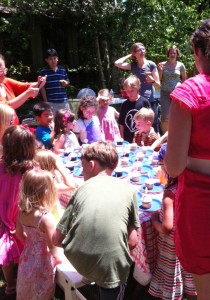
Sam with his friends

5. Eating:

After the activities were finished the kids ate (fortunately one of the other moms stepped in and cut all of the pizzas). While they were eating we packed the cookies up into bags and put out the duck favors. I used a fun circular punch for the thank you tags. Mr. S. designed them and printed them out on card stock for me. I used the same punch for name tags on the pizza (glued to toothpicks) and for cupcake toppers. On the backs of those I punched out colorful paper.
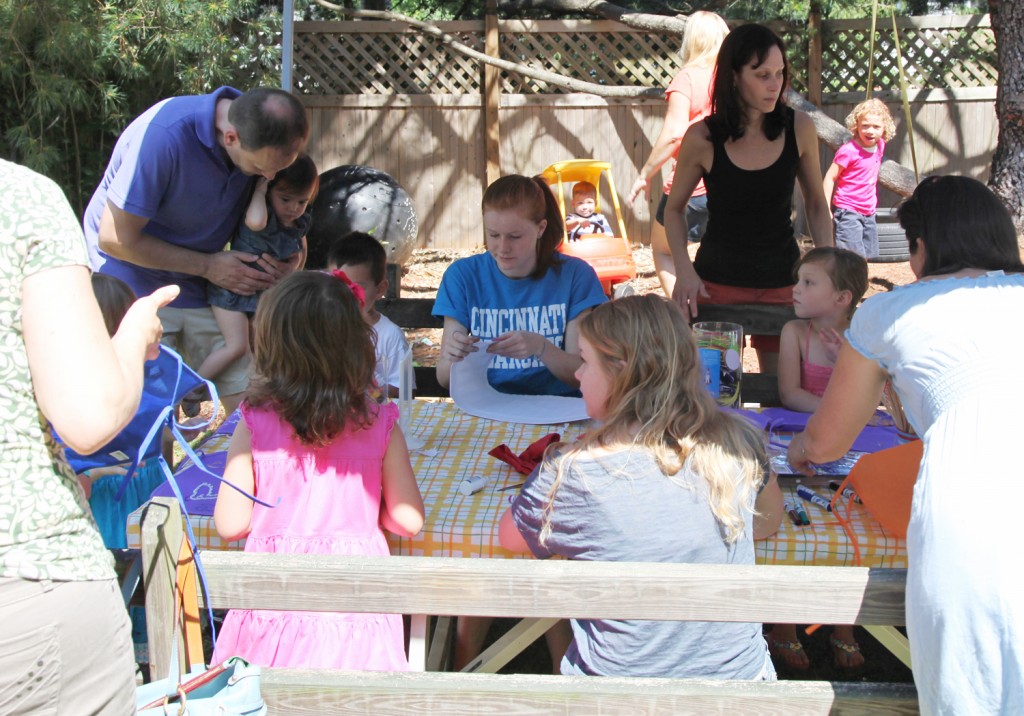
Apron & Hat Decorating

Lessons Learned

1. Get Help: It is a LOT of work to run a birthday party. We had one of the kids teachers help as well as 2 teenage girls (who babysit the kids). I put them each in charge of an activity while my sister-in-law and I manned the pizza station.  Mr. S. floated to keep an eye on everything and take pictures. In the future I think I would have assigned one of the other parents or an additional helper to take pictures. My helpers also stayed for a little bit after to help with clean up (which was definitely helpful).

2. Flexibility: The best plans require flexibility. I imagined that we would use a timer and rotate the kids at 15-20 minutes. In reality, as soon as they were done with an activity they ran to the next thing (or to play). I had to gather different kids to make pizza several times.

3. Timing: Younger kids tend to do well in the morning. We scheduled this party from 10:30-12:30. This worked out well because the kids tend to pay more attention this time of day. I think the 2 hours was just about right for the kids who ranged mostly from 2-5 years old. Much longer than this and they tend to get restless.

4. Have Fun: This is probably the hardest thing for me. I was worried about everything. But ultimately you are doing this for your child and they want to have a good time, and part of that is sharing it with you.
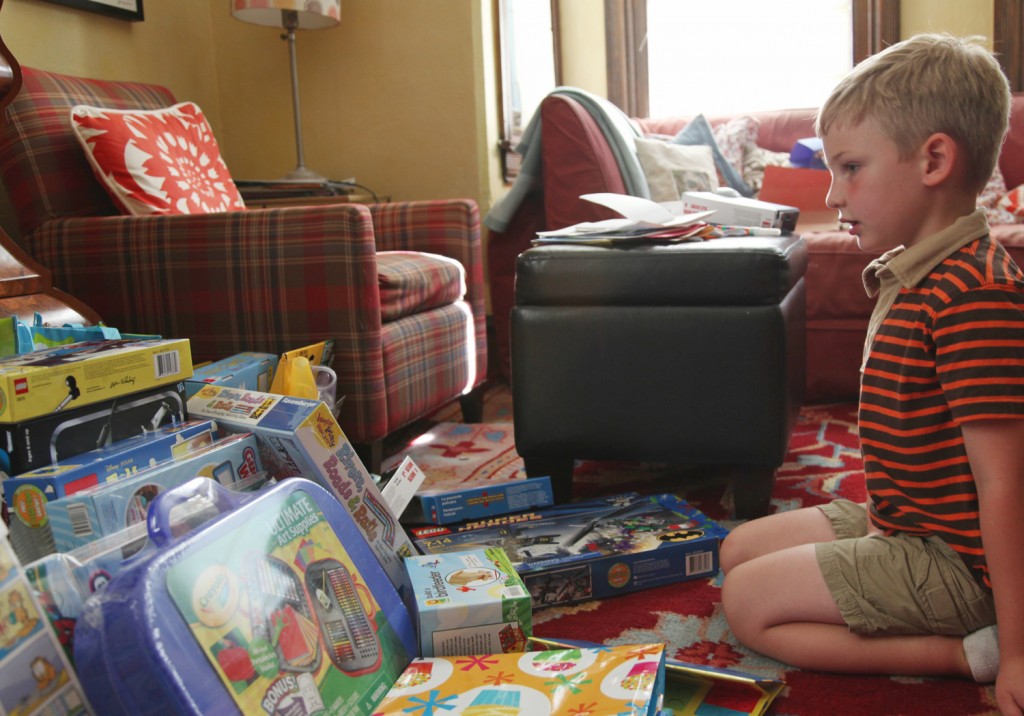
Sam and his loot!

The good news is that Sam and the kids had a great time! I should hopefully be recovered by next year. Thanks to everyone who came and helped to make my little guy’s birthday so special!

1 Comment

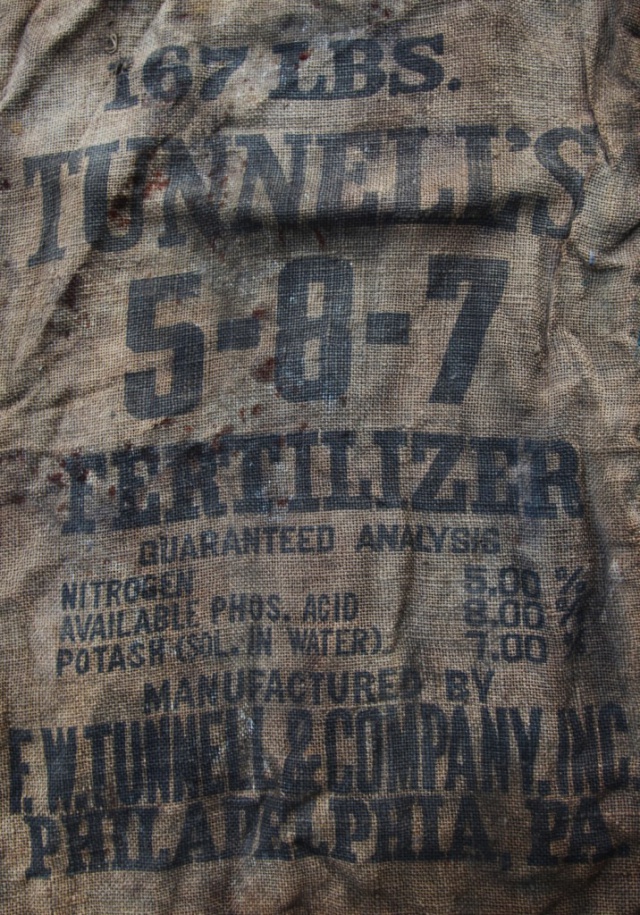
Tunnell’s Fertilizer Burlap Sack

I hope everyone had a great weekend! I am super tired from Sam’s Birthday Party. We managed to make and cook 28 kid size pizzas in about an hour, along with fruit kabobs and cookie and apron decorating. The good news is that everyone had a great time. The bad news is that I think it will take a few days for me to recover.
So anyway, back to my story for today. A while back I posted about the burlap sacks that we found stuffed against the sill plate of the foundation when we were demolishing the basement. We were planning on framing them and hanging them in the basement. I hadn’t thought much about them, since that project is still on the “to do” list.  So I was very surprised to get an email from the great-grandson of the founder of the F.W. Tunnell & Company (who made the fertilizer). He was wondering whether I was willing to part with the sack.  For once my procrastination paid off and I hadn’t gotten around to framing (and potentially cutting the sacks) yet. He still lives near us so I was happy to return the sack to him. He has been looking for a sack like this for a LONG time without any luck, and remembers one hanging in his grandparent’s home when he was a child. Interestingly the F.W. Tunnell & Company was in business from the 1890s to the 1950s. We think our sacks date from the 1910-1930 range.

My guess is that he will have his hanging up before I do. Who would have thought that the balled up piece of burlap would make someone’s day and end up framed in not one but two houses.

Leave a comment

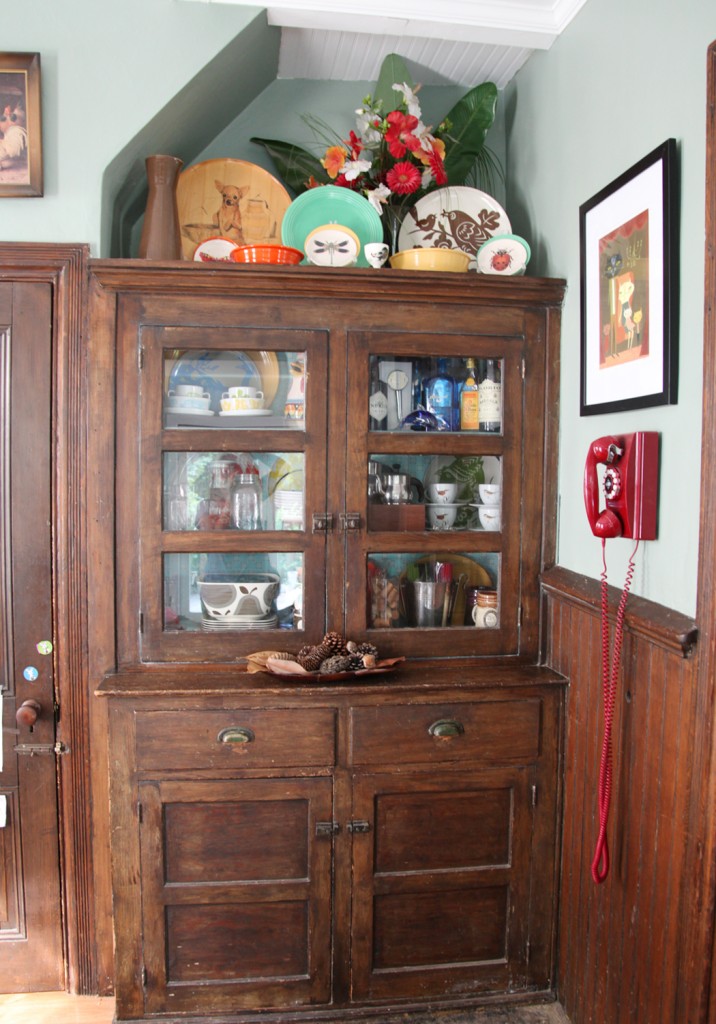
Built-in Dining Room Hutch circa 1920 with new Glass Doors

One of the house projects that we wanted to finish before Sam’s Birthday Party were the doors on our built-in hutch in the Dining Room. This is not original to the house (built in 1888) but probably installed in the 1920s. Originally this was the alcove where the cooking stove was located (the brick is still behind this hutch) but since it has been here that long, we wanted to keep it. The previous owner striped off the paint and I repainted and papered the inside several years ago. The intention has always been to cut out the wood panels on the upper doors and put in glass. Well the doors have been sitting here for years waiting for that to happen. So last week Mr. S. went to work on them! I voted for the router, but he was concerned that it would damage the doors, so he went the route of carefully using a utility knife to the back of the doors (they are pine so they are fairly soft). He carefully took the back of the tongue off the frames and took out the wood, over several nights. Then he installed glass (Lowes will cut glass while you wait) with glazing caulk and painted the inside of them to match the blue (which is also the same blue as our kitchen island and bench).

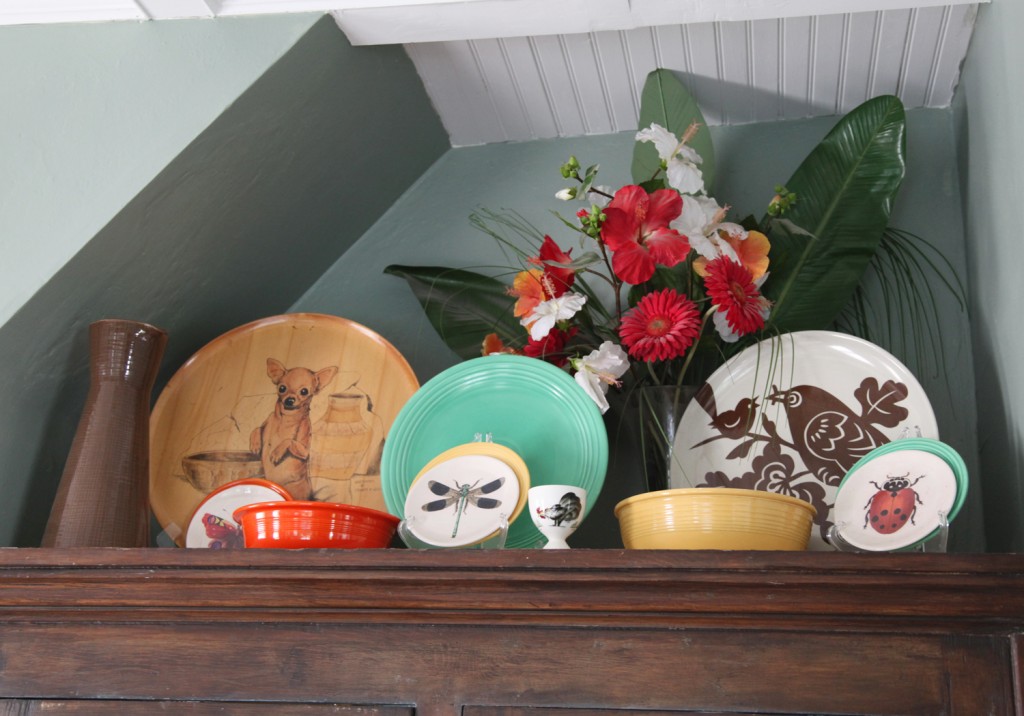
Top of Hutch w/ Vintage Fiestaware mixed with new Plates

I dusted off everything in the cabinets and moved some stuff around. I also added some more plates and bowls on top of the hutch. I am definitely not an expert in arranging stuff but I am liking the additional color from the Fiestaware. These colorful plates and bowls were my grandmother’s (as is the chihuahua platter). The pitcher is from the Orla Kiely line at Target a few years ago. The big bird platter is Thomaspaul and the small plates are from John Derian line at Target a couple of years ago.

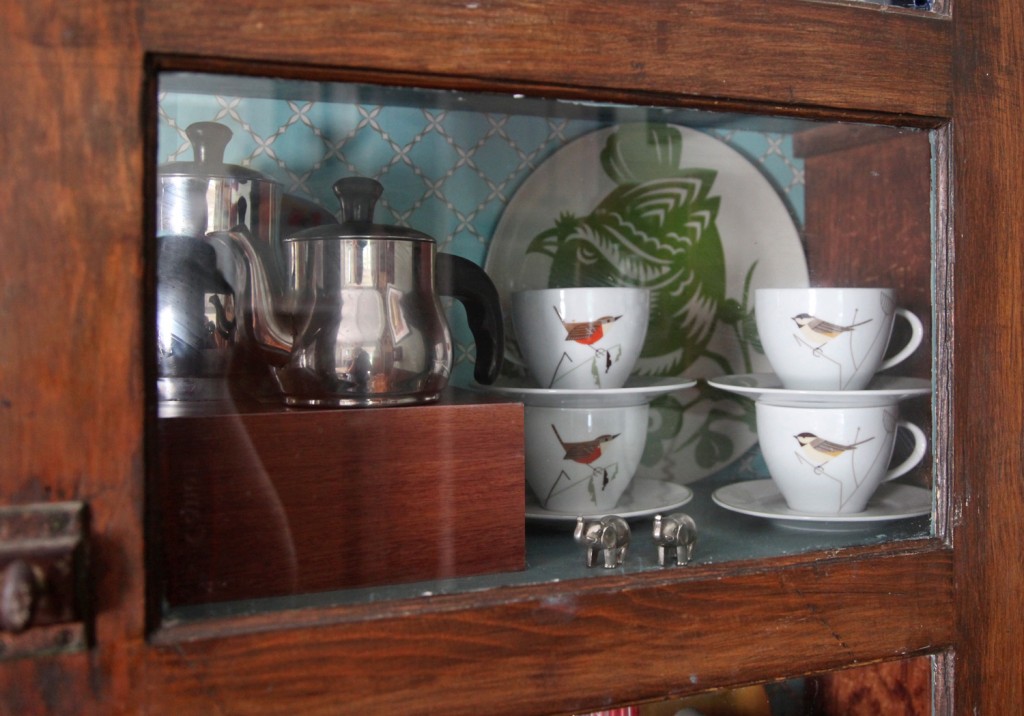
Close Up of Dining Room Hutch w/ Charlie Harper Tea Cups

There is more glare than I was expecting from the glass, but I am really liking that the doors are back up and it is looking more finished. I still need to tile the random little bit of floor in front. It is concrete (from the original cooking stove), so our floor installer didn’t want to put wood on top. We have tile that matches the tile behind our stove all ready (it has been waiting even longer than the doors).

Leave a comment