Archives For -Windows

Old Windows

June 20, 2013 — 4 Comments

thirdfloorwindow
Sorry for disappearing. Life has been much more hectic than I would like. I’m still not sure how I am going to get everything done on my ever growing list, but I thought I would update my lovely readers on the house. The good news is that we have air conditioning! Kind of crazy for our old beauty. We like to think of it as a 125th birthday present. I’m still not completely convinced that it will be able to keep up when the hot weather really shows up, but fingers crossed it will do the job.

Meanwhile my roofer is almost finished except for 2 important spots. The current hot spots are the old windows on the back dormer. The sill was completely rotted, so my roofer handed the work off to my carpenter. He had to disassemble the frames and sill on both the inside and outside. He has replaced the sill but we are currently left with a large hole and some important decisions to make.

house-backdormer-before

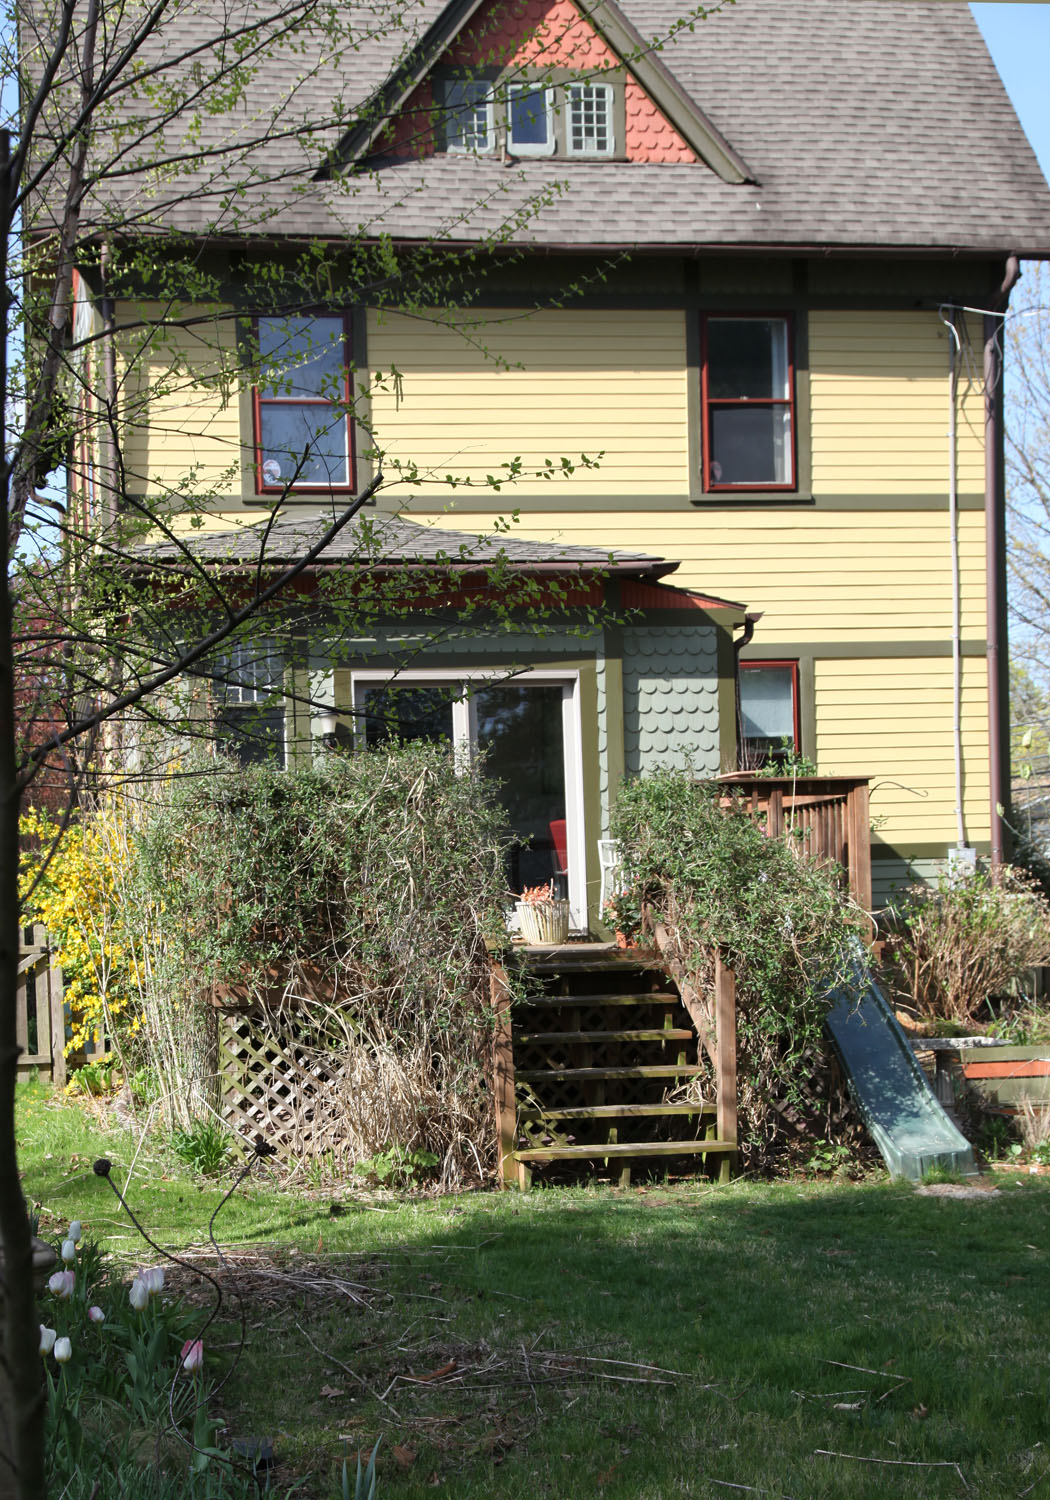
I had planned on restoring the 3 small casement windows, but they are in pretty bad shape. I also talked to a window restorer who warned me that they charge by the linear foot of glazing putty. And we have 31 panes just back here! Eeek! He also said that he had a 3 month backlog! For the the front of the house there is no doubt that we will restore, but back here it isn’t so clear. I’m in the middle of weighing the options, while a piece of plywood holds the spot.

house-backdormerwindow-before

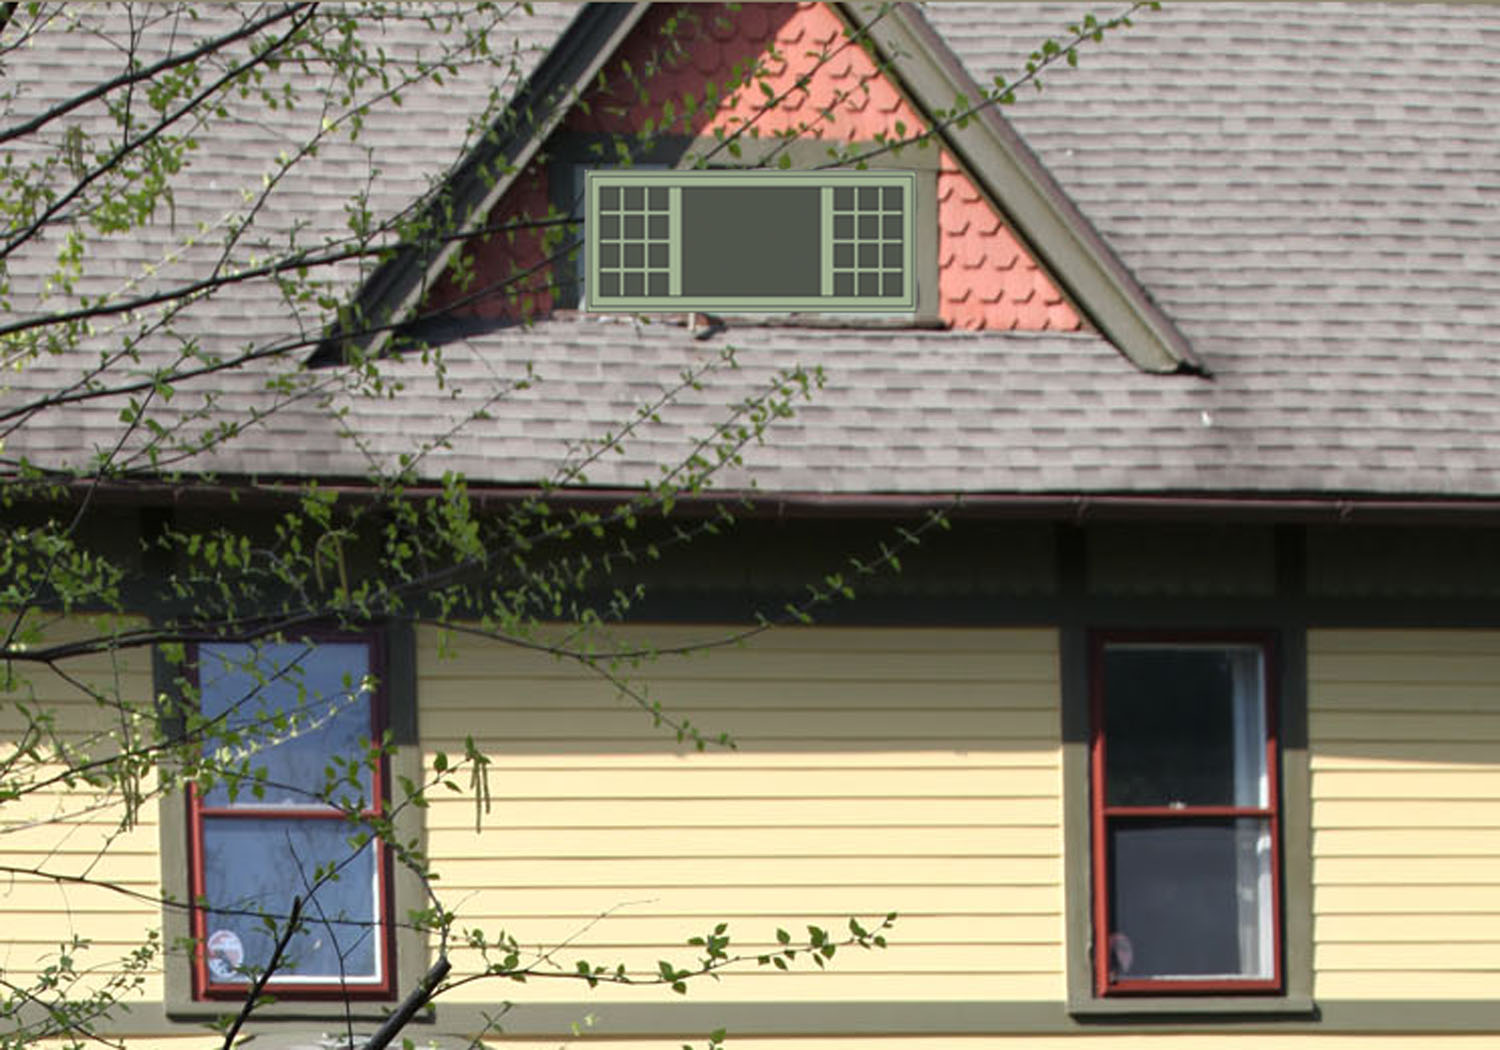
Mr. S. has left it up to me to make the decision. Currently I am leaning towards replacing them with a single awning window. Before you roll your eyes or think I have lost all of my old house cred, I am looking at a custom wood window by Jeldwen with a similar mullion pattern. We went over to the showroom to get a better look.

windowoptions

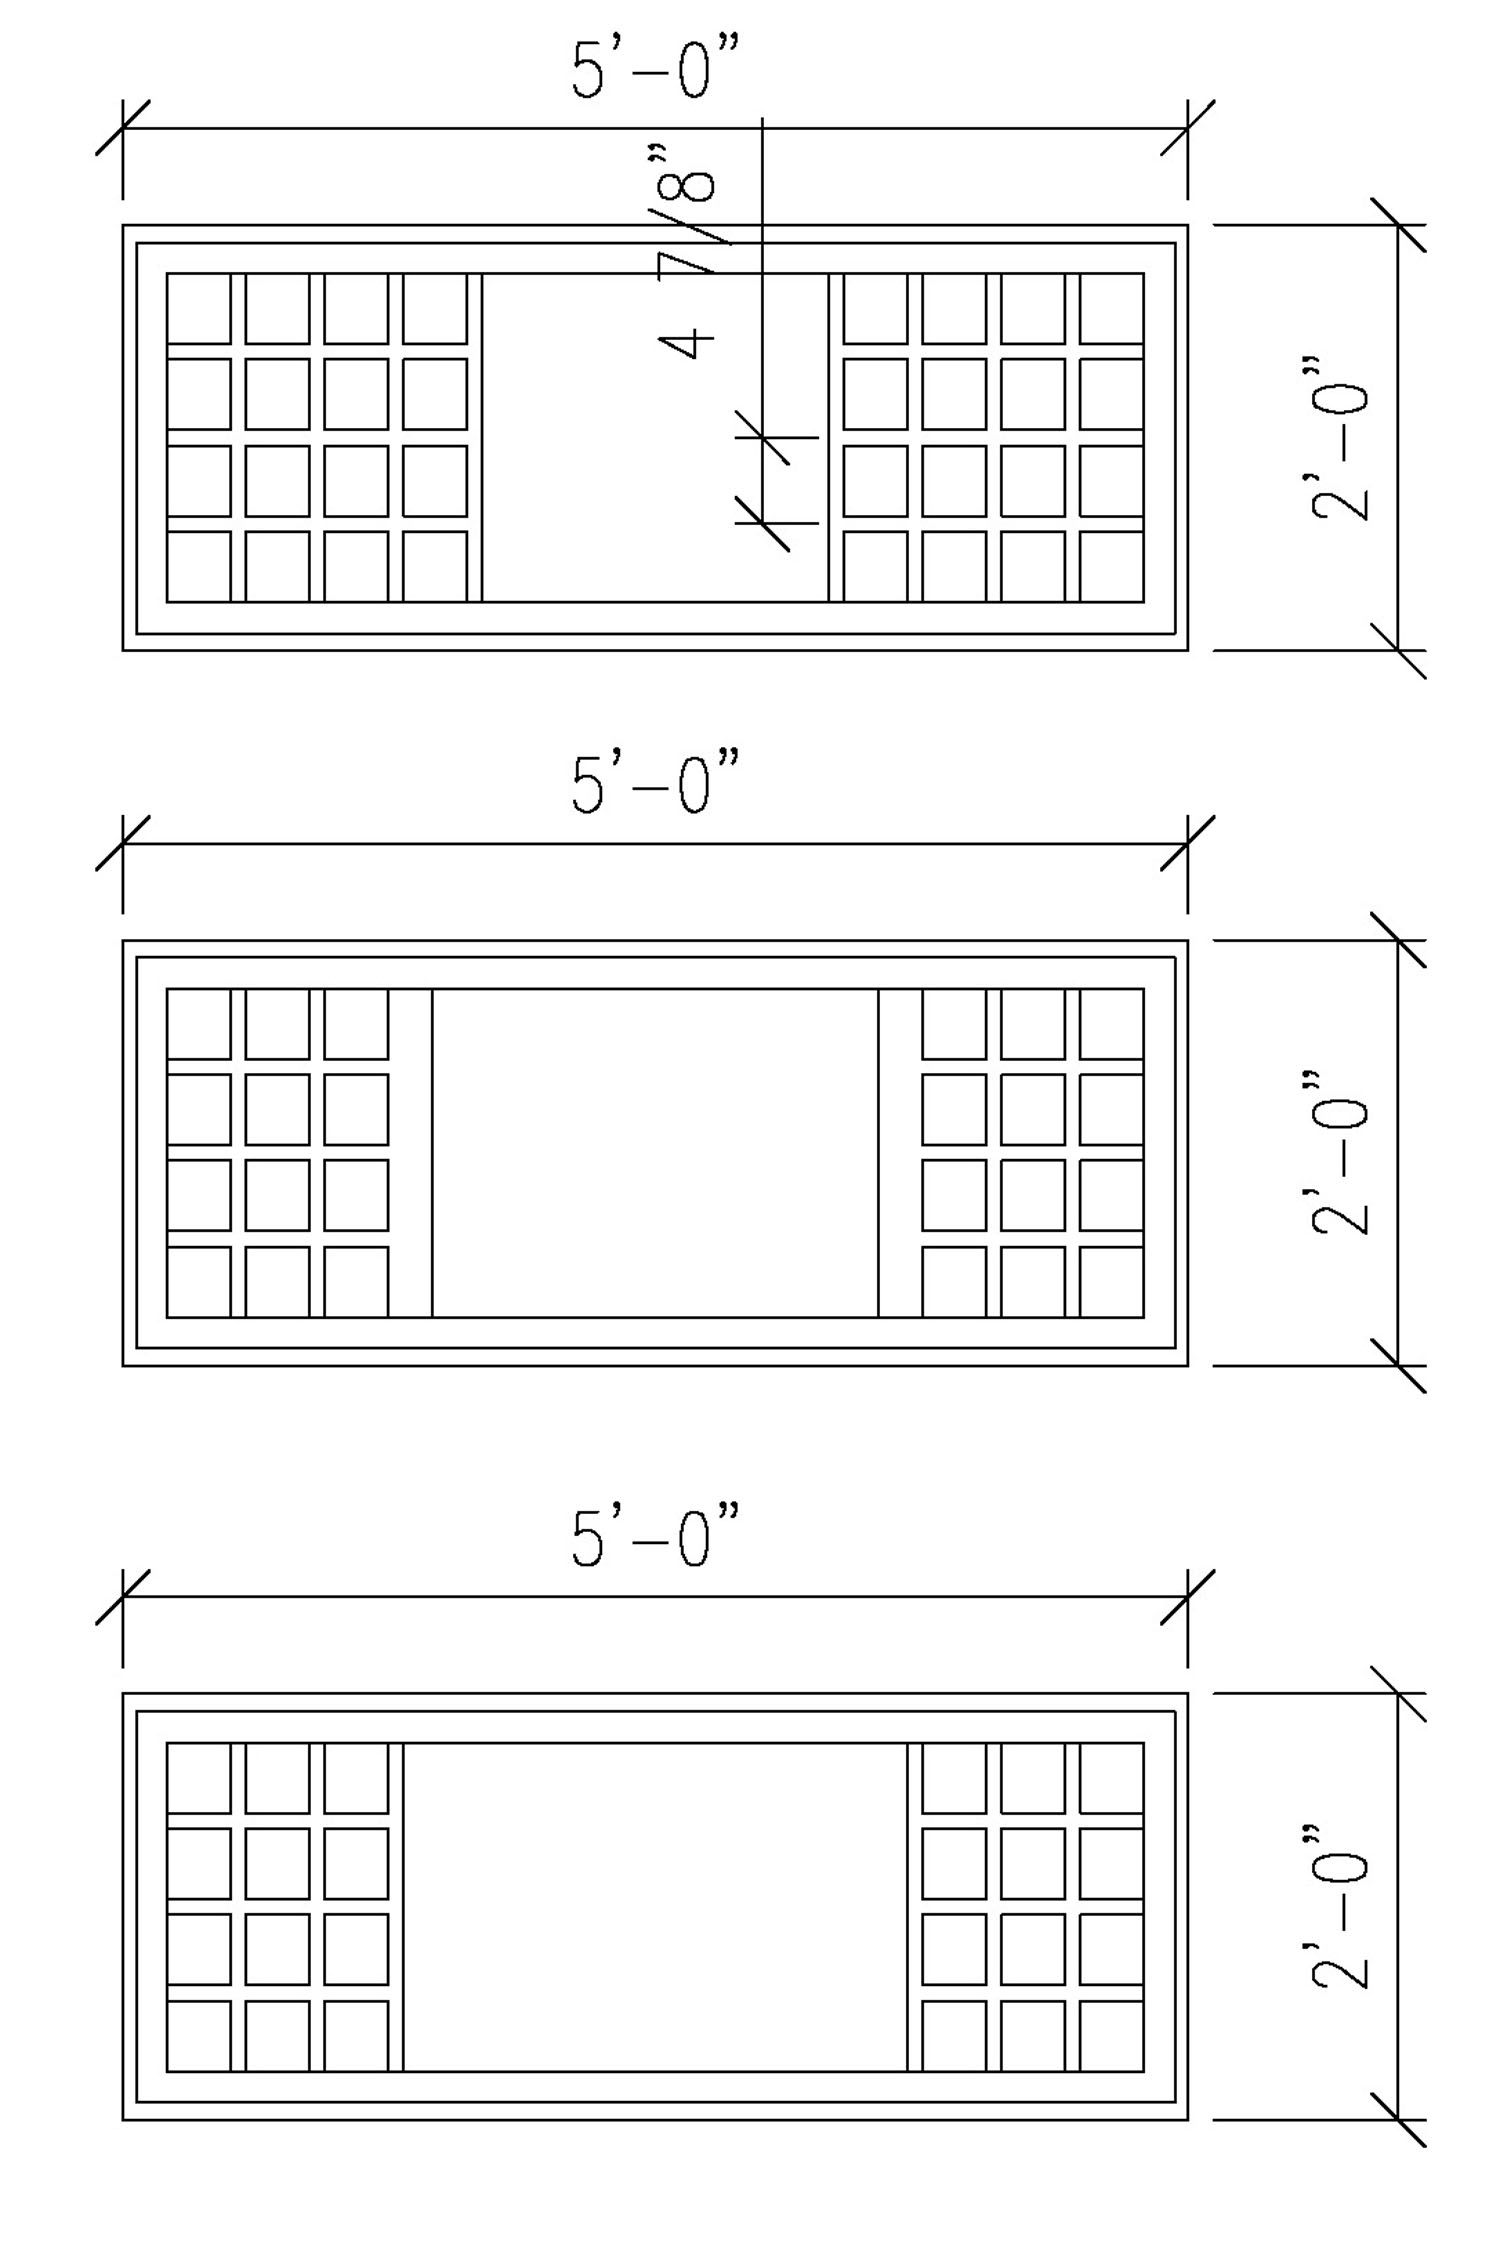
I am pretty torn since I am always telling people to keep their old windows. Over the years we have replaced some windows, due to sizing issues but never one strictly to be replacing it. Of course the third floor windows have been taking a beating for the past 125 years without storms. Above are a couple of patterns that I am considering. The thinnest mullion that they make is 5/8″ wide. Our current ones are about 1/2″. The smallest that they can make the pattern is 4″, our current ones are closer to 3″. I am leaning towards the middle one right now. What do you think?

house-backdormer-rendering

PROS For New Window

-Single awning window will actually increase the visible glazing.

-Awning window will allow for us to keep the window open in the rain to help exhaust out out hot air in the summer.

-It will be less expensive than restoring the existing windows

-I can get it clad in aluminum in a matching color so I won’t have to repaint it for a long time

-I won’t need to install an interior storm

-We can still reuse the existing interior window trim to match the other windows.

Cons For New Window

-Not Historically accurate.

-The window will still look different than the original windows.

I am off to give the supplier a call to get a quote. Stay tuned!

4 Comments

Basement Window w/ Ferns and Hostas

Our basement windows are in a desperate need of a cleaning, but I wanted to take a minute to talk about them. They are original to the house and consist of an outer and inner sash. I have chosen not to replace these, since they match the rest of the windows in the house and since there is already a storm, we wouldn’t gain much energy savings by replacing them. As part of the basement project I will be sealing them with caulk, since there is no reason to make them operable (we have a basement door that we can put a fan in if we need to exhaust something). One of my favorite features of them is that the exterior window has chicken wire installed against the inside of the glass. It gives it a really nice texture.  The other nice thing is that it provides an extra security measure (probably why it was put in). I haven’t ever seen any other Victorians with this detail, but I quite like it. Unfortunately one of the windows is missing the chicken wire on the front and I need to add it, fingers crossed I will be able to get it open.

Sensitive Fern

Ferns and Hosta

Nandina

The other thing, which I have never heard talked about before, but is important to me is the view outside the window. The bottom of our windows sit more or less flush with the ground. This give us a view of the planting beds around the house at eye level. I planted sensitive ferns on the one side of the house shortly after we moved in and I remember realizing that I could see them out the window as I went down the staircase and really liking that. It is an interesting view, since you don’t often get to see plants from that low of an angle. I think the ferns are an excellent choice since they still let some light in and change in the wind. On the other side we have a hydrangea bush. I quiet like seeing the back of the shrub and some of the flowers. Fortunately it doesn’t totally block the window and there are a few flowers that I have been trying to grow in that vicinity to add to the view. I am thinking of adding some columbines since they are not fussy about the light and they have such nice foliage. At the front of the house I added the nandina in the fall. I will have to think about something to plant between those and the window, maybe some more ferns or small grasses.

Has anyone else thought about the view from their basement windows before?

Leave a comment

Modernica Fiberglass Rocking Chair w/ Alexander Girard Pillow (Urban Outfitters)

So I can’t seem to get Maisie’s Room to a point where I want to photograph it. It seems to be the room that holds all the miscellaneous kids clothes and toys. I am also trying to decide how to make the room a little more grown up for her. In the meantime, I decided to take some photos of a few of the details that I do like in the room. So here it goes…

My favorite things in the room:

-My baby girl (okay so she is quickly becoming a little girl)

-Modernica Fiberglass Rocker (based on Eames rocker) (it was my first Mother’s Day present when I was pregnant with Sam)

-Alexander Girard Pillows and Print (Pillow from Urban Outfitters, no longer available)

-Orla Kiely Valances (made from Kitchen towels from Target, no longer available) and storage boxes

-Tree Decals from notNeutral (I originally put these in when it was Sam’s Room)

-Handmade quilt


Ikea Shelf (use to be in our kitchen)

Hanging Balloon from Ikea and wall decals from notNeutral

Wood Postcards w/ Target Frames

Pleat Detail on Valance

Decal on Maisie's Door

Leave a comment

The Valance Fabric and My Sketches for the Design

The top corner of the valance with staples

The pleat on the corner

The Backstory:

When we bought our house it was full of frilly curtains everywhere. One of the first things I did was take them down. They blocked a lot of the light and were needless to say not my style.  For a long time we relied on semi-sheer curtains and blinds (or nothing at all). Now that our style is a little more defined, I feel like the windows could use a little punch.  However there are two issues that we keep running into. First is that I do not want to hide all of the window molding (this is partially why we bought our old house) and second is that we have a radiator under almost all of our windows limiting the placement of curtains.

Test valance: too long and the contrasting fabric in the pleat didn't look good..

First Valance Finished!


The Design:

When I think of valances the first thing that comes to mind are very fancy frilly window dressings. That is not what I had in mind! I put up valances in my daughter’s room a couple of years ago. These were made out of Orla Kiely dishtowels (from Target). It was a really inexpensive and easy project, so I thought I would do something similar but a little more tailored. I looked online for tutorials and only found 1 that I liked. Pam from Bibbidi-Bobbidi-Beautiful (via Little Green Notebook) made a beautiful curtain/valance out of a king sized sheet. I liked the style a lot but I did not like that she installed the valance with duct tape on cardboard. So I took her inspiration and made mine using a 1×3 piece of pine for structure a the top and attached it to the wall with 2×2 angle supports.

For the fabric, I wanted something that would pick up the blue color on the kitchen island and the dining room hutch, while also looking somewhat Victorian. I also needed something that would go with the new rug. In the end, I selected this beautiful fabric called Elizabeth in Chocolate.  The ribbon is from JoAnn’s  and is a simple 1″ wide brown ribbon.

The Install:

1. Determine the height and width of the valance. I marked the proposed height with a piece of painter tape before deciding on the height. I decided to go 1/2″ wider on each side of the window trim. Because these windows do not have rosette corners I didn’t mind covering up the top of the window. Also I recommend mounting it a few inches above your window to make the window appear taller (I mounted mine about 7″ above the window frame and aligned it with the door frame for the back stairs). In the picture on the left you can see that in the first version it was too long (about 21″) I used the entire width (about 55″)  of the fabric and used the excess width in the pleats. In the end mine are about 18″ high.

2. Cut 1×3 pine to proper length.

2. Cut fabric (keeping in mind that if you are using a pattern with a horizontal repeat that you may have to cut some extra fabric to make sure that the pattern aligns in on all of the valances). I also kept the selvage on and turned it under on the side the seams).

3. Iron seams for the 2 ends. Iron the seam for the bottom.

4. Sew the 3 seams.

5. Iron on the ribbon detail with iron on tape (you could also use fabric glue or sew this on).

6. Iron the pleat locations. I used the wood as a template and  marked the fabric with a pin for the corners. You are going to be making “hospital corners”. To do this locate the corner of the side and front. Then fold the remaining middle fabric in half. This spot will also be at the front of the pleat. You need to make basically make a w shape with the fabric. I then ironed this flat and pinned them all together.

7. Staple the fabric to the wood with a heavy duty stapler. I tacked one staple in the middle first then start on one side. First I tacked the side part at the right spot. Then I placed the remainder of the corner pleat on top and fidgeted with it until it was aligned to my liking. Then I stapled over the corner. Repeat on the other side. Then fill in will staples across the top.

8. Attach 2 2×2 angles to the 1×3 pine (you could also do this before you put the fabric on) with a 1/2″ long wood screw.

9. Locate the valance on the wall. Mark holes for wall screws.

10. Install mollies or whatever works best for your wall. In my case because they are so light and I have plaster walls. I just used a 1″ self tapping wood screw.

11. Screw into wall (you may want someone to hold the valance why you do this).

2 Windows in the Dining Room with a Charley Harper print in between.

Double valance over the Desk Area. This required 2 pieces of fabric sewn together and hidden in the middle pleat (please pardon the appearance of our desk).

Dining Room w/ new paint, solar shades and Valances (The child gate is an evil necessity with a set of back stairs like ours. The hole is so that our cats can get through.)


2 Comments

Tools you will need (not shown, painters tape and scissors)

I have been so busy thinking about and working in the yard that I have not made as much progress on my Dining Room as I would have liked. I did manage to mostly finished the window treatments a little while ago. I thought I would give a quick rundown.

The Background:

Our old roman shades had been recalled from Ikea a while back because they were considered a choking hazard. We cut the cords on the back rather than taking them down, since we did not usually open them anyway. But they were still looking pretty dingy after many years of service (including when this room was our kitchen).


Shade taken apart for cutting. I used the self-healing cutting mat with a grid to help make a straight cut. Because the fabric is semi-sheer I could see the grid behind.

The Roller Shade:

I didn’t want to pay for custom roller shades so I looked at Ikea for options. I found the ENJE solar shade (semi-transparent) but of course it wasn’t the right size and I really wanted an inside mount fit so we wouldn’t cover the window molding. After a little searching online I found that several people have “hacked” the ENJE shade to custom sizes.  Check out Door Sixteen for her full details with lots of pictures (which she unfortunately didn’t post until after I had already cut mine).


The Install:

1. Buy ENJE shade in a width wider than what you need (for my 30″ windows I bought the 32″ wide for $24.99)
2. Figure out the width you want including the hardware.

Shade installed in first window.

I had to subtract about an 1 1/2″ from the clear width to the final fabric width to include the chain mechanism and the mounting hardware.
3. Carefully disassemble the shade. This includes taking off the bottom rail and the mounting hardware on the top with a wrench or screwdriver.
4. Cut the side of the shade fabric with an exacto or scissors (see picture).
5. Cut the lower rail with a hacksaw.
6. Cut the upper rod with a hacksaw (protect shade fabric with painters tape). I managed to gouge my finger doing this so be careful.
7. Reassemble.
8. Hang. (you will need wood screws for this since Ikea does not provide them).

The first one took me about an hour and a half. The rest took about 45 minutes. I have finished 4 windows and I am still debating whether to put shades on two of the smaller windows. i really like them. They are unobtrusive but provide a nice amount of privacy.

1 Comment