Archives For HOUSE PARTS

Old Windows

June 20, 2013 — 4 Comments

thirdfloorwindow
Sorry for disappearing. Life has been much more hectic than I would like. I’m still not sure how I am going to get everything done on my ever growing list, but I thought I would update my lovely readers on the house. The good news is that we have air conditioning! Kind of crazy for our old beauty. We like to think of it as a 125th birthday present. I’m still not completely convinced that it will be able to keep up when the hot weather really shows up, but fingers crossed it will do the job.

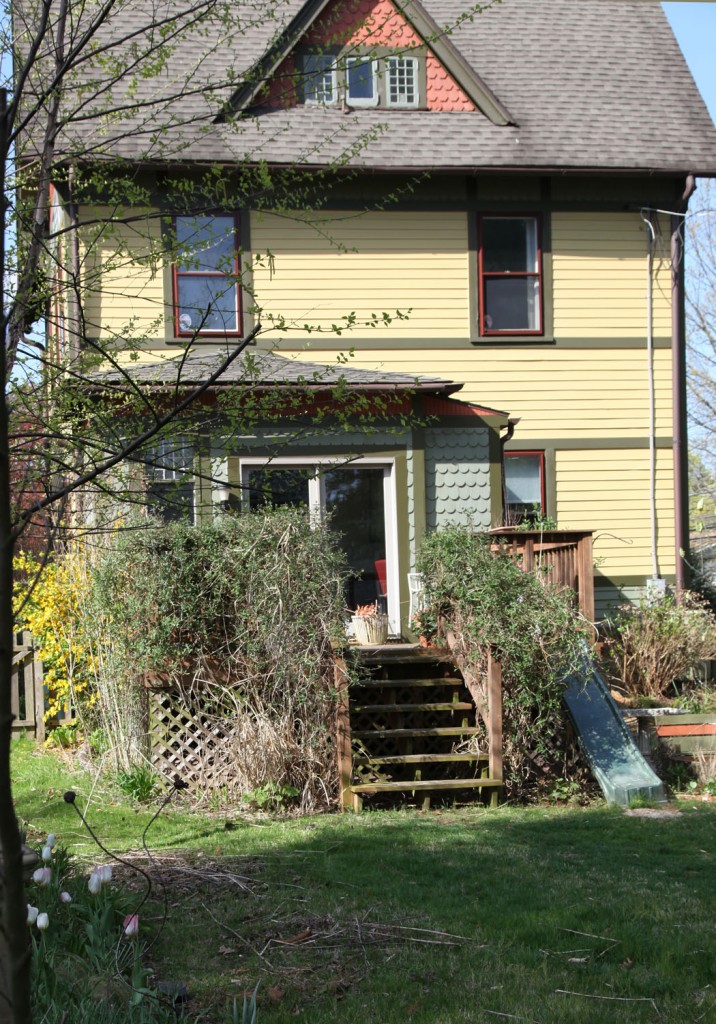
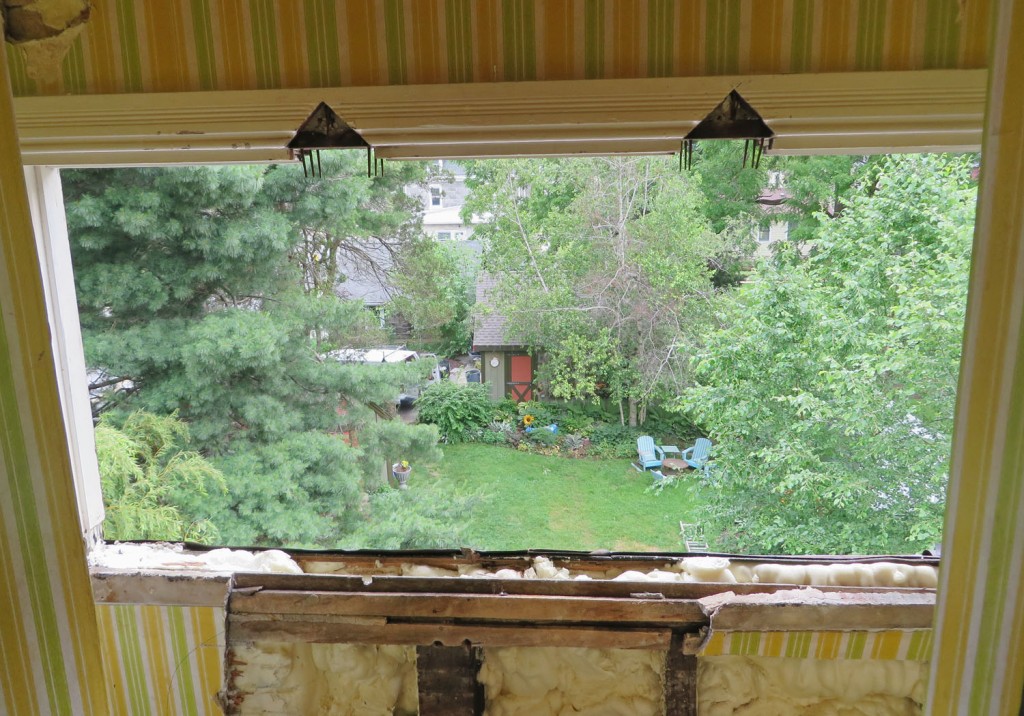
Meanwhile my roofer is almost finished except for 2 important spots. The current hot spots are the old windows on the back dormer. The sill was completely rotted, so my roofer handed the work off to my carpenter. He had to disassemble the frames and sill on both the inside and outside. He has replaced the sill but we are currently left with a large hole and some important decisions to make.

house-backdormer-before

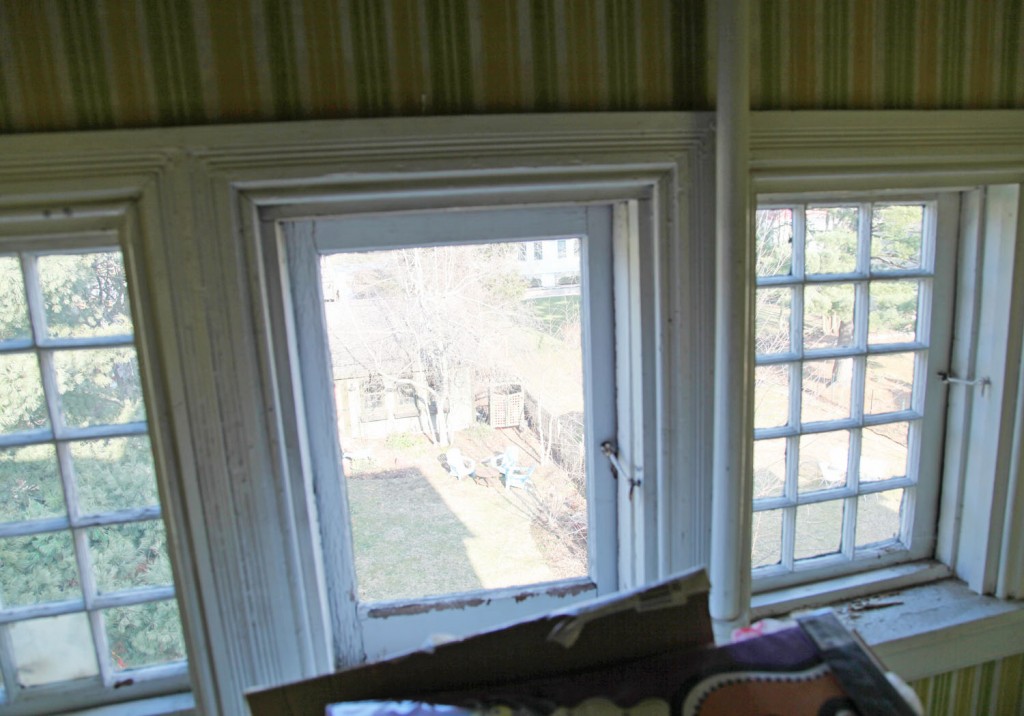
I had planned on restoring the 3 small casement windows, but they are in pretty bad shape. I also talked to a window restorer who warned me that they charge by the linear foot of glazing putty. And we have 31 panes just back here! Eeek! He also said that he had a 3 month backlog! For the the front of the house there is no doubt that we will restore, but back here it isn’t so clear. I’m in the middle of weighing the options, while a piece of plywood holds the spot.

house-backdormerwindow-before

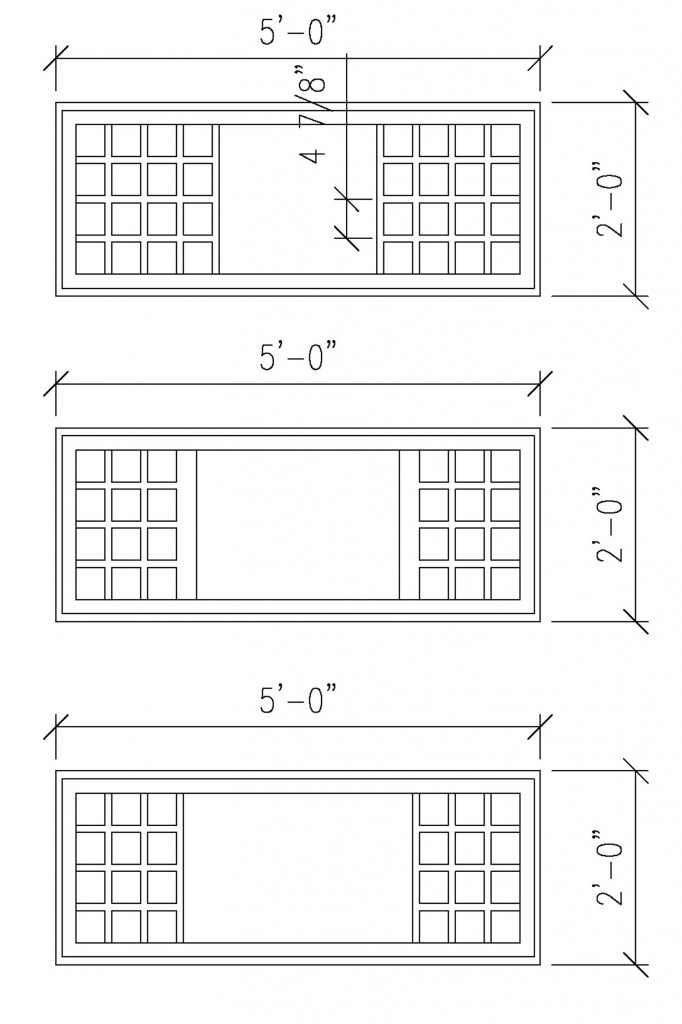
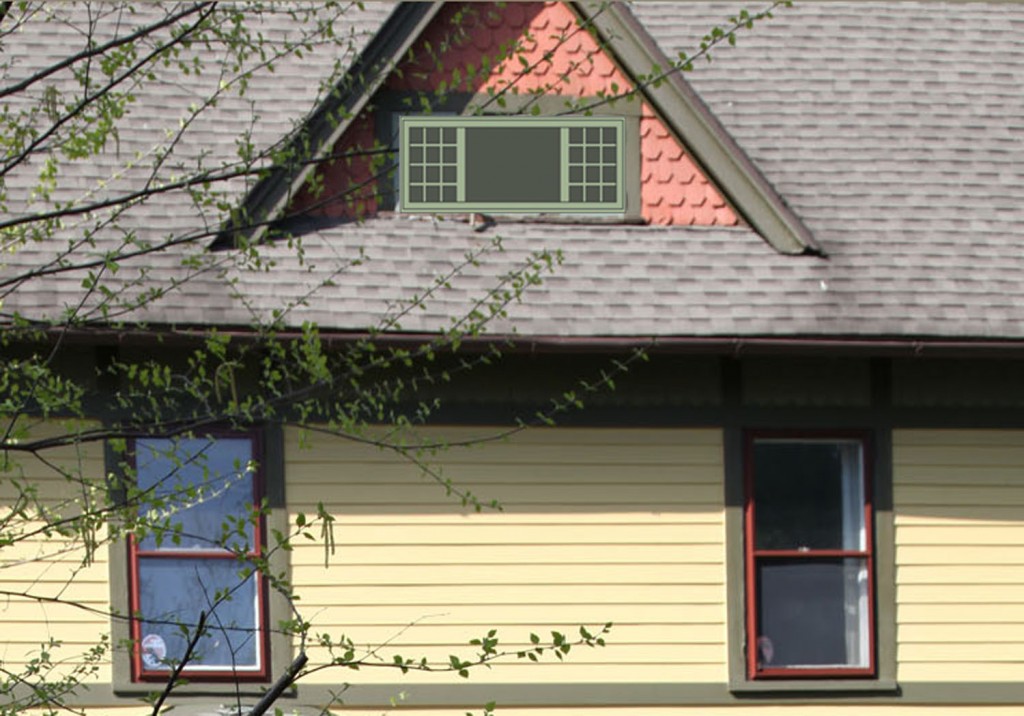
Mr. S. has left it up to me to make the decision. Currently I am leaning towards replacing them with a single awning window. Before you roll your eyes or think I have lost all of my old house cred, I am looking at a custom wood window by Jeldwen with a similar mullion pattern. We went over to the showroom to get a better look.

windowoptions

I am pretty torn since I am always telling people to keep their old windows. Over the years we have replaced some windows, due to sizing issues but never one strictly to be replacing it. Of course the third floor windows have been taking a beating for the past 125 years without storms. Above are a couple of patterns that I am considering. The thinnest mullion that they make is 5/8″ wide. Our current ones are about 1/2″. The smallest that they can make the pattern is 4″, our current ones are closer to 3″. I am leaning towards the middle one right now. What do you think?

house-backdormer-rendering

PROS For New Window

-Single awning window will actually increase the visible glazing.

-Awning window will allow for us to keep the window open in the rain to help exhaust out out hot air in the summer.

-It will be less expensive than restoring the existing windows

-I can get it clad in aluminum in a matching color so I won’t have to repaint it for a long time

-I won’t need to install an interior storm

-We can still reuse the existing interior window trim to match the other windows.

Cons For New Window

-Not Historically accurate.

-The window will still look different than the original windows.

I am off to give the supplier a call to get a quote. Stay tuned!

4 Comments

masterbed-PAX-closet2

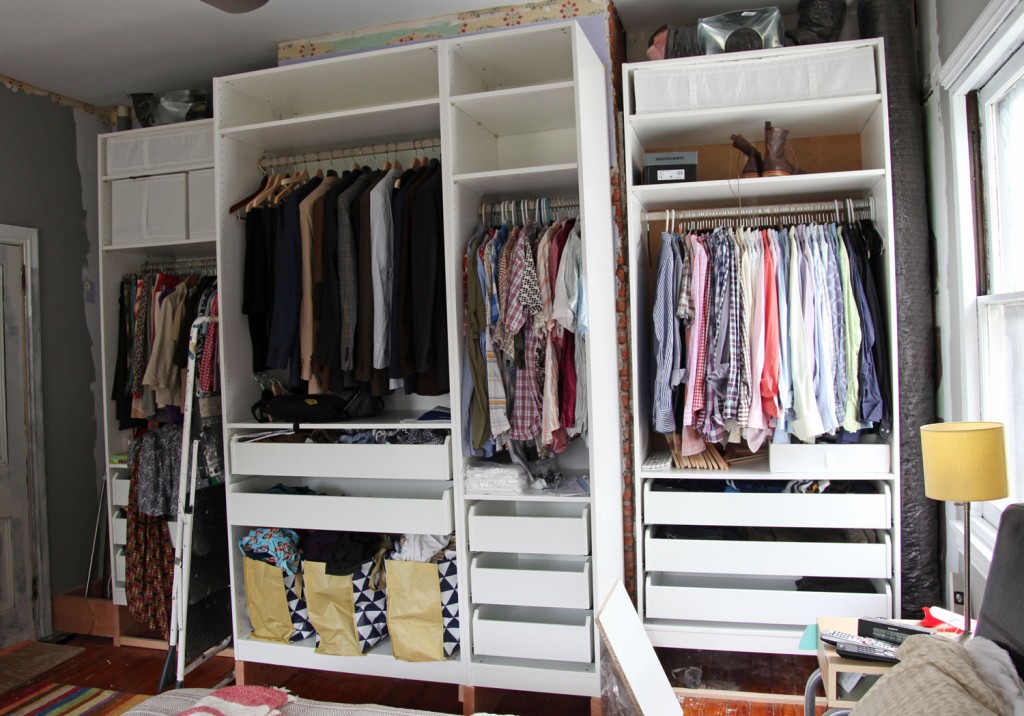
I hope everyone had a lovely weekend. Things are moving along here, in fits and starts and some late nights. We actually have all 4 Ikea PAX Closets assembled, in place and fully fitted out (minus the doors). I had to do some last minute rethinking on the closet layout. I drew out the elevation in Autocad to make sure that everything fit. I will have to do a more detailed breakdown on how to best layout the PAX units, since it is a bit of mystery until you get into it. I was really particular about maximizing the space to meet our needs, which included setting the shelves to fit the Ikea Skubb boxes perfectly. Now I feel like I am an expert on all things PAX.  I can assemble a drawer in 10 minutes flat!

Fortunately it is relatively easy to move stuff around on the units. I made a stop to Ikea on Thursday to get everything we needed. I was the crazy lady with 2 carts trying to get to the checkout.  The goal is to be able to store almost all of our clothes in here, and actually give the kids their closets back. Can you tell we are busting at the seams here?

ikeapax-closetprogress1

Here is how it is looking this morning. I’ve manged to shove a bunch of stuff in here last night. Not exactly how I wanted to start off using our new closet, but it is already proving to be useful. I did organize Mr. S’s shirts by color and replace most of his hangers with the huggable hangers, which are nice and thin (although they did shed quite a bit making it look like one of our cats had decided to hang out in the closet). I need another pack or two to finish it off.

masterbedroom-pax-progress

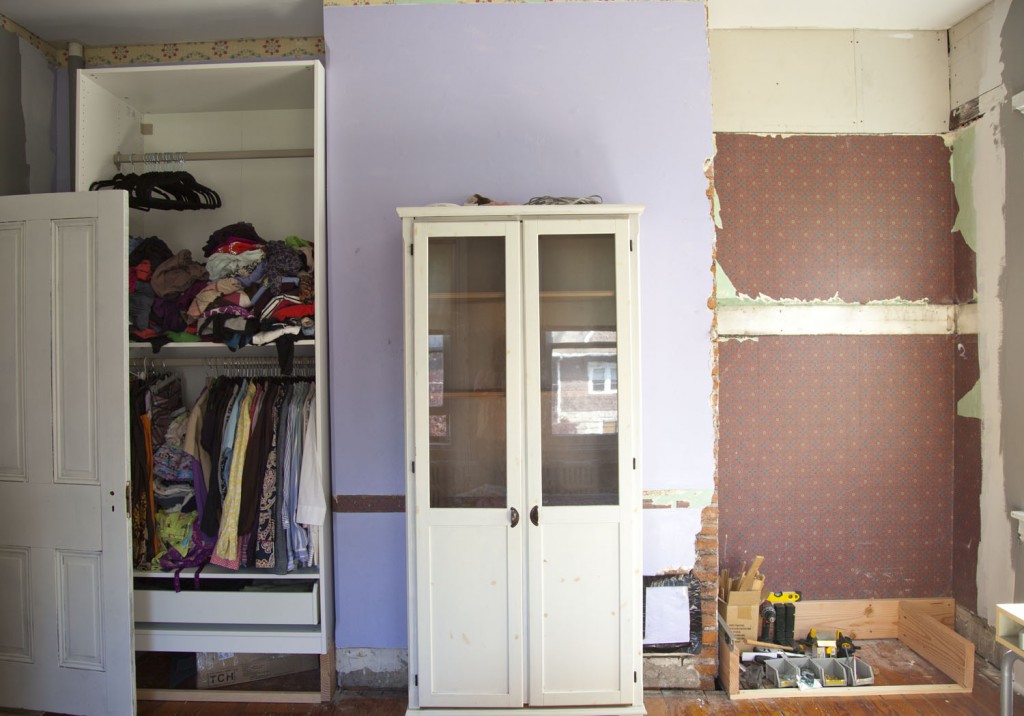
Considering we started last Monday like this, we have actually made some good progress! I do feel like a little bit like I am living in a walk-in closet at the moment. Some doors should fix that problem, but we are probably looking at a 4-6 weeks before we have those, since I need to double check some measurements before I order them.

Our air conditioning guys have been working in the house and we have been trying to stay one step ahead of them. This meant that we needed to get these closets up so we could empty the kids’ closets to allow for the new ductwork to go in. If all goes well they will be done just in time for Memorial Day (which was our goal).

What did you work on this weekend?

Leave a comment

Stained Glass Options

April 5, 2013 — 4 Comments

hall-before-glass2

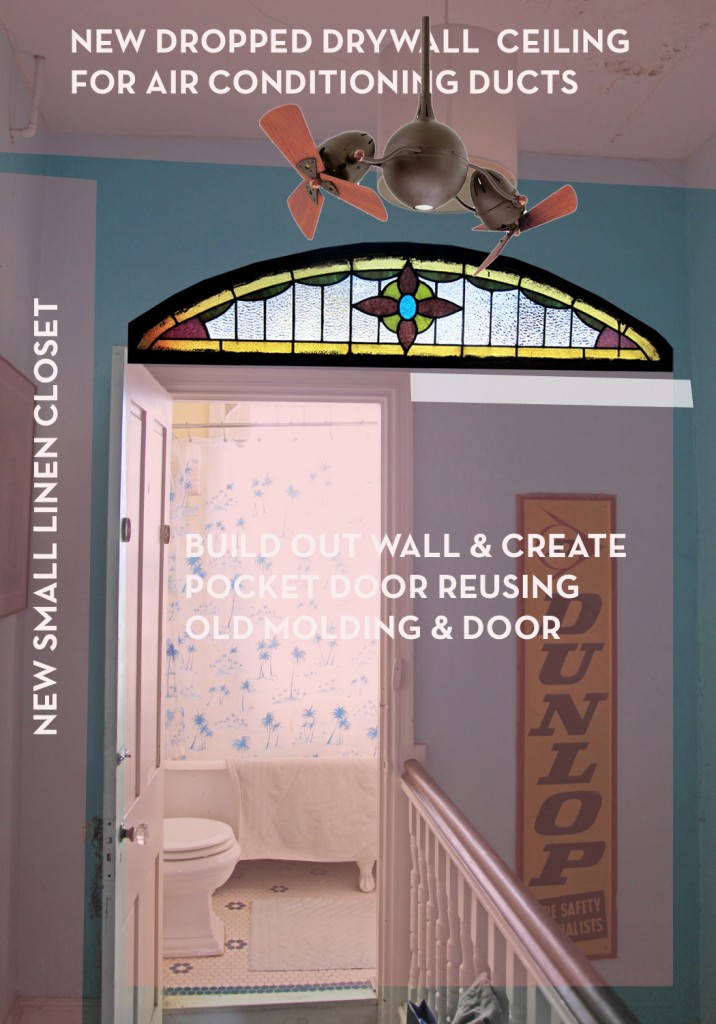
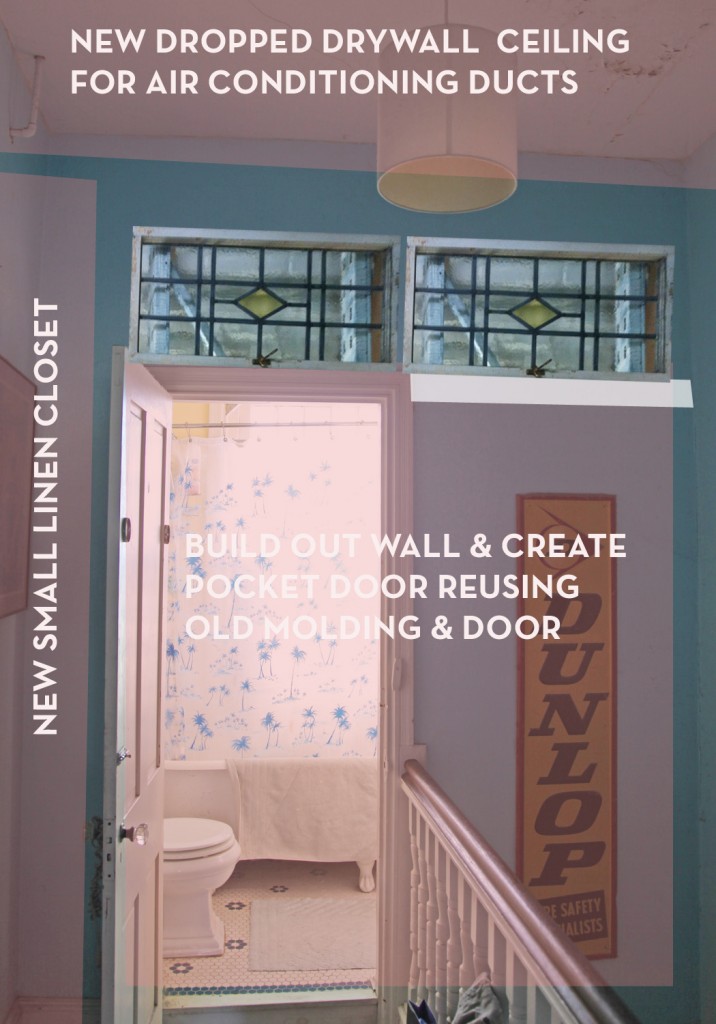
I’m in a bit of a holding pattern here while I wait for my regular contractor to get here and coordinating with the other trades. In the meantime I have been looking at some stained glass options for the bathroom. I can’t finalize this until I know the ceiling height which is based on the air conditioning but I have a reasonable idea of the space so I thought I would show you my latest photoshop rendering of the hallway. I also added in the ceiling fan that bought.

I stopped over at Philadelphia Salvage recently but was disappointed with their selection. I need a pretty specific size so I have been lurking on ebay. I really like a lot of the stuff that Bigsteveareno29 sells. He is in Pennsylvania about 2 hours from here. I don’t think I would trust shipping stained glass, but we could plan a trip. He also sells some interesting closet fronts that I have been admiring.

stainedglasstransom1

This is a close up of the antique stained glass that I am currently favoring. I think it would look pretty good with our existing daisy stained glass window which is on the adjacent wall. I am pretty close to being able to make this fit with the lowered ceiling. It will be tight but I think I can make it work.

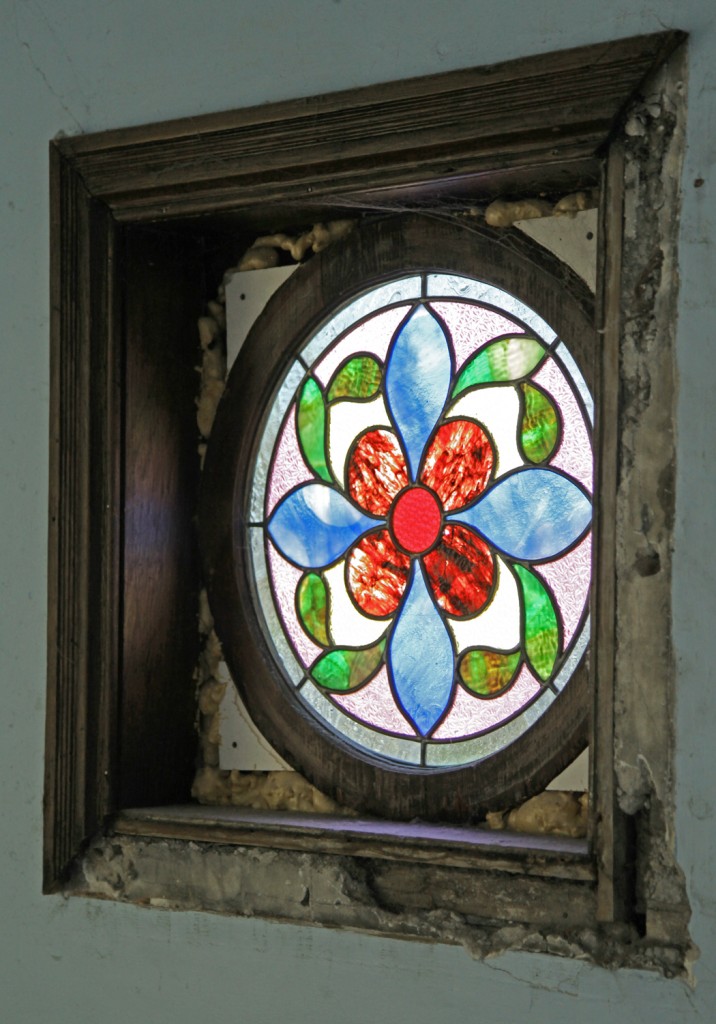
daisystainedglass

We had this our original daisy stained glass window restored when we were having the siding done. As you can see we never got around to fixing the plaster and trim around it. I figured I would add that to the list on this round of hallway work.

What do you think? Should I scrap the stained glass and just go with clear glass?

4 Comments

Second Floor Update

March 26, 2013 — 6 Comments

hall-before-glass

We are slowing making progress here. We are in the midst of a stomach bug epidemic, so life has been moving a little more slowly than usual.  The contractor was just here to go over moving the master bedroom door, discuss options for the bathroom door and the handrail and show him the plans for the electric. Mr. S. and I also managed to start clearing out our bedroom in preparation for moving the door over the weekend. That was actually quite therapeutic, and it feels good to get a good bit of clutter out of the space. Of course our playroom and garage are almost full and we still have one closet in our bedroom that will require emptying and demolishing. I am thinking that we may be installing our bedroom closets piecemeal so that we can continue to function. The alternate option is to empty out the space and work like mad for a couple of weeks. Currently that seems unlikely as there are a number of trades to coordinate. Which reminds me that I have a delinquent roofer to get a hold of.

bathroom-elevation

I thought I would show you my drawings for the bathroom wall since there isn’t a lot in actual progress to see.  In the picture above I threw in a couple of stained glass windows to see what I thought of adding them to the space. Of course this project cannot continue without some sort of scope creep! Since we are going to be working on this wall I thought it would be nice to add some light into the corridor from the bathroom. Well then we need windows. And well if we are going to add glass, why not add stained glass?

I think my contractor thought I was a little crazy, although he should know how I work. He did think my linen closet was ridiculously small (hey, I don’t have one, so any closet no matter how small is an upgrade).

Industrial-Barn-Door-Hardware1

I think I have decided in favor of exposed barn door hardware over a hidden pocket door. This one from Rustica Hardware is in a dark bronze finish which I like. The wheel are actually wood, which I think is pretty cool. I will be pairing this with a more traditionally styled Victorian Pull.

pottedflowerpocketdoorhardware

This potted flower bronze pull is from Charleston Hardware Company. It has the daisies which are always a favorite of mine. We will have to use some sort of latch to lock it, since the door isn’t thick enough for a locking mechanism.

ceilingfan-acquabronze

On the ceiling in the hall we are going more industrial again. I had been eying a different ceiling fan but I saw this one (Acqua Ceiling Fan II in Textured Bronze) for a great price on Joss & Main and decided to go ahead and order it. The whole unit rotates in addition to the wood blades. Overall this space is going to be a bit more eclectic and industrial then some of our other spaces in the house. Our first floor tends to stick much closer to the Victorian feel, but upstairs I think it is okay to have a little fun. I’m sure some future owner will abhor by choices, but I am liking the direction. And frankly most of my choices could be changed to something more traditional fairly easily.

What do you think? Have I lost my mind? Am I headed toward some sort of Victorian Steampunk craziness?

6 Comments

tower1

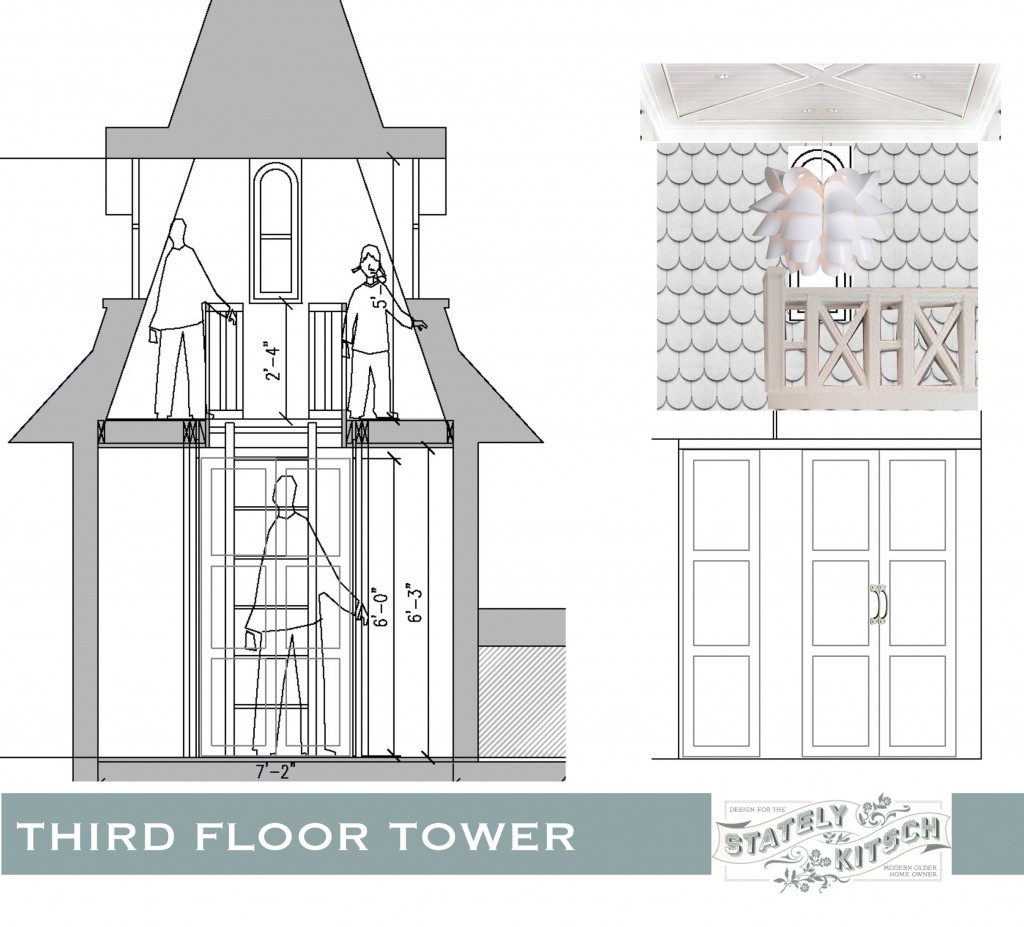
Well it is Friday afternoon and I am finally getting this together. I have been doing quite a bit of thinking about the design for the tower. When I design I like to look at the space, draw it up, look at the space some more, look around for products/ review standard size cabinets, spend too much time looking on Pinterest and then go back to drawing. It usually serves me well to take breaks and come back. I often come up with my best ideas while I am laying in bed just before nodding off. I like to visual the space in my head (yes I am a design junky).

I am liking the mix of materials in the collage above. It will inevitably be impossible to photograph but it should look pretty cool.

tower2

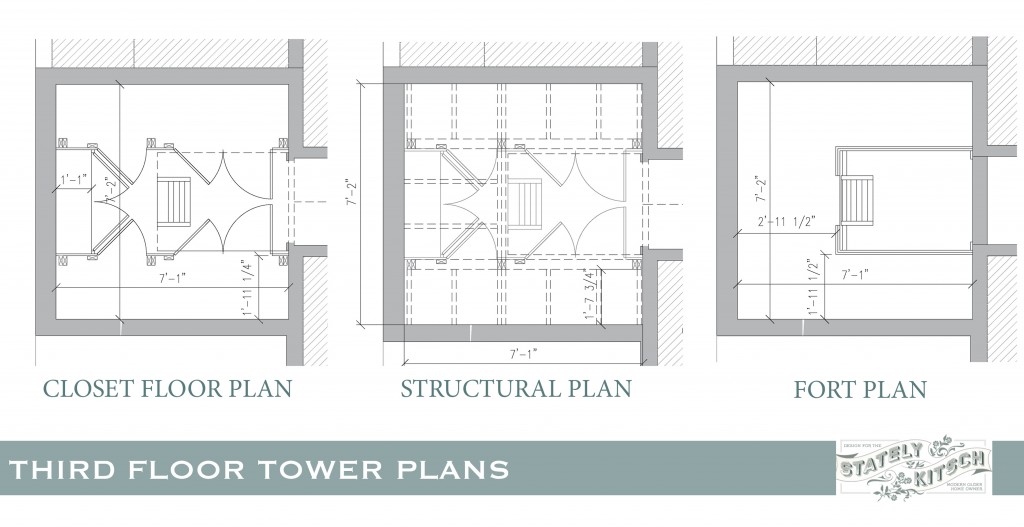
To pin down the design, I drew up a basic structural plan. I needed to get an idea of where we would put in columns and floor joists for the tower. The columns will interfere with the closet space a little bit, but we only need 6. The majority of the joists will tie into the walls. I will install a board that will attach to the wall joists and then use joist hangers off of that to hold the floor joists. It is fairly similar to a deck design.  I haven’t decided how I am going to finish the ceiling of the closets, but I am planning on cladding the beat up plaster with the thin plank material and a 1×4 board at the top to attach the clothes rod to. I figure some of the final details will have to get figured out as we go.

As part of this I needed to decide whether we were going to install doors on the closets or just use curtains. Ultimately we decided that we really want doors. Maybe I will regret that, but I like the idea of having doors that kids and pets can’t get into very easily. I am planning on using this area to store out of season clothes and storage bins that hold the kids baby clothes. At the back of the tower the closet will be narrower and have shelves, which I would like to use for some of my knick-knacks.

tower3

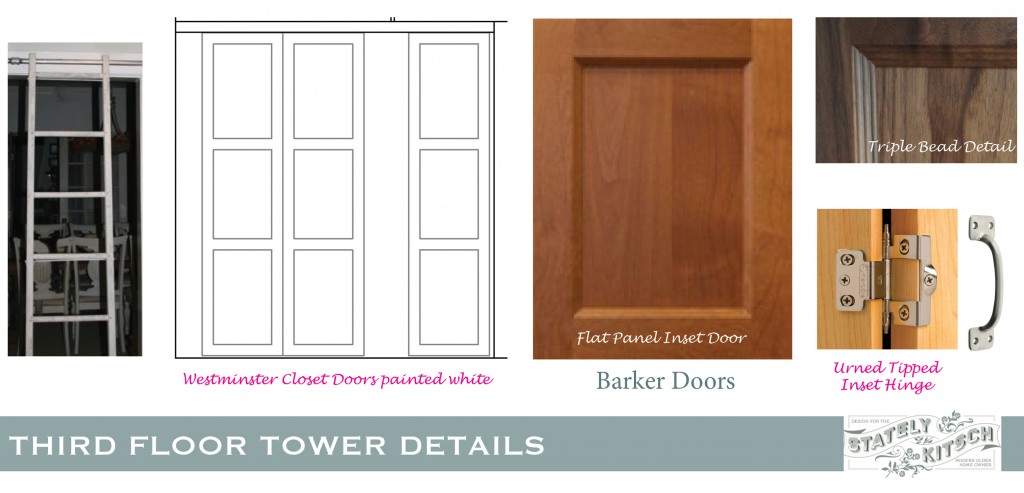
The next question was what kind of doors and were we going to DIY them. I thought about just making simple beadboard doors, which would actually match what is up there now, but after a lot of debate and reading this post from Sawdust Girl about making doors, I decided that it would make sense to buy doors, especially after I discovered Barker Door. They offer custom American made doors in a bunch of materials and finishes. They have good reviews and a pretty quick turn around. If I could stay at 72″ high the price per door was reasonable. This meant that the top couple of inches of the closet wall will have a trim piece, but considering that saves $70 a door, I am willing to make that compromise. After looking at their options and prices I have decided on the Westminster door style which is a flat inset panel door w/ a nice triple bead detail. I am going to go with the alder frame and mdf panel. These should paint beautifully and be nice and sturdy. I have been debating whether the doors should be fully inset or overlaid. Overlay doors  are much more forgiving, but I really prefer the look of the inset. Again Sawdust girl laid it all out for me. I am thinking that I may wait and order the doors after I have the frames up, so  I can make sure that everything is the correct dimension and Barker door allows you to order down to 1/16″. I am also considering their doors for the Ikea closets for the Master Bedroom.

I am off to take care of my sick little one. I hope everyone has a lovely weekend!

Leave a comment

It’s FOAMTASTIC!

March 7, 2013 — 6 Comments
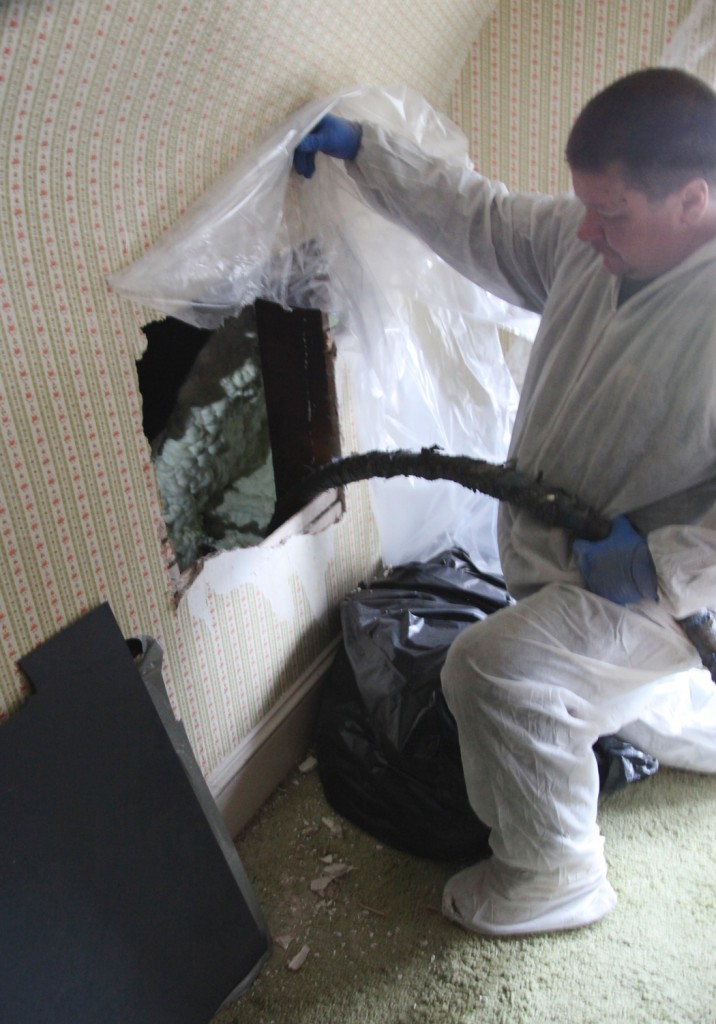
sprayfoam-1

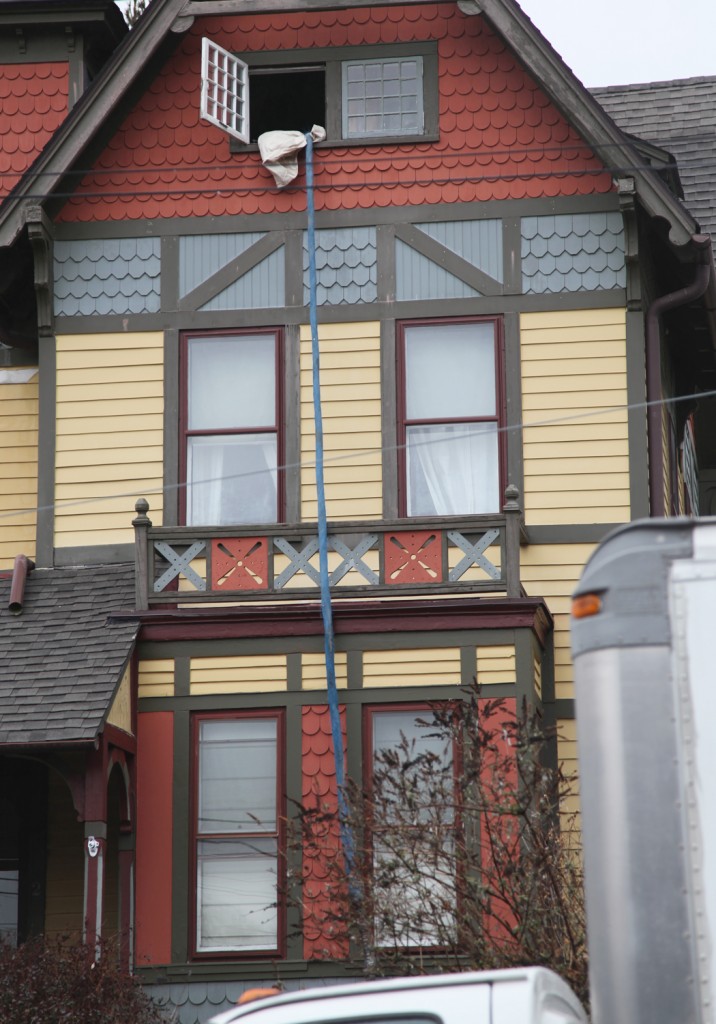
Foam hose going from the truck to our third floor.

It’s done!  The third floor is officially insulated with open cell spray foam insulation! It has been pretty brutal here the last week getting the third floor ready and dealing with some last minute coordination (and lots of contractors), which included me driving back and forth from my office more times then I want to count. I am already out of sequence from my to do list but I think we may actually be ahead of schedule (and when does that ever happen?).
sprayfoam-2

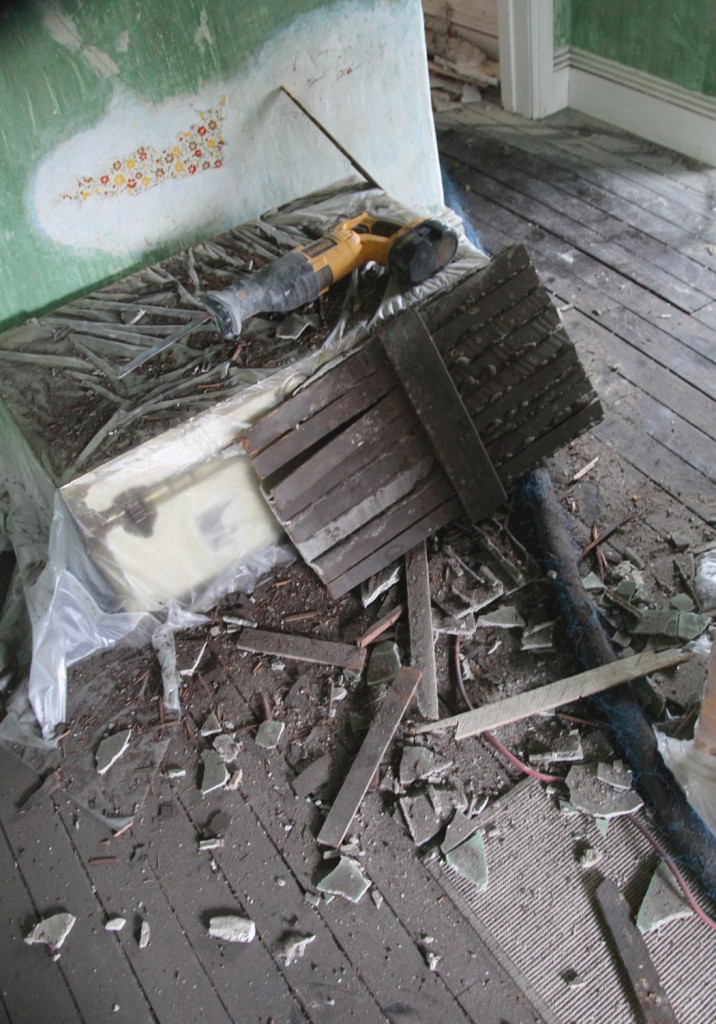
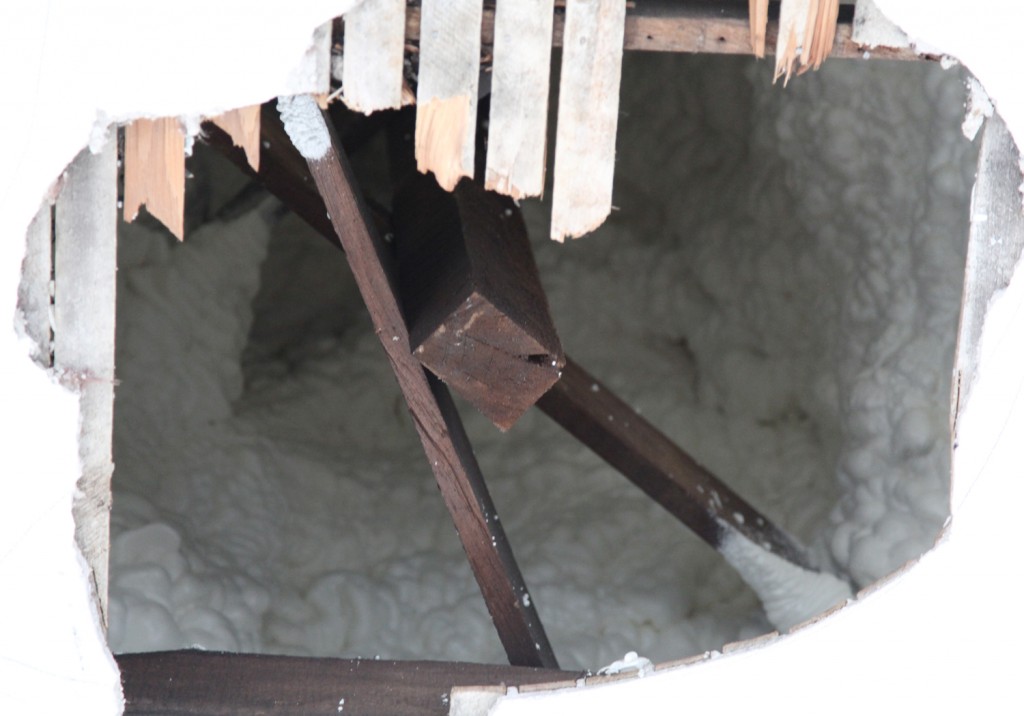
Plaster and lathe from one of the ceiling access holes (before clean up).

So while the cold, rainy windy weather beat down on our little house yesterday, the contractors moved ahead and installed all of the insulation. And I have to say it was pretty rough. We cut a few holes in the plaster but decided to let them cut the rest (mistake #1). They were hot to move, so I finally relented and let them cut. While, the majority of our plaster is fine, the areas around the holes are extremely rough and not particularly well thought out (i.e. not always adjacent to studs to allow for new patches). I should of had my regular contractor cut them, or waited a couple of weeks for us to finish it. The advantage I thought was that they know where the holes need to go. Fortunately the curves are well preserved even if the areas around the ceilings access holes look pretty terrible at the moment. The reality is that I will have to do some extra work on the plaster, but at least that is one step closer to actually making the space useable.
sprayfoam-3

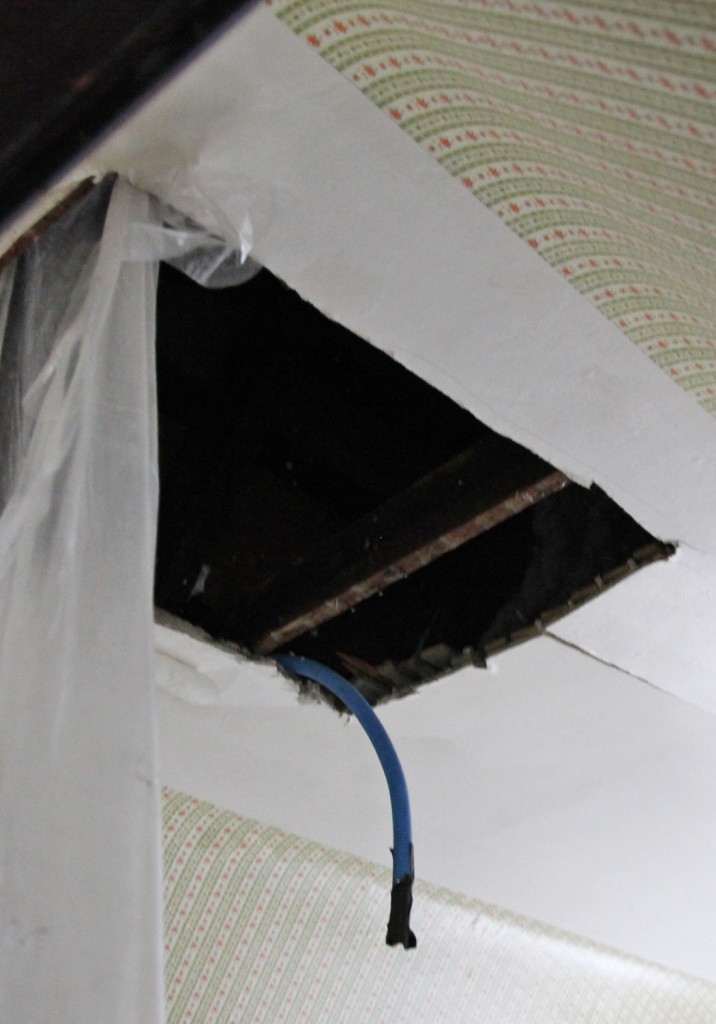
We had our electrician come over the weekend to discuss a plan for getting power up to the third floor for the new air conditioning air handling unit. I think we have a good plan (which incorporates moving our bedroom door over). The one important issue became how would we get power from the side wall up to the ceiling after the insulation was installed. Fortunately our electrician had a plan. He said to pick up some Smurf conduit. What is this you ask? It is thin blue corrugated flexible electrical conduit that could be placed ahead of time so that they could spray around it and leave us a path to run electric after the insulation! Fortunately the big boxes sell it in rolls of 100′. Of course the plan also included the insulation guys cutting holes and then giving us time to run the conduit.

Mistake #2 was letting them start to cut holes in the afternoon before they start spraying, with no wiggle room. Needless to say they didn’t finish! In fact they were only halfway done on Tuesday night. Mr. S and I managed to lay 4 of the 6 pieces that we needed (and just needed the insulation guys to move the conduit into the correct hole in the ceiling.
sprayfoam-4

When they showed up yesterday they were all set to start insulating at the same time they were still cutting holes. hmmm…not so much time to lay conduit. So after calling the boss and talking to them multiple times they agreed to put in the last 2 pieces.

The foam insulation installation actually went fine. It is one guys job to climb into the small cavities and spray the foam. Needless to say this is not a job I would want! He sprayed all of the eave areas and all of the top of the attic by crawling (mostly on his back) for long distances and periods of time. He definitely deserves props for doing that!
sprayfoam-7

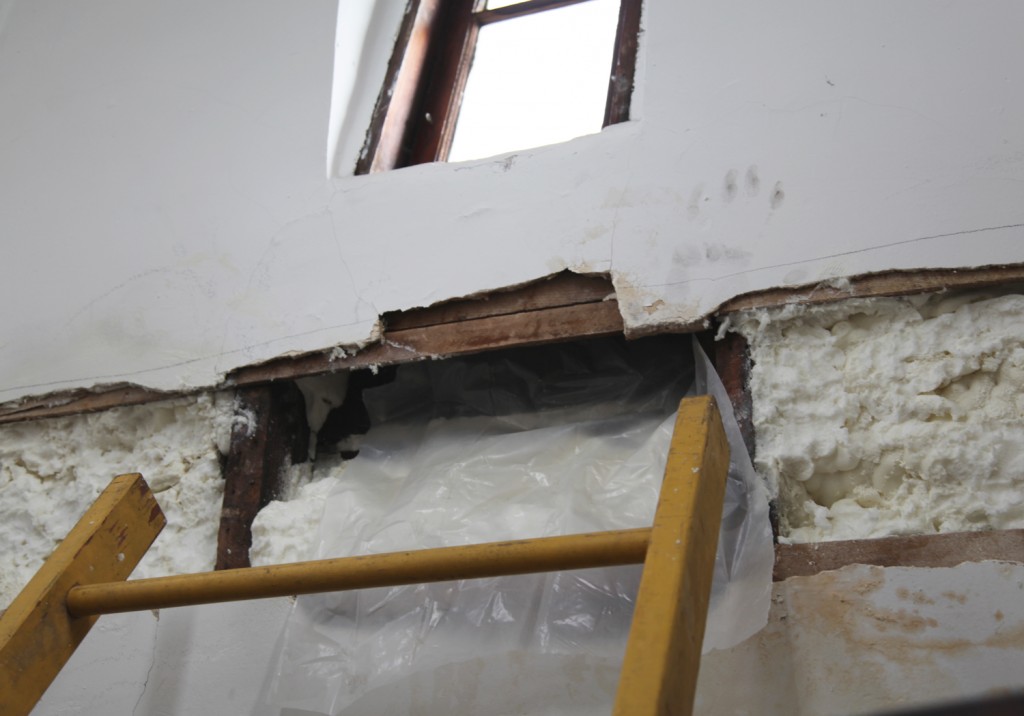
The last place they cut the holes and had a strategy for was the tower. My roofer came over yesterday morning (just as the spray foam was starting) to take a look at our various flashing problems. They hadn’t cut below the tower windows yet, so we could only speculate about the moisture problems. Mistake #3, I should have cut holes below the windows ahead of time. By the time they cut the holes (early afternoon) they discovered that the spot where the flashing is installed incorrectly was causing a slow drip (water and spray foam not a good mix). I stuck my hand up the hole to discover that the blocking adjacent to the flashing problem was wet. Fortunately the other 3 windows appeared to be dry. Given the super windy rain, it was a good day to feel around for dampness. After some discussion, it was decided that they would cut a piece of plastic under the sill and leave it unsprayed. I figured I could use a can of spray foam after the flashing is fixed.
sprayfoam-5After a lot of perplexed looks they did manage to spray the top of the tower (about 18′ up). I wasn’t there when they did it so I’m not sure how they exactly got up there, but it is done. The plaster ceiling looks like crap (good thing I am planning on covering over it with beadboard or some other material).
sprayfoam-6

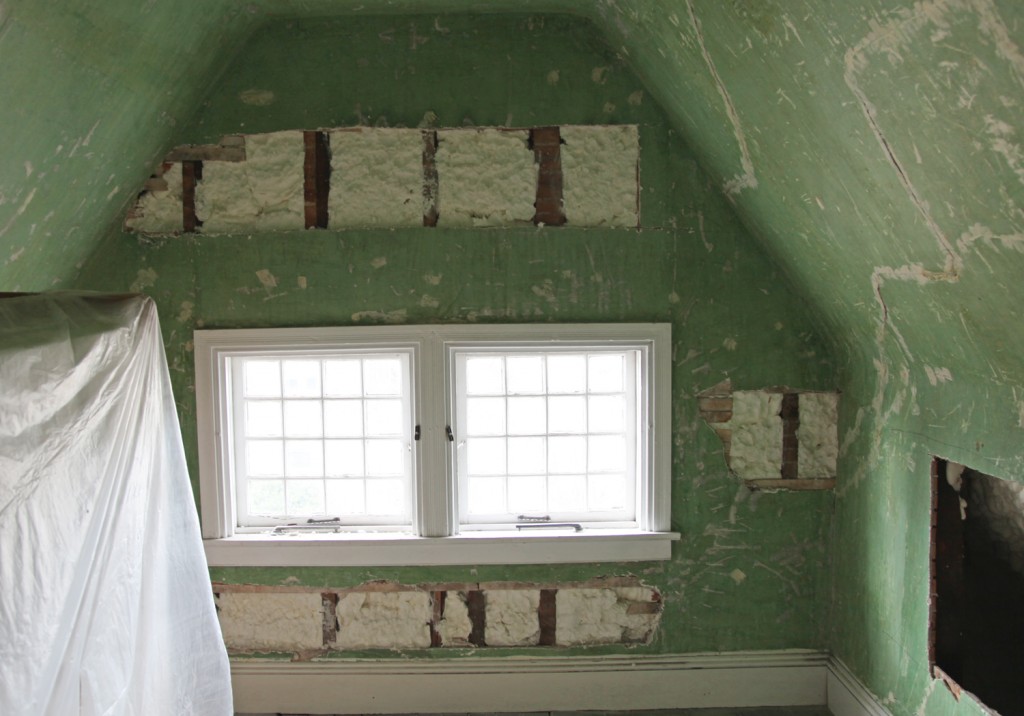
Here you can see the finished end wall. The verdict? There is a nice firmness to the walls now and they aren’t cold to the touch which is pretty nice. And the guys did do a reasonable job of cleaning up. And I still think this was the right solution for insulating our house. The R-Value per inch is way better than fiberglass and you get a much better seal. I was also impressed the cost of the spray foam has come down significantly in the last couple of years. We should actually recoup the cost in about 10 years with savings on heating and air conditioning. We won’t know for sure until we see our wintertime heating bills next year but fingers are crossed (after all we had NO insulation up there before). I am also hopeful that it will keep the worst of the summer heat from transferring to the house.

Next on the list is getting a couple of AC contractors in to figure out the system and layout!  But I think I am going to take a breather for a few days before then.

To summarize here are my thought on my spray foam experience:

1. Pick a reputable contractor. My contractor had a lot of good reviews and the architectural firm that I work with had recently worked with them.

2. Do NOT have them cut the holes in your walls. They will probably need to cut a few last minute holes into areas that they can’t get to, but I think that is better left to a carpenter or someone you trust with your house. After all spray foam is there thing not carpentry.

3. Make sure to have all of your access holes cut well ahead of the insulation to allow for #4 and #5.

4. Coordinate with the other trades including electricians and mechanical contractors, so that you can leave appropriate infrastructure in place BEFORE the insulation goes in.

5. Complete any roofing and flashing work before the insulation goes in to avoid moisture problems. Having a leak behind the new insulation could leave to quicker rot since the water doesn’t have any where to go. We did take a really good luck at the underside of the roof to check for leaks or moisture.

6. It is kind of smelly so I don’t recommend hanging out near by that day. We put our kitties in the basement to be as far away as possible.

Phew! I’m tired.
6 Comments

PhillSalvage10

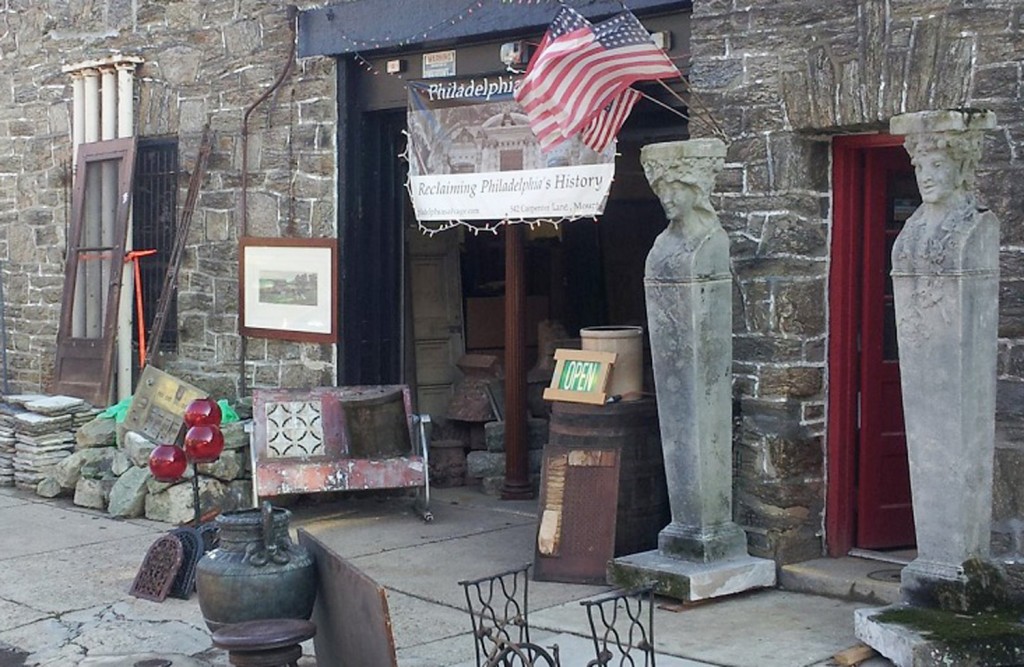
I love a good salvage place! Unfortunately most of my old haunts have disappeared over the years, so I was excited to go and visit a relatively new place. Philadelphia Salvage Company has been around for over a year and I had heard passing mention of it, but one of Mr. S’s coworkers recommended it to him so we decided a visit was in order. We packed up the family on Saturday morning and headed over. It is in West Mount Airy (across from Weavers Way), Philadelphia.

Looking at their website I was concerned that pricing would be on the high side, after all the best places are usually in sketchy neighborhoods with dusty artifacts that have been sitting around for a decade waiting for someone to take them home. Fortunately I thought that their pricing was pretty reasonable, even if their stock wasn’t as extensive as some of the other places I have been to. I was pleased with the quality of what they had too. Here are some of the items that caught my eye.

PhillySalvage9

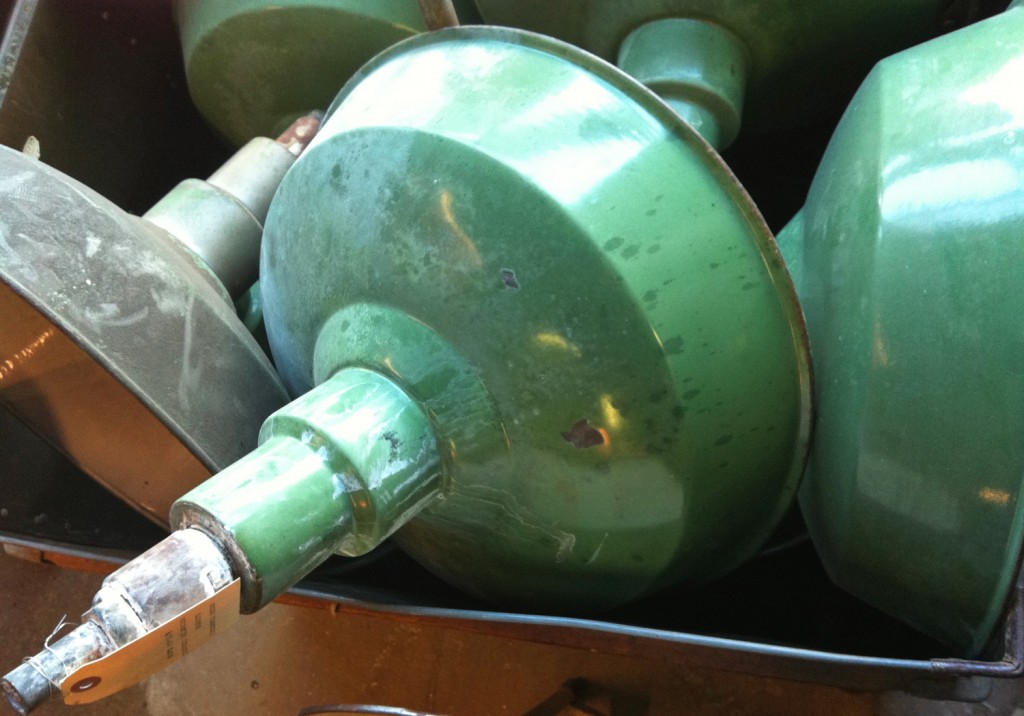
Aren’t these vintage industrial fixtures nice? They are pretty big and have a nice patina. They require rewiring, but a row of these would look great over a kitchen island. There were a whole pile that were already sold (probably for a restaurant).
PhillySalvage1

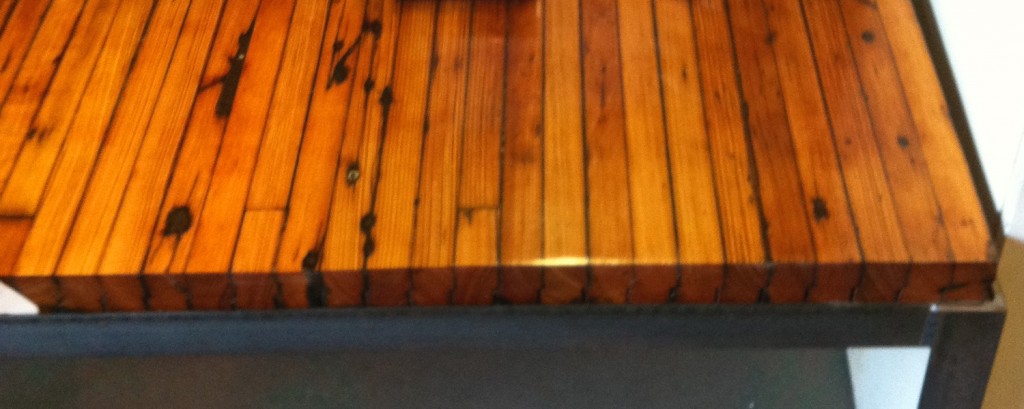
This table top is made out of an old bowling alley floor. It looks really great. They were also making a giant dining table out of the same material. One of the cool things is that they offer refinishing in addition to making furniture, which is definitely a bonus depending on what you need something for. Usually you have to lug whatever you buy to a separate place to get it worked on.

PhillySalvage2

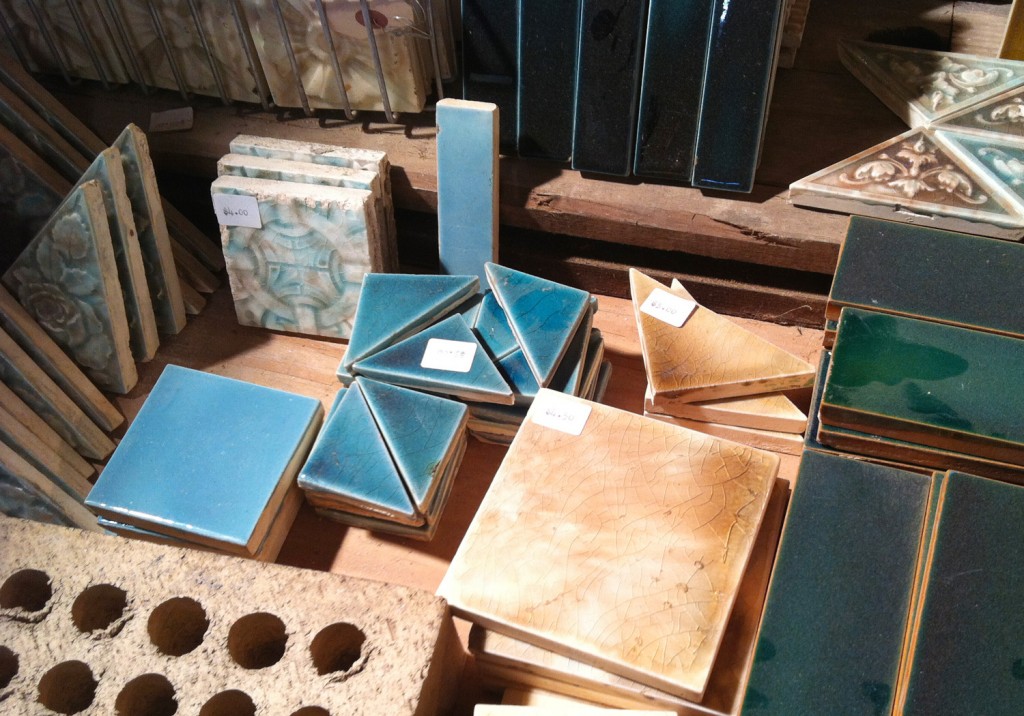
I loved their tile collection. We used similar new tile for our kitchen backsplash. The color and crackling is really quite stunning. They had also removed all of the old grout, so these are all set for installation.

PhillySalvage5

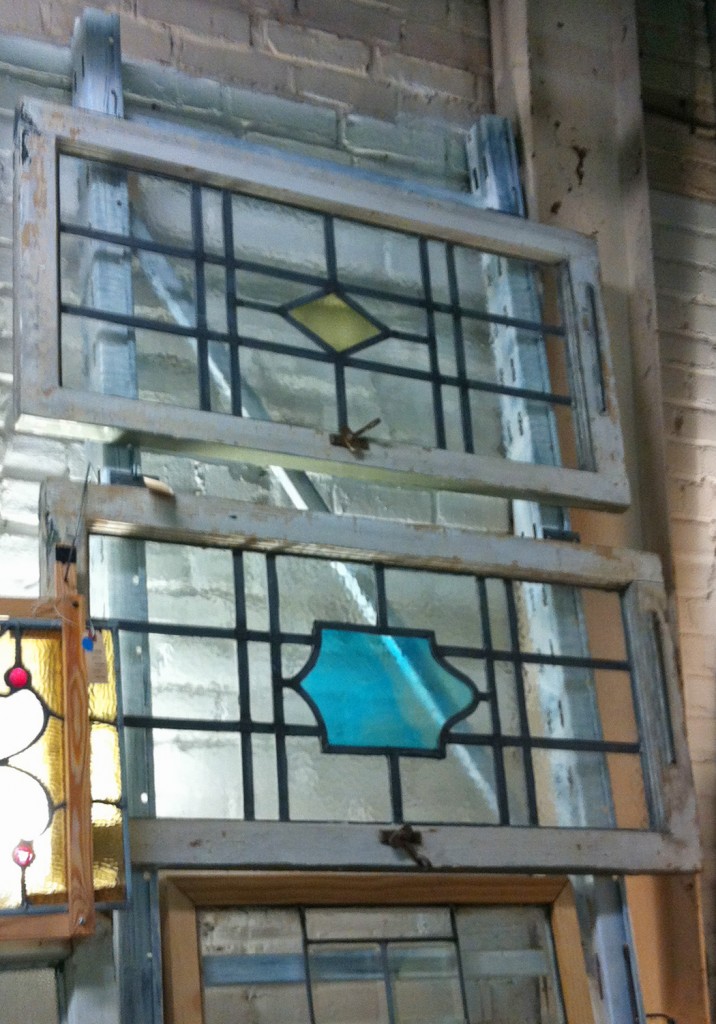
I also really liked these windows. The colors of the glass medallions were really amazing. I find a lot of stained glass too fussy for my taste, but these are a nice mix of a little pop of color in a nice geometric pattern.

PhillySalvage4

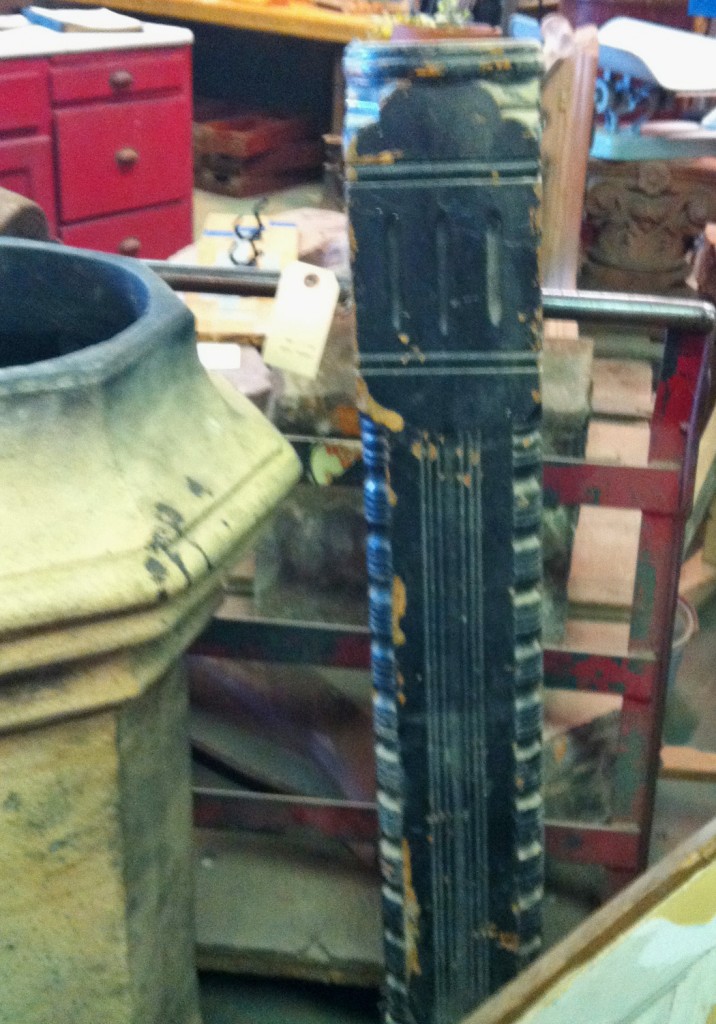
Of course I was like a kid in a candy store, so walking away empty handed was difficult. We didn’t end up buying anything while we were there, but I have since called and put 2 things on hold. One is for the house and one is for the garden. The garden one I will unveil later on, but we did choose this newel post. It is a dead on match for our newel post (which is a small miracle).  I have a bad habit of stockpiling old house parts (i.e. half of our garage loft is filled with extra house parts). So I told myself if I don’t have a place for this I shouldn’t buy it, even if the price is really good (which it was). So after I got home I was thinking about the upstairs hall and how we are going to have to cut the handrail at the bathroom wall, I thought why not use a piece of this to finish it off. Right now the rail dies into a piece of wood, and has always felt a little bit off, and I’m not sure how it was finished originally. I think if take one side of this, it will make a really nice detail.  Maybe if I can salvage one of the other sides I will add it down in the basement at the bottom of the stairs. Our contractor is actually going to be over later this week putting a closet in for us (one of those items that didn’t get finished last year).

Does anyone else love salvage stores or have any recommendations?

Leave a comment

Animal Coat Hooks

November 16, 2012 — 5 Comments

I’m not quite sure where the week has gone but I am really looking forward to the weekend. Sam had has Kindergarten Thanksgiving Feast the other day and it was so great to see the kids dressed as Native Americans and Pilgrims. It is amazing to see the teachers work their magic. Imagine 44 kids all perfectly well behaved, singing songs and having a meal of mini muffins, popcorn and apple slices together. We need to finalize our Thanksgiving menu here and I am going to try to perfect my pumpkin pie this weekend. I am also going to see if I can finish the coat rack in time. Speaking of which, in my search for the perfect coat hook I also came across some really nice animal hooks.

Metal Animal Hooks

I am planning on interspersing a few of these metal ones on our coat rack, to keep it whimsical and inspire the kids to use it. I actually picked up a couple of brass beetle knobs on clearance at Anthropologie a couple of weeks ago. My kids love bugs, so I think they will be excited to use them.

1. Rabbit Knob, Anthropologie $12

2. Fox Knob, Anthropologie $12

3. Octopus Hooks, Urban Outfitters $14

4. Deer Hook, Urban Outfitters, $12

5. Bull Dog Hook, Urban Outfitters, $12

6. Squirrel Hook, Anthropologie, No Longer Available

I thought I would also show you some more colorful options. That I think have the right mix of fun without being too cutesy.

Colorful & Fun Animal Hooks

I really like some of these fun hooks. I think my favorite is the T-Rex head. Too bad it appears to only be available in England.

1. Yellow Giraffe Hook, Urban Outfitters $14
2. White Elephant Hook, Anthropologie, $20
3. Aqua Squirrel Hook, Land of Nod $29
4. Red Reindeer Hook, World Market, $13.98
5. Bastis Tail Hook, IKEA $2.99
6. T-Rex Head Hook, Dwell UK, $14.95
7. Blue Bunny Hook, The Modern Baby UK, $9.95 (also available in other colors)

Which one is your favorite?
I’ve picked out a couple of hooks for our coat rack. Can anyone guess which ones?

I hope everyone has a great weekend!

5 Comments

Domed Coat Hooks

November 12, 2012 — Leave a comment

I hope everyone had a nice weekend! We had 2 lovely warm fall days and managed to get some of the last of the yard work done. Unfortunately our neighbor’s oak is still holding its leaves so it looks like we will still be raking after Thanksgiving. My shoulder is still mending, so my general pace is slow these days, paired with not being able to sleep comfortably. Fortunately it will eventually heal, it is just taking longer than I would like.

Domed Hooks

I thought I would do a little round up of some of the domed coat hooks I’ve found on my search for the perfect hook. I have clearly spent WAY to long searching, but at least I feel good about my decision. It is hard to find “domed” hooks. They don’t usually come up under “domed” or anything else in particular. I don’t even remember where I first came across them, but I really like the idea of a hook that isn’t pointy (i.e. better for the coat and for potential eye poking hazards).

1. Letter Hooks, Anthropologie, $14

2. Brass & Ceramic Dome, Signature Hardware, $13.95

3. Brass Single Domed Coat Hook, Signature Hardware, $11.95

4. Cast Iron Hook, VanDykes, $10.95

5. Iron Hat & Coat Hook, Signature Hardware, $11.95

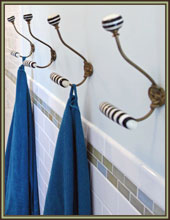
6. Black & White Striped Wall Hook, Anthropologie, $18.(I used these on Sarah’s bathroom).

Which one do you like? Am I the only one who spends this much time searching for the perfect hook?

I selected #3 for our coat rack, partially for aesthetics (i.e. it goes with my vintage Victorian hardware) and partially because it doesn’t have a top portion so I can hang it closer to the shelf. I ordered them a few days ago, so hopefully they will arrive shortly!


Leave a comment

New Handle

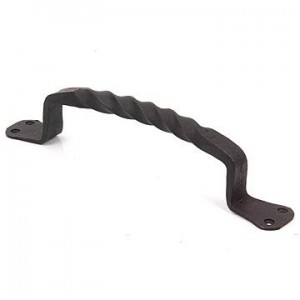
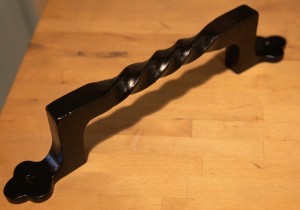
13" Clover Leaf Door Handle in Black, $17.99

9" Bulkhead Handle, $10.99

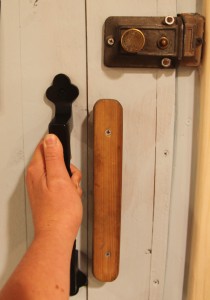
After I painted our backdoor last week I realized that it was in desperate need of a new handle (somehow the home made 20 year old one wasn’t cutting it anymore). I also needed to pick out pulls for the new lower cabinet drawer unit at the pantry/wine area. So I took a look an VanDykes’s Restorers and they were having a sale on most of their handles! Fortunately they arrived quickly and I have installed the handles for the drawers and I will probably get around to installing the backdoor handle this weekend. I also picked up handles for the bulkhead door (for when we get around to making new doors).

For the backdoor I chose this beautiful clover leaf handle.  It is super heavy and slightly rustic looking in person. I think it is going to look great once I repaint the door a darker color and install it. I will also be installing a matching one on the outside (since this handle is suitable for outdoor exposure). I also picked up a similar, although slightly smaller set for the future bulkhead doors (currently we have a piece of exterior plywood on hinges).

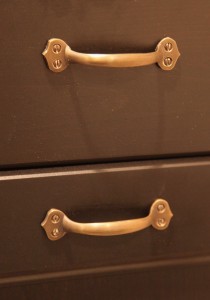
New Cabinet Pulls, $3.49

Victorian Safe

For the cabinet pulls I decided to go with a similiar finish to the safe handle. In this case I chose a an antique brass finish (not something I would normally choose) and I think it looks great against the brown/black finish of the Ikea drawer unit. In between these two units will go the fridge and freezer. Right now I am leaning towards a white freezer (unfortunately the model that I want only comes in white). My plan is to use chalkboard contact paper and cover it. Then finish it off with some gold/brass colored vinyl details and maybe some fun lettering to match the safe.

I also need to pick up the wood counter from Ikea. When I checked last week it was out of stock, but hopefully it be back soon. I can’t wait to get this area further along. Now I just need to get moving!

2 Comments