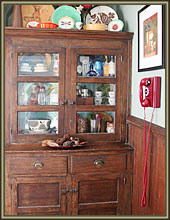
I thought I would step back a little and give everyone the background for Andi and Neil’s kitchen. It was stuck in a 80-90′s time warp. Their twin was built over a hundred years ago but you wouldn’t know it from the kitchen. Fortunately the majority of the house still has its original charm and the previous owner added a nice sunroom behind the kitchen. The cabinets were white laminate particleboard in bad condition and not worth keeping. So we knew we were looking at a full redo of the kitchen. So where to begin. Lets start with the first category from my previous post…

Martha Stewart Living Kitchen Cabinets @ Home Depot

From Sarah's Cottage on HGTV
1. Collect images you like of kitchens, appliances, details and colors
Overall Look & Feel: One of the first things I gave Andi to look at was a brochure from the Martha Stewart Living Kitchen Cabinets at Home Depot. She loved the look of the “painted cabinets” (they are not actually wood but some other man made product called “Purestyle”) and a simple framed door style . For some reason Home Depot doesn’t show very many photos of the Martha Stewart online, but they have a nice brochure at the store that I recommend picking up. One thing I will give Martha is that her taste in color is always spot on. The cabinet colors are the right mix of modern with a classic twist, so they will hopefully stay in style for quite some time.
Another kitchen that I think is a great inspiration is the kitchen from Sarah’s Cottage (a really interesting show on HGTV where Sarah Richardson renovates her summer cottage). In her large kitchen she uses 2 different color painted cabinets and an amazing tile backsplash. It has a nice mix of vintage paired with modern. The website also conveniently lists the paint colors for the kitchen cabinets!

Ikea Tida Oak Upper Cabinet

Ox Hill Cabinet by MSL for Home Depot

Ikea Tida Oak Lower Cabinet

Cabinet Colors based on Sarah's Cottage
Cabinets: The challenge is to find a simple door style that is painted/can be painted that is affordable and has enough options and sizes to make the kitchen work efficiently.

Caesarstone in Pebble

Caesarstone in Misty Carrera
Counters: We started by looking at Quartz Options. These were my first recommendations because you get a durable surface that does not require sealing. Also granite requires looking at actual slabs to get a better understanding of the color variation.

Ikea Domsjo Farmhouse Sink $312

Ikea Eleverdam faucet w/ pull out sprayer $179
Farmhouse sink: They like the classic look and good functionality of a big farmhouse sink.

30" Gas Range, Sears Kenmore Elite $1300-1700

Ikea Nutid Counter Depth Fridge $1399
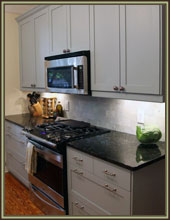
Appliances: They also already have a pretty new stainless steel dishwasher, so it made sense to use stainless steel for the fridge, range and microwave. Ikea’s appliances are made by whirlpool now, so it is more appealing to buy them with the cabinets. They also offer the least expensive counter depth fridge on the market. However I don’t like their gas range options. We have a Kenmore Elite range that we love. It has a lot of the features of a “professional” range like really powerful burners but is more moderately priced.

Biltmore Polished Marble Tile, The Tile Shop $13.99 sf

Marble Backspash, The Tile Shop $11.99 sf
The Backsplash: I LOVE the tile backsplash from Sarah’s Cottage. Unfortunately that tile is REALLY expensive. It is also probably a bit too busy for Andi and Neil’s kitchen. These are a few sample that I found. However these can’t be finalized until the counter is determined. The good thing is that these are one of the last things to be installed so we have time.

Coffered Beadboard Ceiling (from our Dining Room)
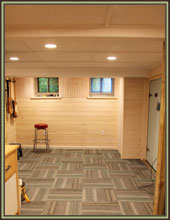
Ceiling: Andi wanted a beadboard ceiling (similar to the one we have in our Dining Room). Fortunately this can be installed fairly easily with beadboard (or beadboard plywood) and some simple pieces of lumber. Then it is finished with some small crown molding.
The Mood Board: I already showed this a few weeks ago but now that I have broken down the selections you can see how they look together. The final selections of some of the materials are a little different than shown, so you will have to stay tuned to see everything installed!

Mood Board
P.S. Stay tuned for some updated demolition photos!